Username
Password
Remember Me
Log in
Forgot your password?
Forgot your username?
Forgot your username?
How to Update Options Templates in Products in Magento 2 |
| Magento 2 Extensions |
| Written by ITORIS Team, 2017-08-25 |
|
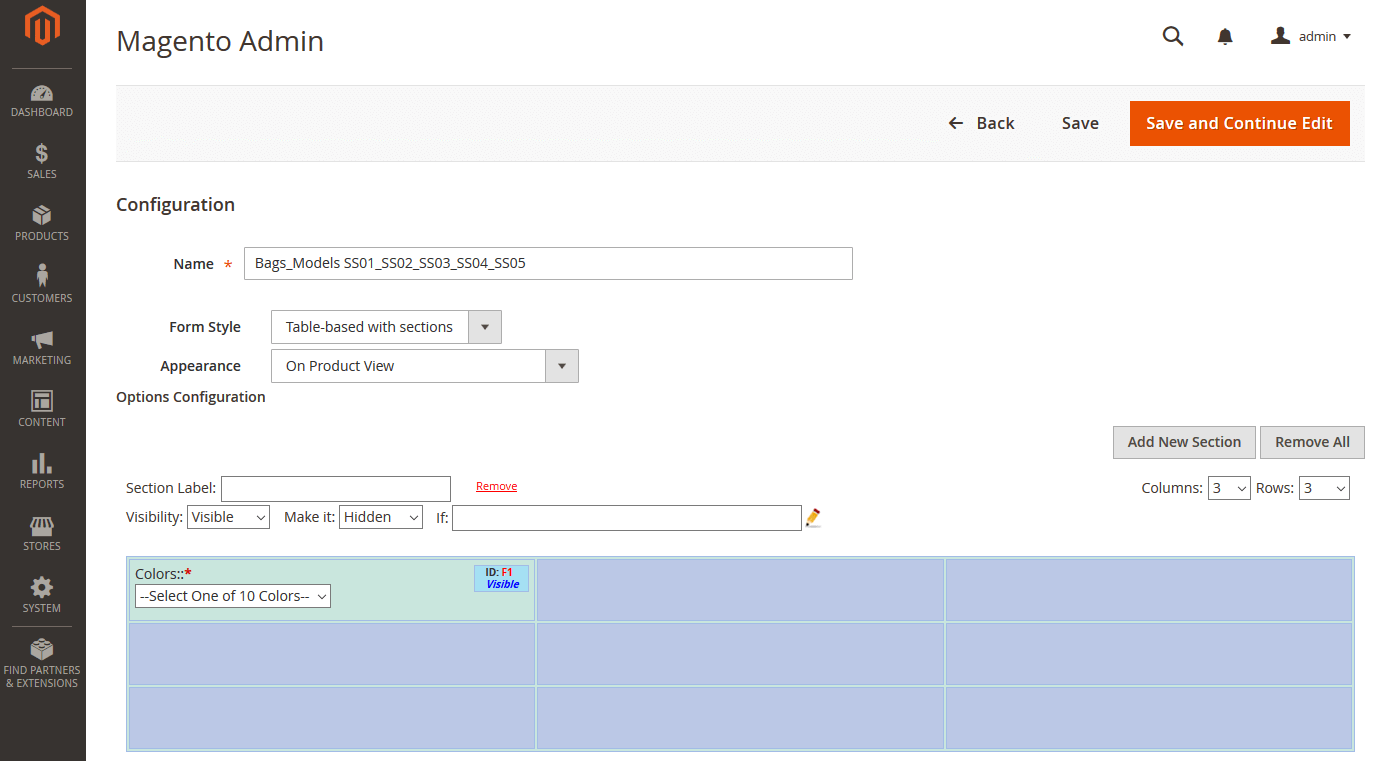
Managing and updating hundreds and thousands of products with custom options may turn into a nightmare, especially when you have to edit a bunch of options within a short period of time. Creating options templates and applying them to a number of products will help to solve the issue. The Dynamic Products Options extension saves your time and helps to optimize the process of updating custom options. The extension expands the functionality of creating and applying options templates to multiple products in bulk. It improves and simplifies the process of updating products by allowing to make changes in one options template only and associate it to multiple products. Create an Options TemplateClick PRODUCTS -> Product Options Templates -> Add New Template. Add the sections with custom options to our template. After the editing process is finished, remember to save the template by clicking buttons “Save” or “Save and Continue Edit”.
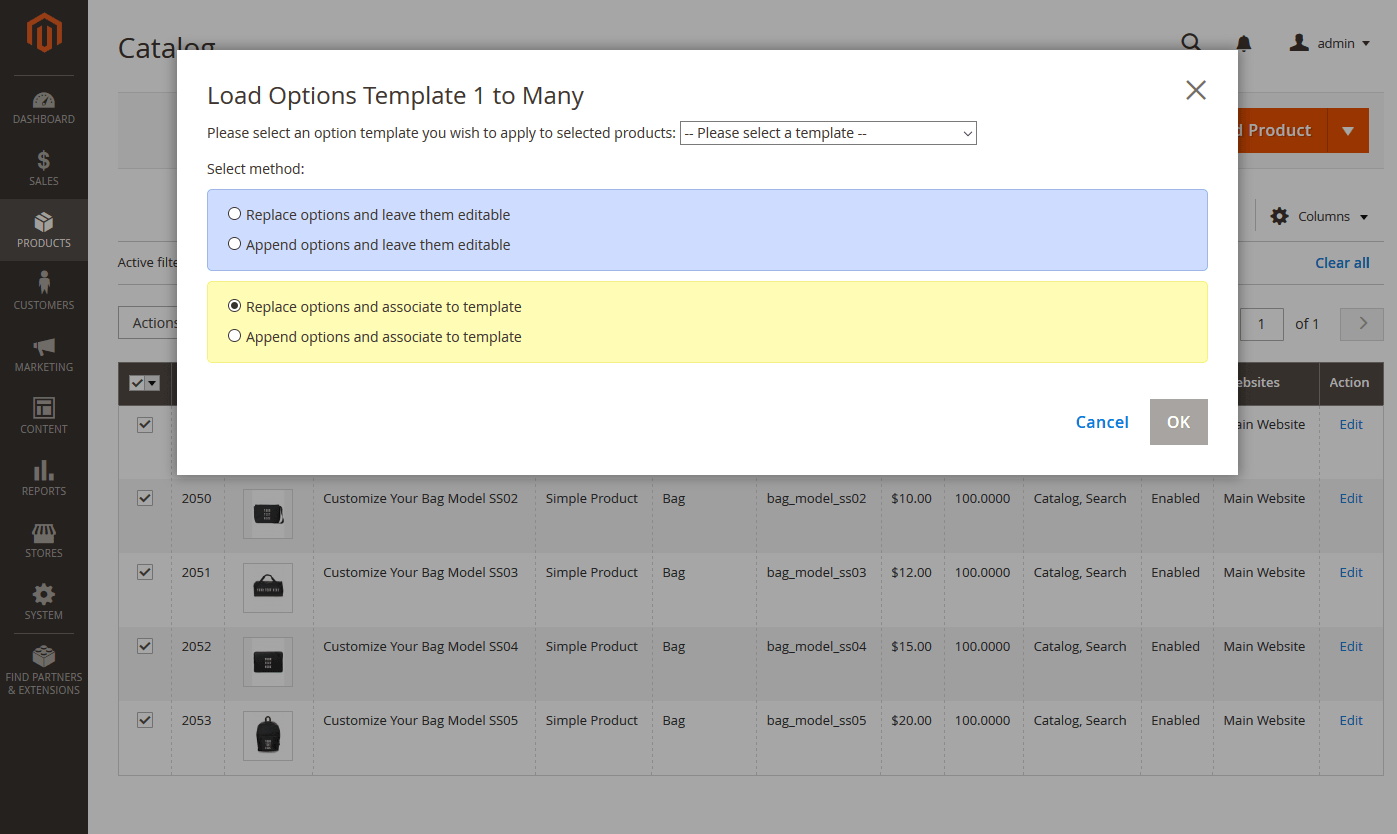
Load Options Template 1 to ManyWhen the template is saved, go to the product grid and apply the template to the chosen products. Select necessary products and choose “Load Options Template 1 to Many” in the Mass Actions dropdown.
Choose the necessary template in dropdown and select one of the following methods: Replace options and leave them editable – the chosen template is added to the products removing current custom options. You are able to edit options without updating them within the template. Append options and leave them editable – the chosen template is added to the current custom options without removing existing ones. You can edit options per product only. The changes made in the template won’t be applied to products automatically. Let’s choose the third method called “Replace options and associate to template”. After you choose the template, all custom options in the selected products will be replaced with the options template. You no longer need to make changes in the product options. Just make necessary changes in the template and apply to the products. Using the forth method “Append options and associate to template” you will be able to add a new bunch of custom options to the existing ones. Thus you need to make changes in the particular template to update all options in the chosen products. After choosing the mode click “OK” to apply the selected template. Then open one of the updated products and find section “Dynamic Product Options”. The section with added custom options will look as follows:
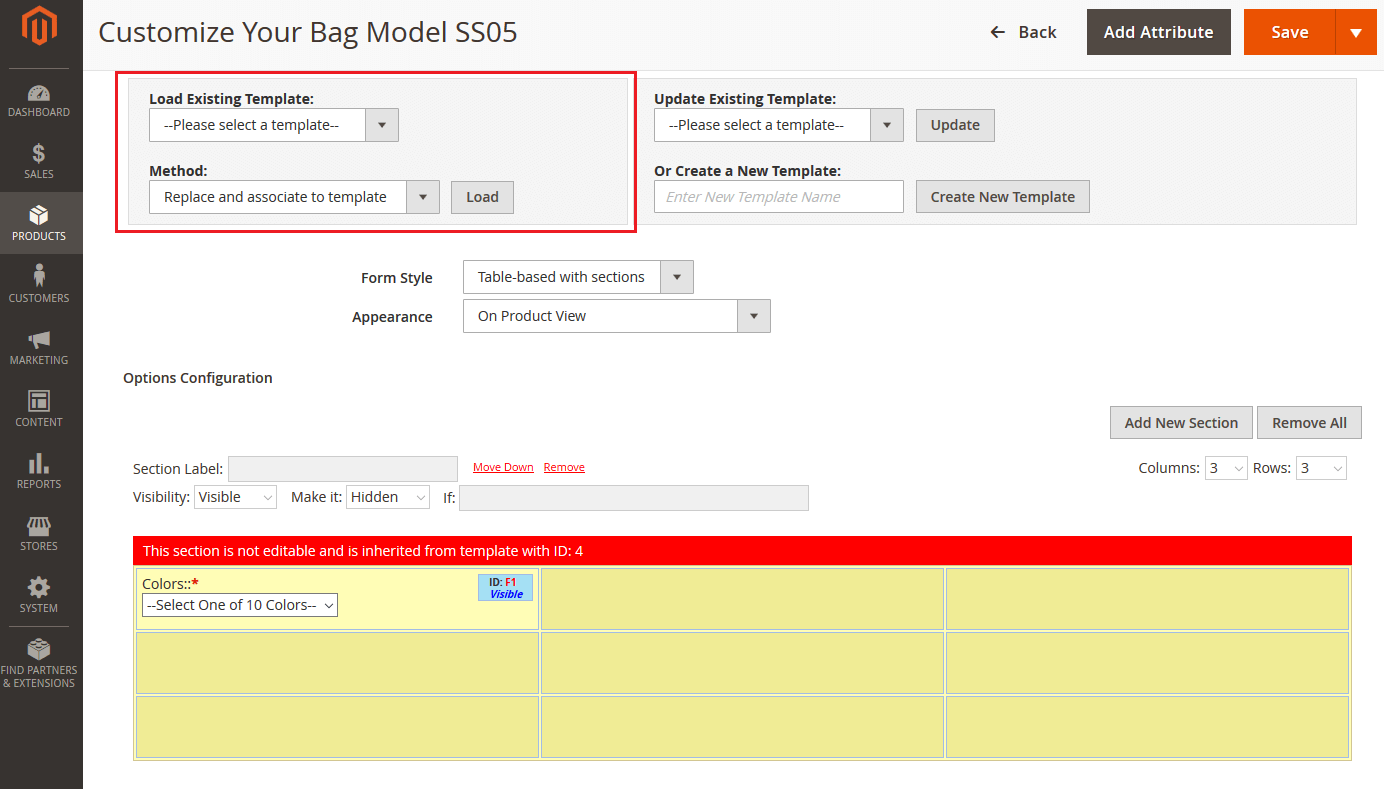
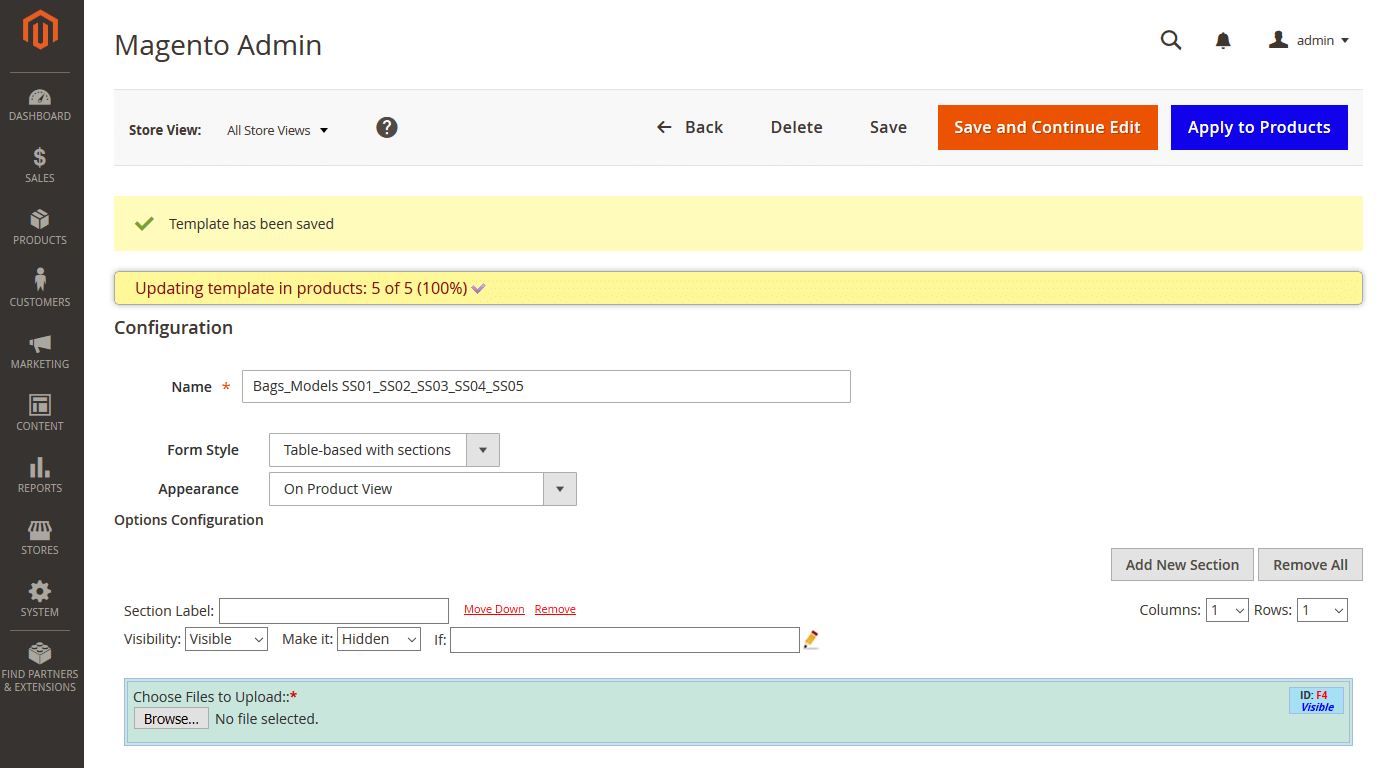
The chosen method won’t allow to edit options in the product directly. You can update the template only and then apply the changes to the products. You can also add a template per product. Find the “Product Options Templates” block, load one of the existing templates and choose a method. Update Options TemplatesNow let’s edit our template and apply to the chosen products. Go to PRODUCTS -> Product Options Templates. Then select the necessary template in the list and open it for editing. After you add, delete, or change custom options, save the template and click button “Apply to Products”. You can track the updating process in the progress bar above the settings. After the update check out the results in backend or frontend.
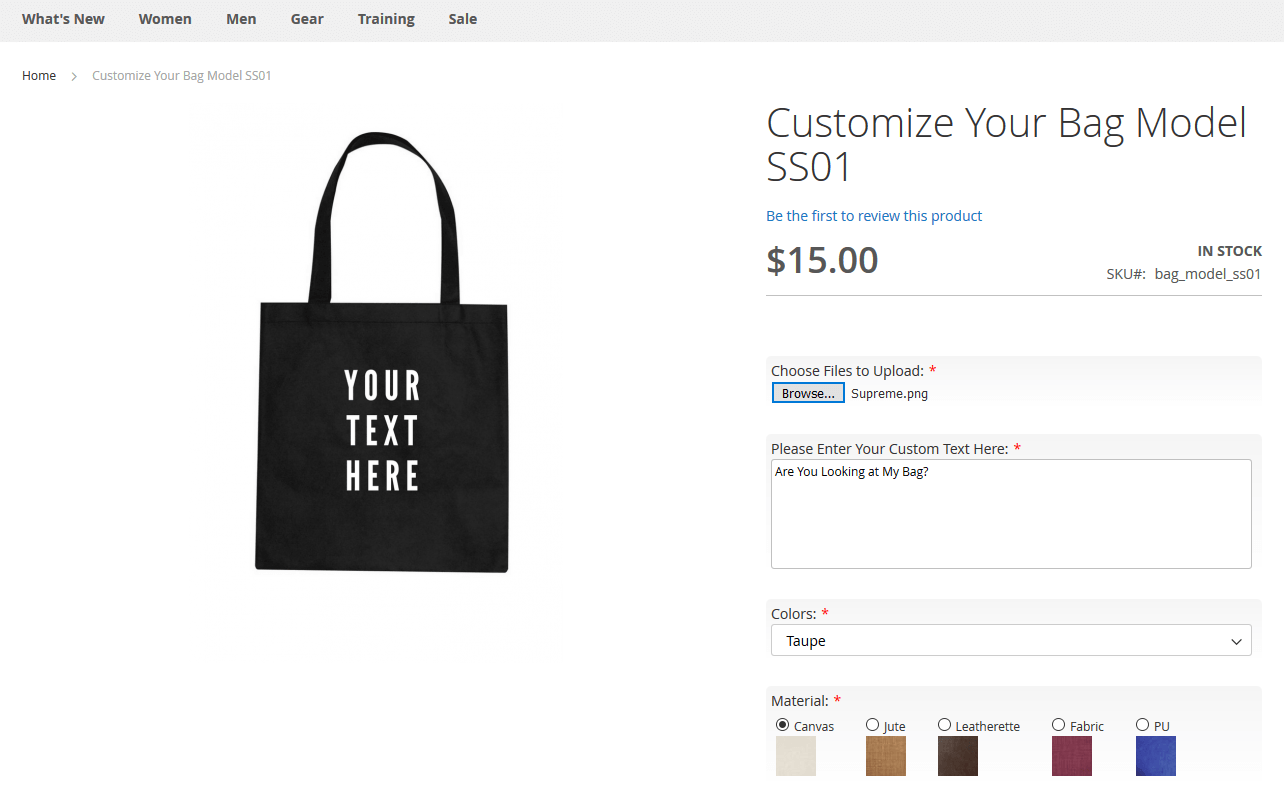
Now you can see how the custom options will look in the updated products on the Frontend.
Here you can find more articles related to the Dynamic Product Options extension functionality: How to Edit Custom Options for Different Store Views in Magento 2 How to Create Dependent Custom Options in Magento 2 How to Create a Bundle Offer Based on Custom Options in Magento 2 |