Username
Password
Remember Me
Log in
Forgot your password?
Forgot your username?
Forgot your username?
How to enable Multiple Wishlists in Magento 2 |
| Magento 2 Extensions |
| Written by ITORIS Team, 2016-10-10 |
|
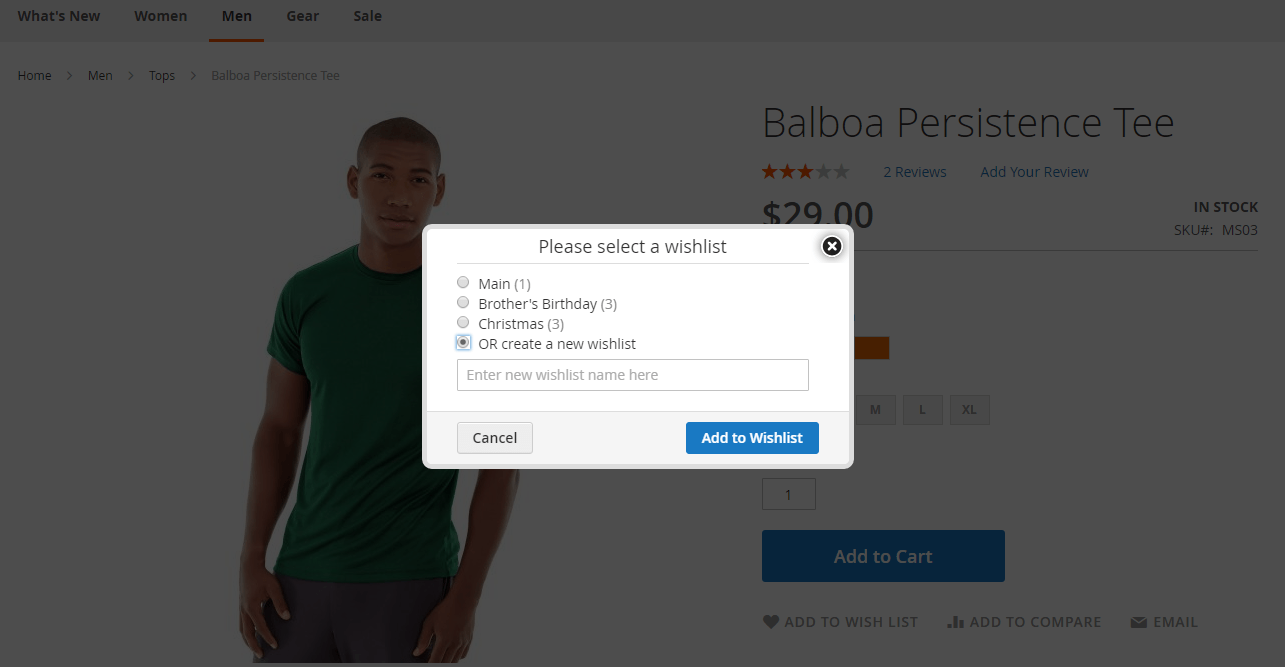
Every day the modern world makes us take decisions quickly and plan our life thoroughly. The same goes for shopping. It's a good idea to create separate wishlists for future mum's birthday, for your gym, keep presents for your brothers and friends separately. The ITORIS team provides you such ability with the Multiple Wishlists extension for Magento 2. By defaults Magento won't allow to create multiple wishlists. Using the extension a customer can create a number of wishlists, delete or rename them. Also the same product can be in two or more wishlists at the same time. You can read more about the Multiple Wishlists extension for Magento 2 in the User Guide. Before creating wishlists let's enable the extension following STORES -> Settings -> Configuration -> ITORIS EXTENSIONS-> Multiple Wishlists -> General. Choose "Yes" in dropdown "Extension Enabled". The extension allows to add one or all products from a wishlist to a shopping cart. By defaults Magento removes products from the wishlist in this case. The Multiple Wishlists extension can keep products in the wishlist. After you enable the extension, select "Leave product in wishlist" in dropdown "After Product Added to Cart". Typically when the wishlist is selected Magento directs customers to the account. Choose option "Stay on current page" to allow customers to continue shopping. Now let's move to the Frontend and create an account. After your registration, choose a product you want to add to a wishlist. The extension allows to add the selected product to the exiting wishlists or create new ones. After you choose the product, click button "Add to Wish List". When the popup appears, add the product to the existing wishlist. The popup appears on every page when a product is added to wishlist. You can also create your own wishlist clicking "OR create a new wishlist". Then enter a new wishlist name in the field and click button "Add to Wishlist".
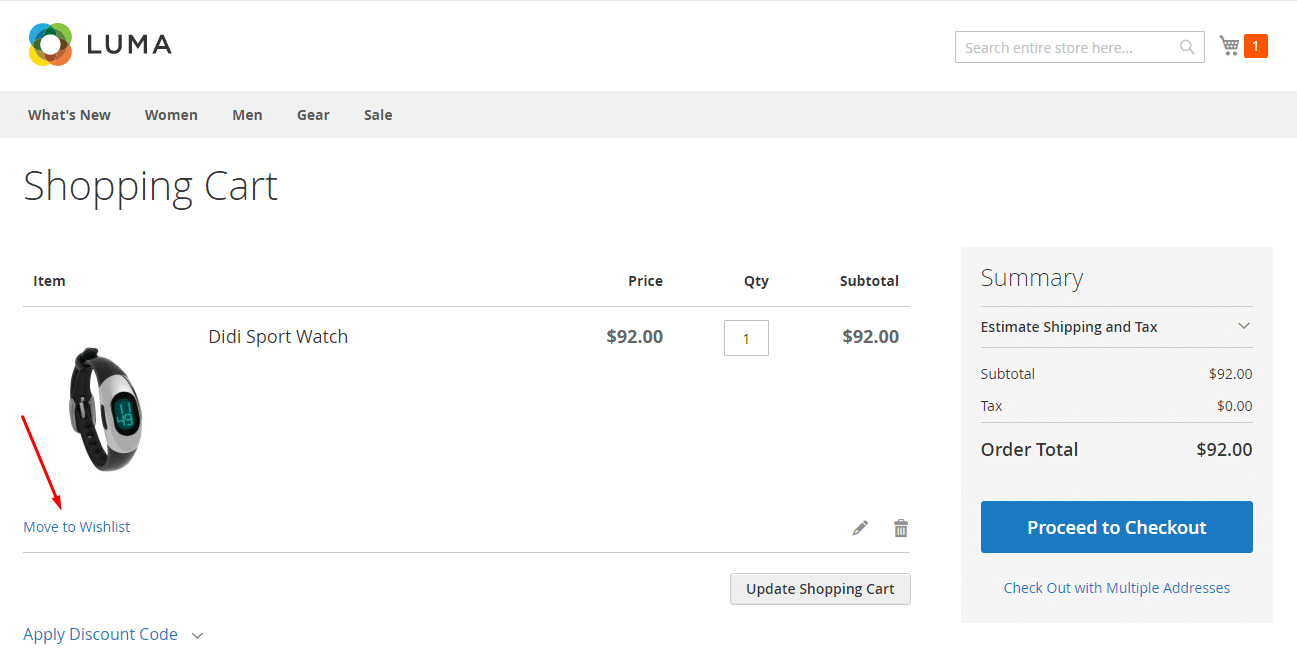
After adding a product to a shopping cart, the Multiple Wishlists extension allows to move the product back to the wishlist. Click the "Move to Wishlist" link. The product will be deleted from the cart automatically.
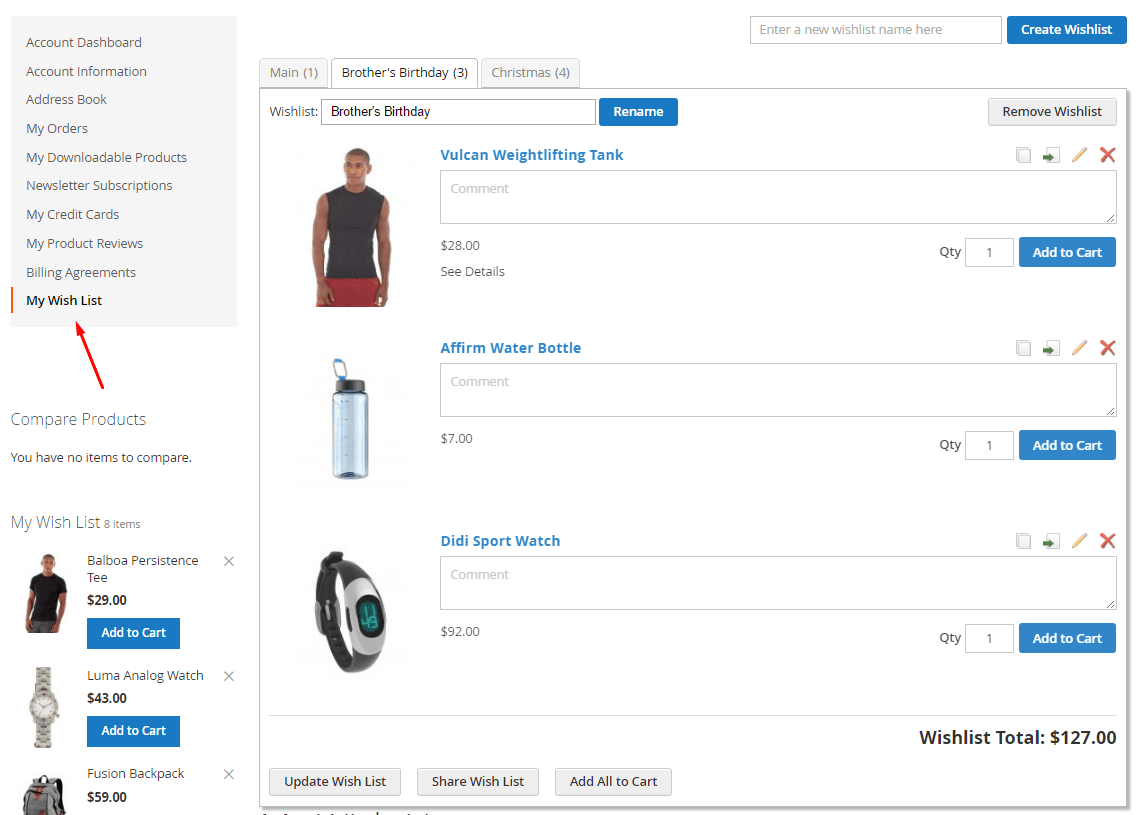
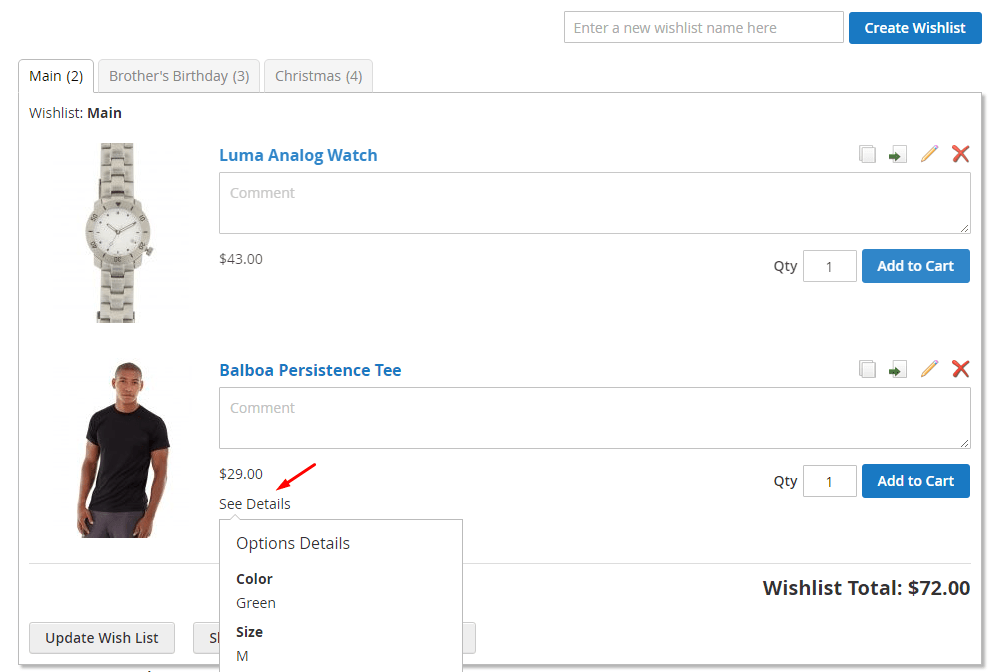
Using the extension you can also manage wishlists. Go to Account Dashboard -> My Wish List. You have tabs with the existing wishlists. Choose one of them. You can create a wishlist by entering a new wishlist name in the field. Then click button "Create Wishlist". If you want to change the wishlist's name, for instance the "Brother's Birthday" wishlist, enter a new title in the "Wishlist" field and click button "Rename".
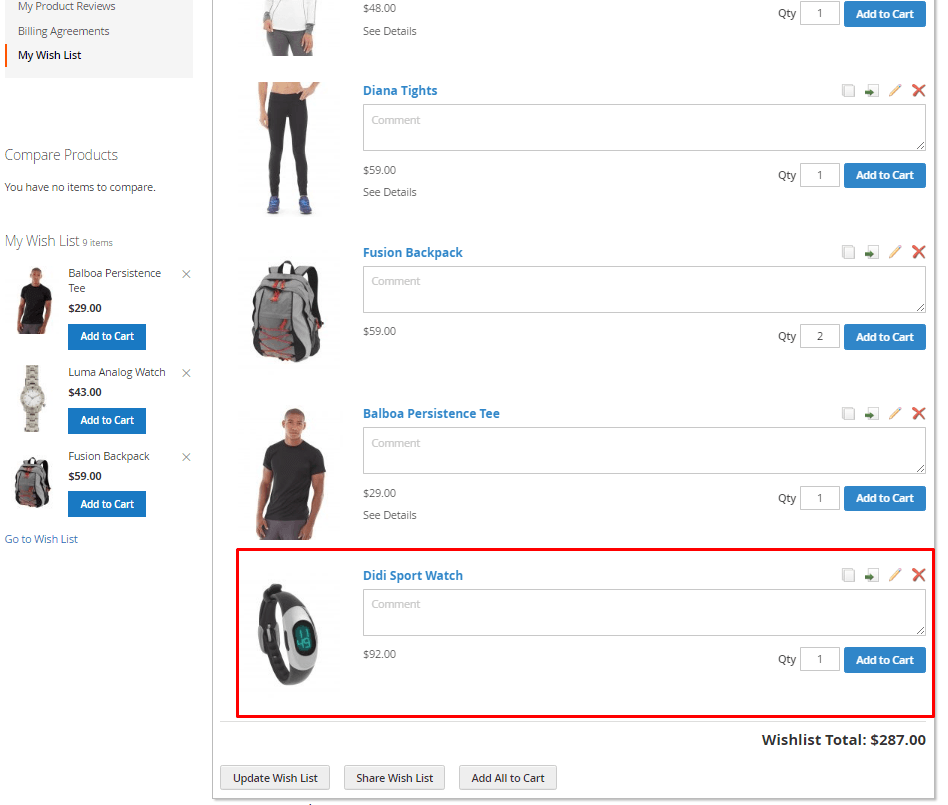
If you want to delete wishlist "Brother's Birthday" click button "Remove Wishlist". If you need to change product's quantities or want to add your comments, make all needed changes and click "Update Wish List". Thus your customers will be able to plan the budget before placing the order. The extension allows to move and copy products between wishlists. Let's copy product "Didi Sport Watch" from wishlist "Brother's Birthday" to the "Christmas" wishlist. Click on the "Copy" icon. After the popup appears, choose a desired wishlist. In our case it's "Christmas". Then click button "Copy Item". You can see that one more product was added to the "Christmas" wishlist.
You can move other products in the same way. Click the "Move" icon. After the popup appears, choose a desired wishlist and click "Move Item". If you don't need a product in your wishlist, you can remove it clicking the "Delete" icon. Also if you want to change product's size, color or other details, click the "Edit" icon. You will be directed to a product's page. After you make all changes, on the product's page click button "Update Wish List". When you have a product with options, for example "Balboa Persistence Tee", link "See details" appears. Click the link to see the product's details.
The extension allows to add a product or multiple products in bulk to a shopping cart. If you want to add a single product to the shopping cart, click button "Add to Cart" next to the product. Click "Add All to Cart" to add all products to the cart. You can also share wishlists with friends using the "Share Wish List" button. Enter friends' emails separated by comma. Also you can write a short message for your friends. To share the wishlist click "Share Wish List". Using the Multiple Wishlists extension you can create separated wishlists for different events. Also you can easily manage wishlists. The extension provides a convenient popup to choose a wishlist when adding product, ability to keep products in wishlist after adding to cart and share wishlists with friends by email. Moreover, the total price is calculated for each wishlist. Learn more about the extension's features in our Video Tutorial about Multiple Wishlists. |