Username
Password
Remember Me
Log in
Forgot your password?
Forgot your username?
Forgot your username?
How to Remind Customers to Leave Reviews in Magento 2 |
| Magento 2 Extensions |
| Written by ITORIS Team, 2018-03-06 |
|
Feedback is a powerful promoter of delivering good customer service. Modern customers are more likely to get products based on positive reviews rather than negative ones. Imagine buying doors at a new online store. Will you be guided to get doors if you see more negative reviews or no reviews at all? According to the statistics 22% of customers won't get a product if it has one negative review. But a few positive reviews can encourage potential customers to trust you and produce an average increase in sales. How to make customers leave reviews especially positive ones? After a customer's order is invoiced and shipped send customers the request to review the purchased products via a short and well-structured email. The Review Reminder extension for Magento 2 is a good tool to remind and push customers to share their experiences in your online store. The extension sends review reminders automatically and saves your time by asking customers personally and generating the review base in your store. After the customer's order gets the "Complete" status the reminder will be sent according to the specified date. You can manage and track all reminders in backend, preview and customize the default email template, choose senders, enable a BCC copy and clear logs in specified days. You can also specify which customer groups will get the email notifications or define conditions when the reminders should be sent out. Now let's have a deeper insight into how to enable review reminders.
How to Enable Review RemindersThe extension activates the notifications if users purchase one or multiple products and their orders get the "Complete" status. You can schedule the date when the review reminders are to be sent automatically in the general settings following STORES > Configuration > ITORIS EXTENSIONS > Review Reminder > General > Send Reminder in X Days. By default all review reminders will be sent in 14 days. Please note the reminders will be sent automatically at 3 AM daily if the cron job is configured. More detailed information about the cron job configuration is available in the Magento 2 documentation. Let’s complete the following steps to activate the reminders.
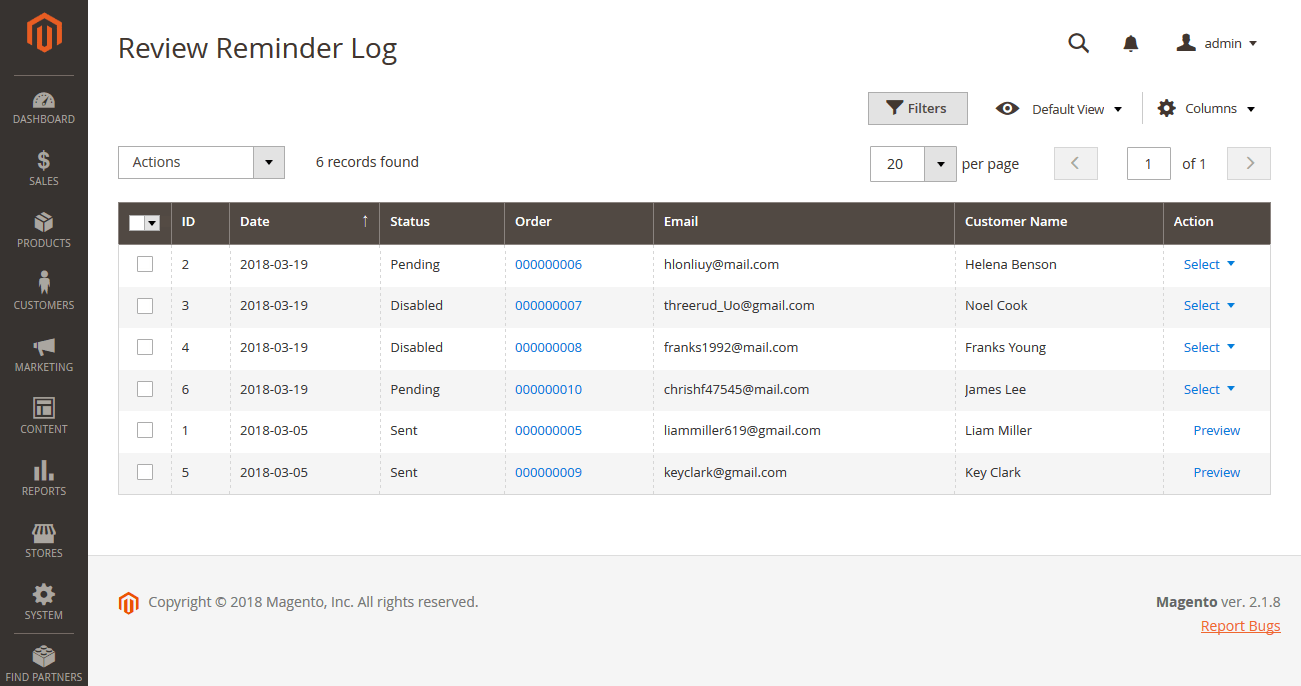
The log stores all pending, disabled and sent reminders available in the store. After the order is complete the pending reminder will be displayed in the log. How to Send and Manage Review RemindersBy default the extension cleans the log in the specified days. You can configure that setting following STORES > Configuration > ITORIS EXTENSIONS > Review Reminder > General > Clean log records older than X Days. By default the log will be cleaned in 60 days. All pending reminders will be sent automatically in 14 days since the order has been completed and the cron job has been configured. The log allows to track the date when the reminders will be sent or have already been sent. You can send the multiple notifications in bulk or per reminder manually. To send the multiple emails in bulk, do the following:
To send a notification per reminder, do the following:
The extension allows to filter reminders, remove or change the columns' positions on the grid to match your workflow. You can also disable or enable reminders via the mass actions tool or per reminder. Each reminder has its own status displayed on the grid. You can send the notifications if the reminders have the "Pending" status only. You can also open orders for more details via the link in the "Order" column, track customers' emails and names and preview the email template by choosing "Preview" in the "Action" column.
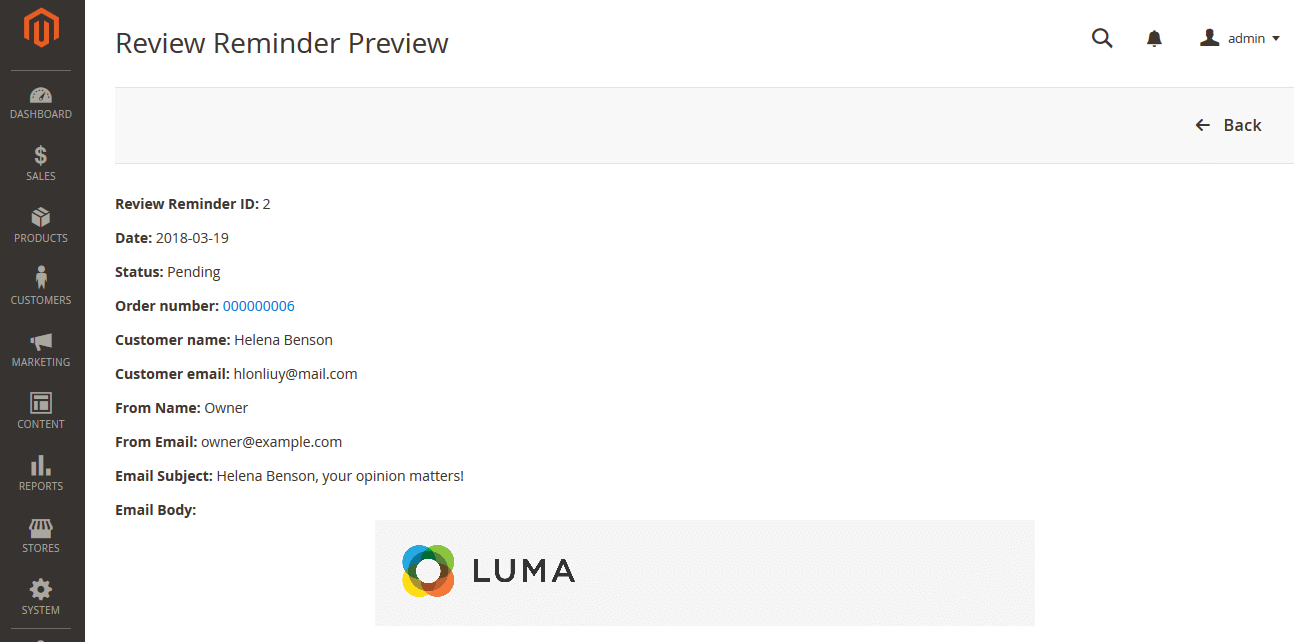
How to Customize the Email TemplateYou can preview each reminder to make sure the notifications will look the same in the customers' emails. Choose the "Preview" option in the "Select" dropdown on the grid. The extension provides the general overview of the reminder. You can check its ID, the date when the reminder was created or the date when the reminder was sent, the status and order's link, the customer's name and email. You can also track the sender's name and email as well as customize the email subject and body. The information above the template is available for admin only. You can change the sender following:
The "Review Reminder" email template is set by default. You can create your own email template and apply it to all reminders. You can change the template following:
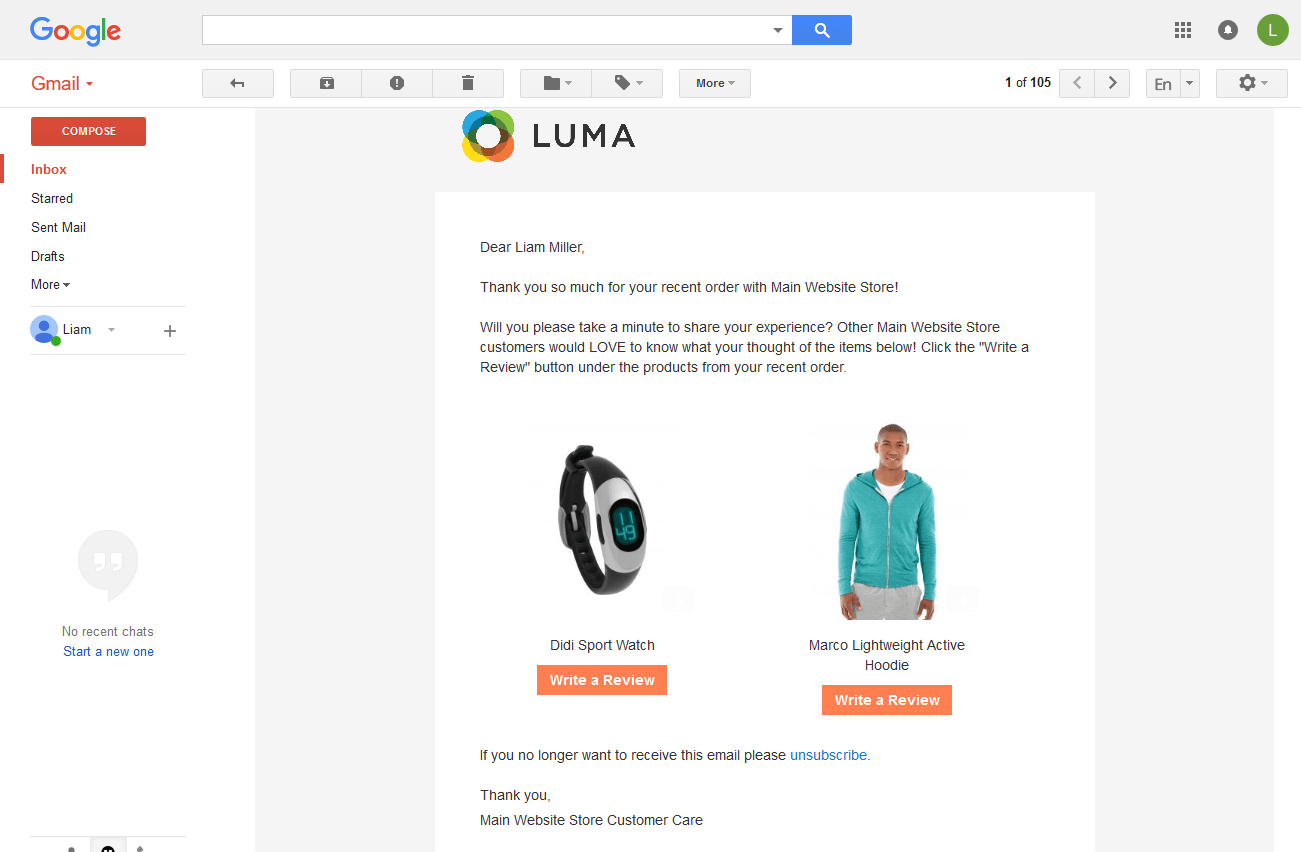
You can check how the default email subject and body will look in the real email. To submit a review click the "Write a Review" button below. You will be redirected to the product review tab. The email also contains the unsubscribe link allowing to unsubscribe from getting the email notifications after the order is complete. You can also send a test email from backend following STORES > Configuration > ITORIS EXTENSIONS > Review Reminder > General > Test Reminder. Enter your email in the input box and click button "Send a test email".
You can also customize the email subject and body following:
Your customers will receive the following email:
Users will be able to leave reviews in a few clicks and the unsubscribe link will allow to manage and unsubscribe from the notifications if necessary.
How to Limit Access to Review RemindersThe extension allows to define what customer groups will receive the email notifications via the certain limitations available following: STORES > Configuration > ITORIS EXTENSIONS > Review Reminder > Reminder Configuration. The limitations are the following:
|