Username
Password
Remember Me
Log in
Forgot your password?
Forgot your username?
Forgot your username?
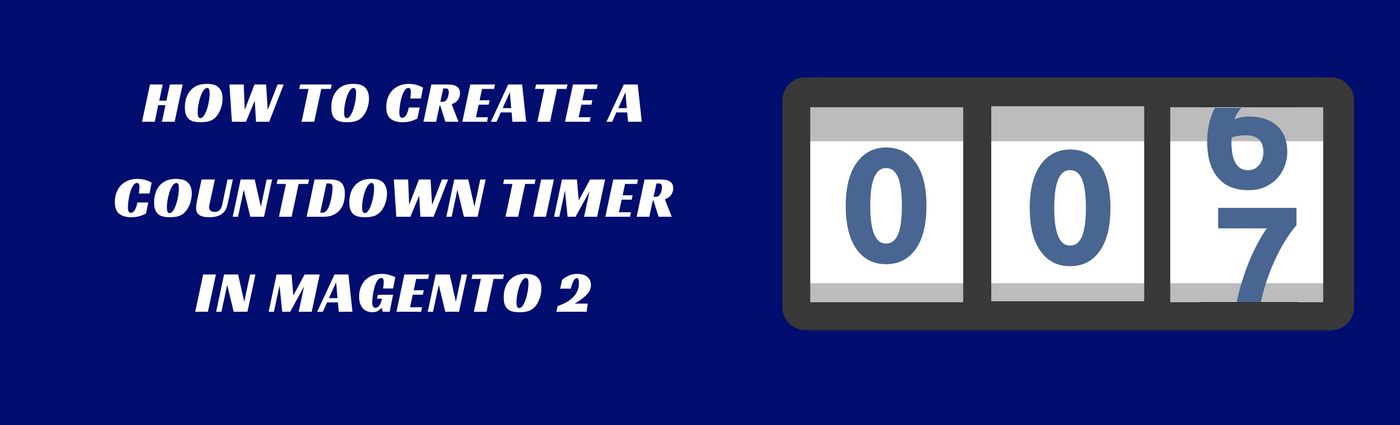
How to Create a Countdown Timer in Magento 2 |
| Magento 2 Extensions |
| Written by ITORIS Team, 2018-03-09 |
|
Creating and inserting a timer into your website is a good stimulating tool, motivating customers to take action. Magento 2 itself allows to add special prices to products. What is the best and fast way to remind customers about current or upcoming discounts? Countdown timers offer clients some useful information about the benefits they can get. For example, the special offer with 80 % discount ending in three hours’ time or one day sale of customers' favorite headphones. The Special Price Countdown extension for Magento 2 creates incentives and displays time and information for products with special prices. The extension enables the countdown if the offer is set to expire soon or available in the nearest future. The customizable timer format and template allows admins to create the effective countdown in Magento 2 that will attract customers' attention. Are countdown timers useful?
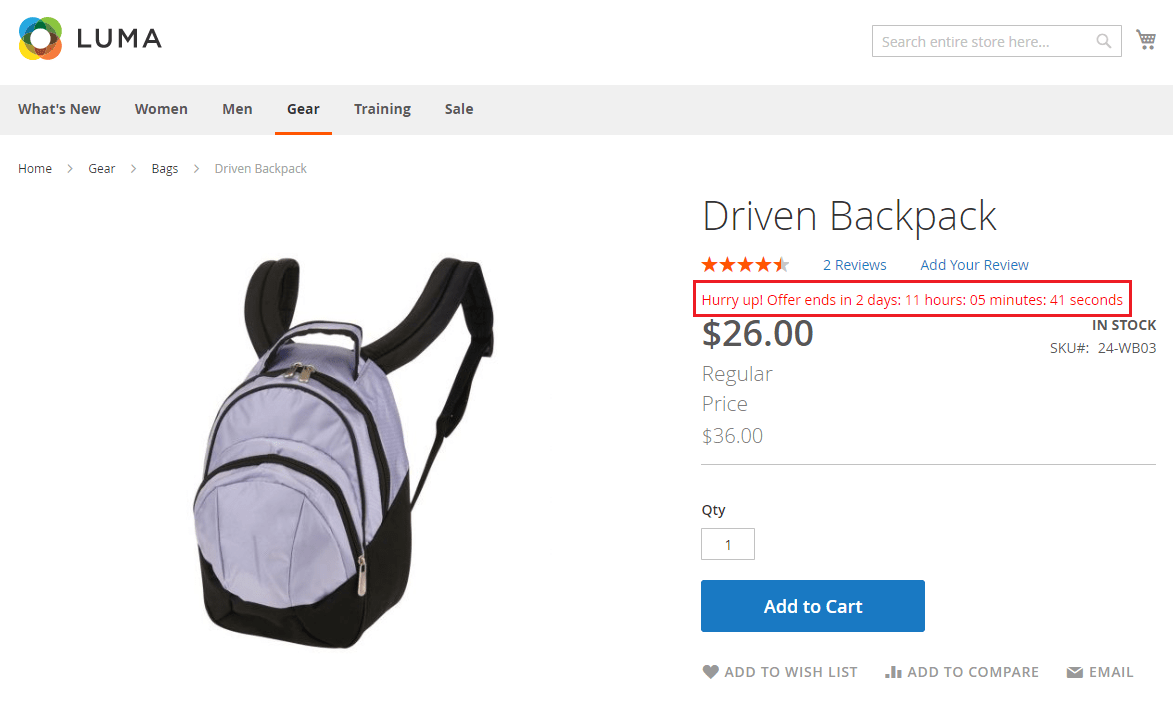
The extension enables an automatic countdown displaying the special price time period. If the special offer comes to an end, the end countdown is shown on product and category pages to remind customers about discounts which just expired. If the special offer is coming soon, the start countdown is displayed on product and category pages informing visitors about upcoming offers. You can also insert the timer into Homepage, related products, upsells and cross-sells as well. It is also possible to customize the Magento 2 countdown timer format via the HTML tags and variables. Enable Countdown on Product PagesAfter special prices were created for necessary products you can display the countdown timer on frontend. Let's get a deeper insight into how to enable the end countdown timer if the special end date is set. You can find the general settings following STORES > Configuration > ITORIS EXTENSIONS > Special Price Countdown > Special Price End Countdown. The same configuration is applied per product as well.
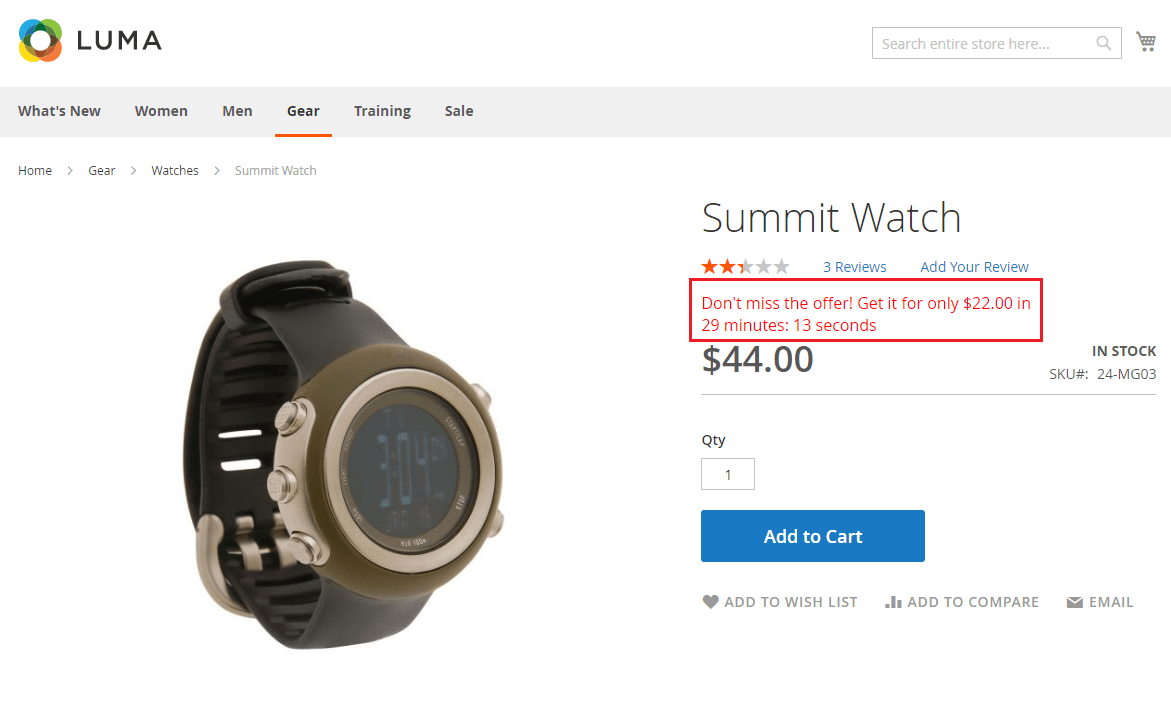
You can also enable and customize the start countdown timer following STORES > Configuration > ITORIS EXTENSIONS > Special Price Countdown > Special Price Start Countdown. The special price start countdown notifies when the special price will be activated. You can leave the default settings unchanged or customize them according to your needs. This is how the special price start countdown looks on product pages.
Enable Countdown on Category PagesAlong with displaying the countdown timer on product pages you can show the separate and customizable timer on category pages.
The extension also allows to enable the countdown timer on category pages after the special price start date is specified.
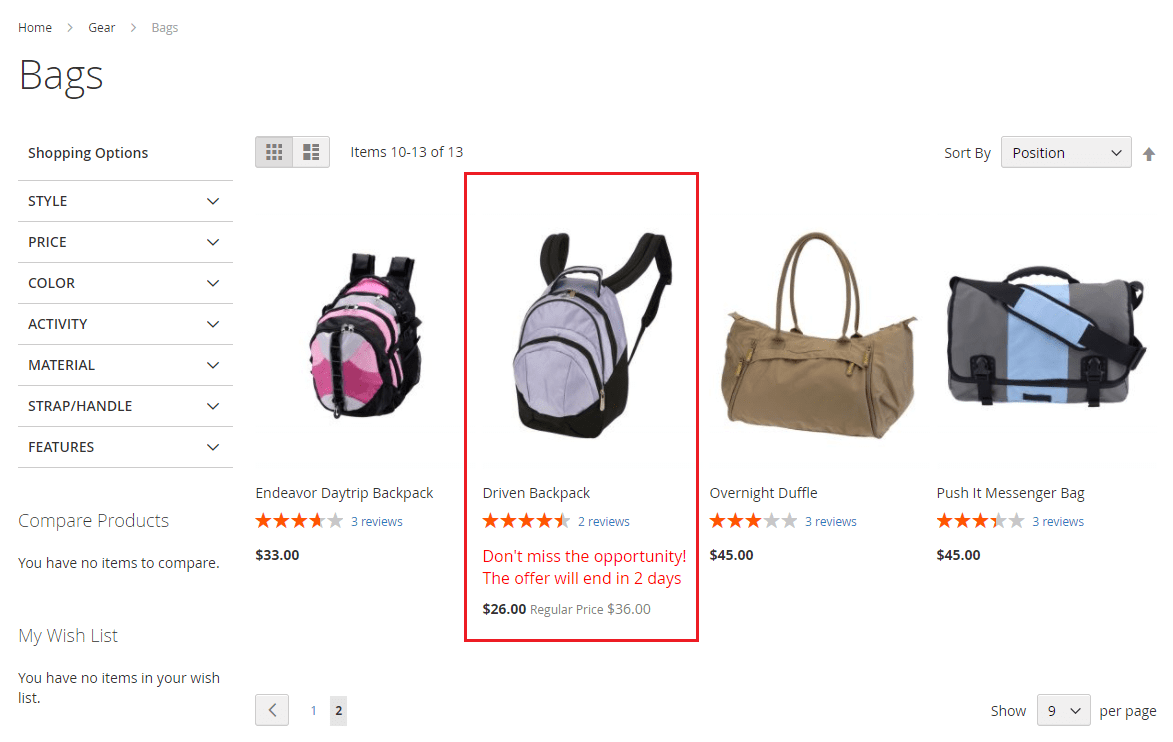
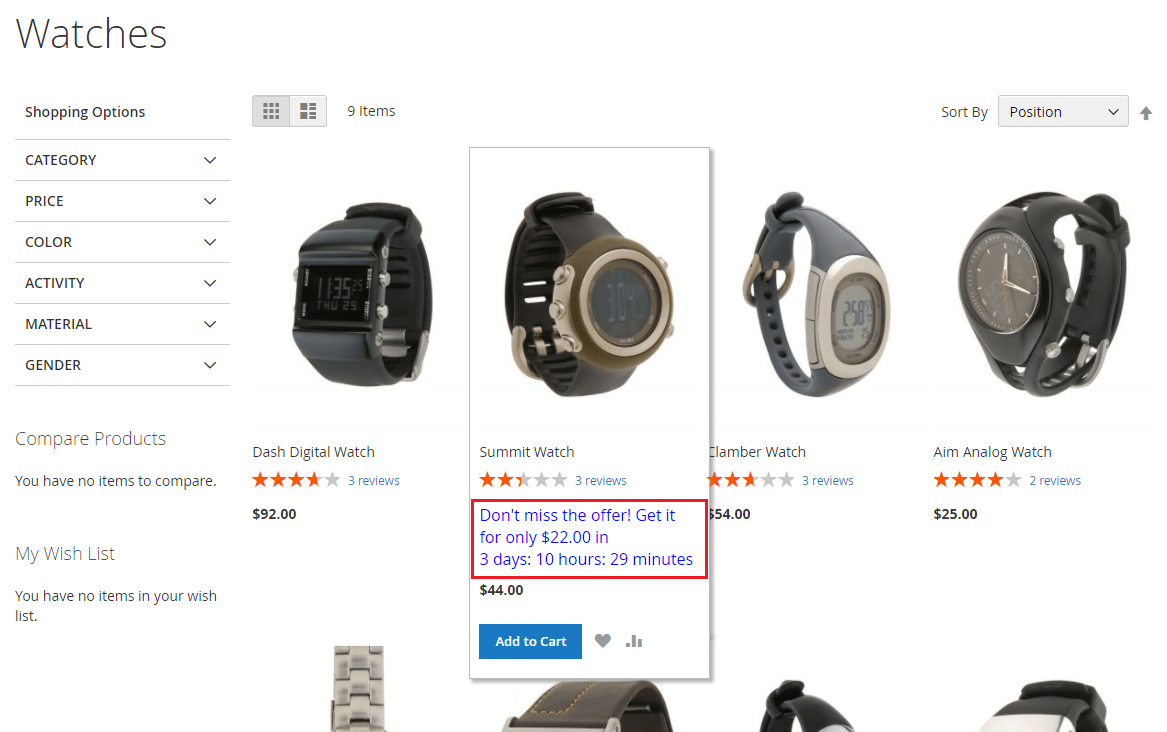
This is how the special price start countdown looks on the category page.
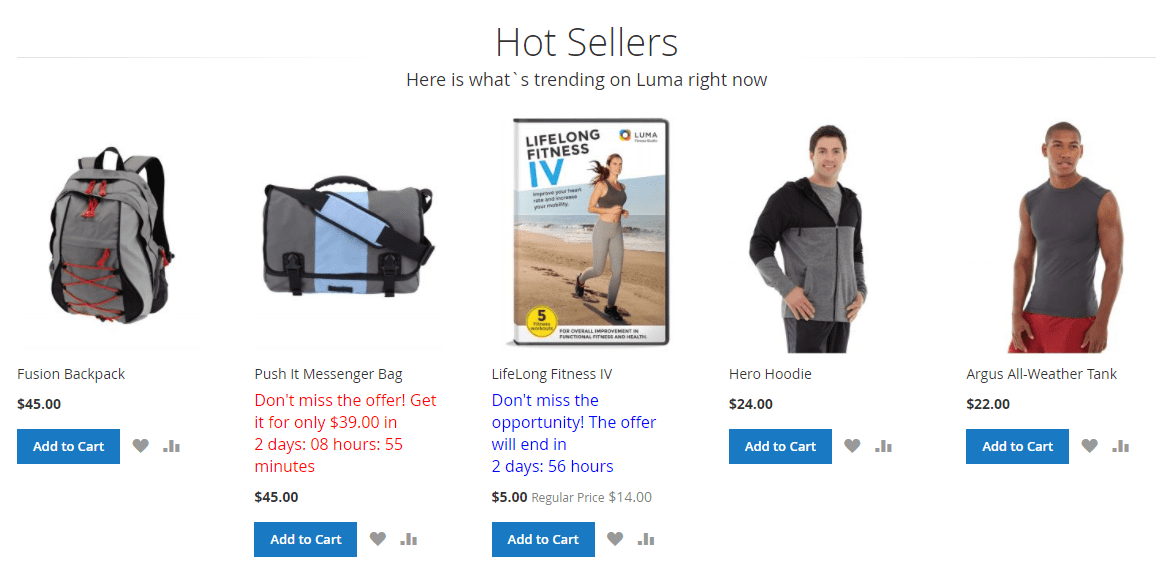
Enable Countdown on HomepageBoth special price end and start countdown can be enabled on the homepage as well. There is no need to create additional blocks or insert widgets. All products with special prices inherit the category timer settings.
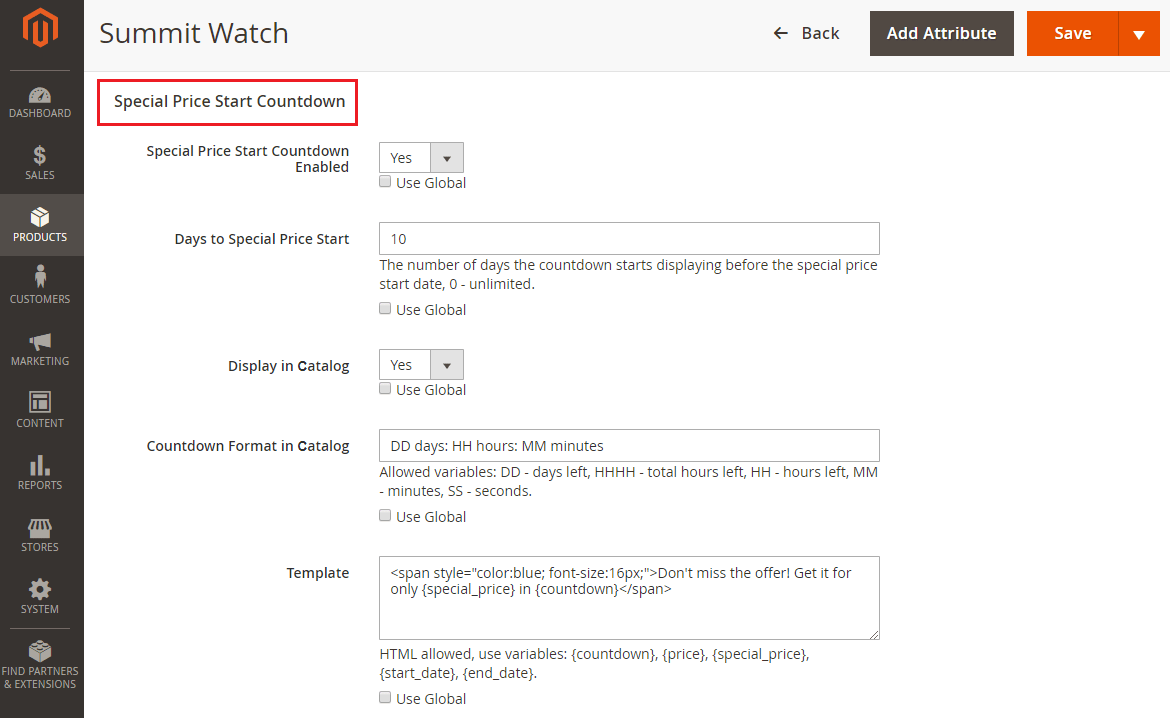
Enable Countdown per Product with Special PriceAll product settings have a separate section allowing to configure the start and end countdown timers. Find the section following PRODUCTS > Catalog > choose a product > Special Price Countdown Settings. Clear the checkbox to make changes within the product. The settings for the special price start countdown will look as follow:
|