Username
Password
Remember Me
Log in
Forgot your password?
Forgot your username?
Forgot your username?
How to add custom fields to the registration form in Magento 2 |
| Magento 2 Extensions |
| Written by ITORIS Team, 2016-10-13 |
|
As you know the customer has to fill in name, password and email during registration in Magento 2. These are default fields. Let's imagine the situation when admin wants to know not only customer's name and email, but also his billing address, gender or create additional custom fields. It's possible with the Registration Fields Manager extension for Magento 2. By defaults Magento won't allow to add additional custom fields to the registration form without additional coding. The ITORIS team provides you with a solution. You can easily add more fields to the registration form, group fields into sections and translate them for different store views. For detailed information about Registration Fields Manager you can check out the User Guide. The extension allows to add system fields and create new custom fields. Now let's go to the backend and add custom fields. Go to CUSTOMERS -> Customers -> Registration Form Fields. After you enable the extension, sections called "Personal Information" and "Login Information" will be created automatically.
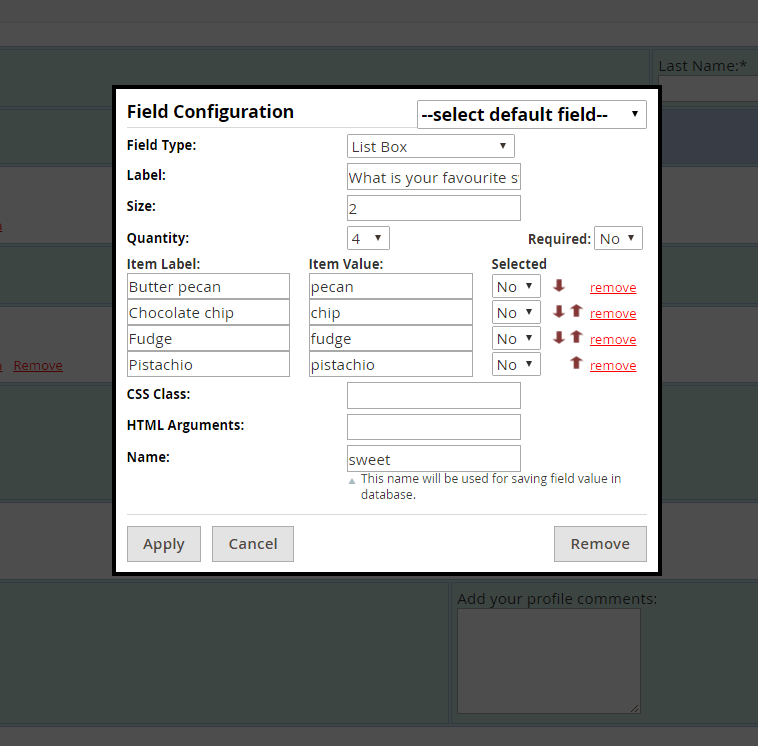
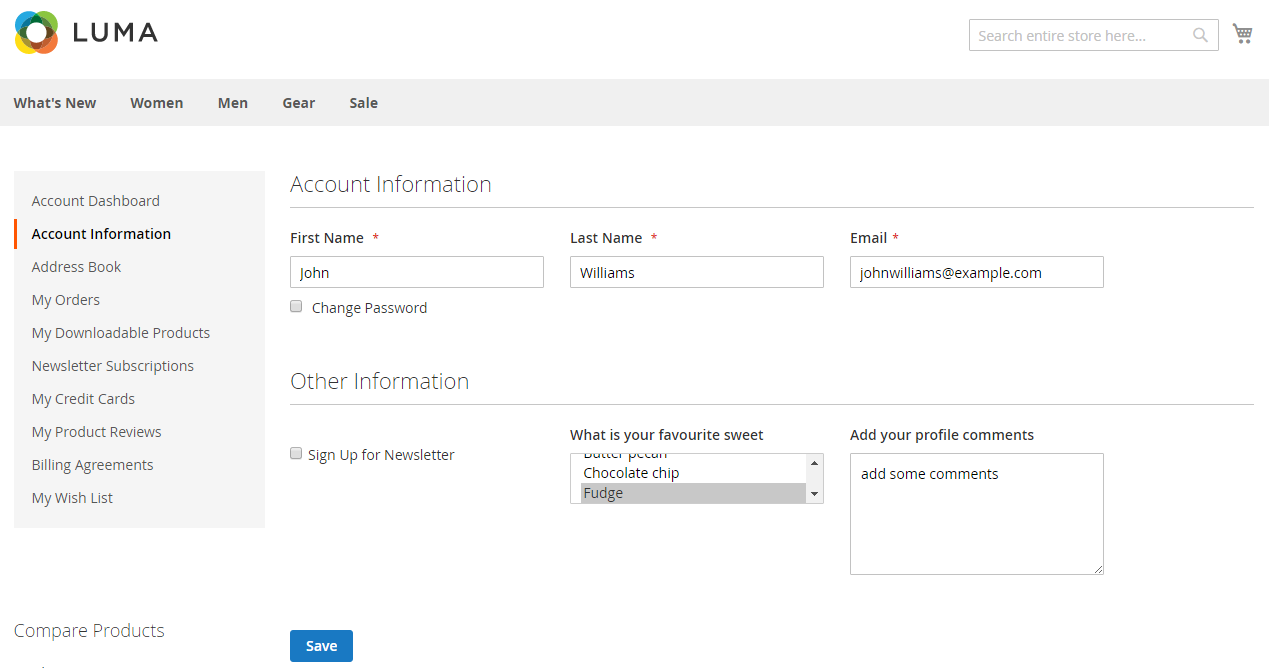
Let's add a new section. Click button "Add New Section". After adding the section, enter "Other Details" in "Section Label". At the top of the section set two columns and one row. Then click the "Edit" icon in an empty cell. When the popup appears you can create new custom fields or add system fields in dropdown "select default field". Each field has its own properties. To create a custom field, you should choose a field type in dropdown "Fields Type". Let's add the custom field called "What is your favorite sweet". Click dropdown "Field Type" and choose "List Box". Then enter the field's name in "Label". Enter "2" to define the scope. Click dropdown "Quantity" and choose how many items you want to add. In our case there are four items. Choose "No" in the "Required" dropdown to make the field optional. Then enter titles in "Item Labels". In "Item Value" enter the same titles. Choose "No" in the "Selected" dropdown to leave items unselected. You can also remove them clicking link "Remove". Let's leave "CSS Class" and "HTML Arguments" empty. Enter "sweet" in "Name" as this property is required. Also "Name" should be unique, alpha-numeric with no spaces and special symbols, in lower case preferably. Click button "Apply" to save the field.
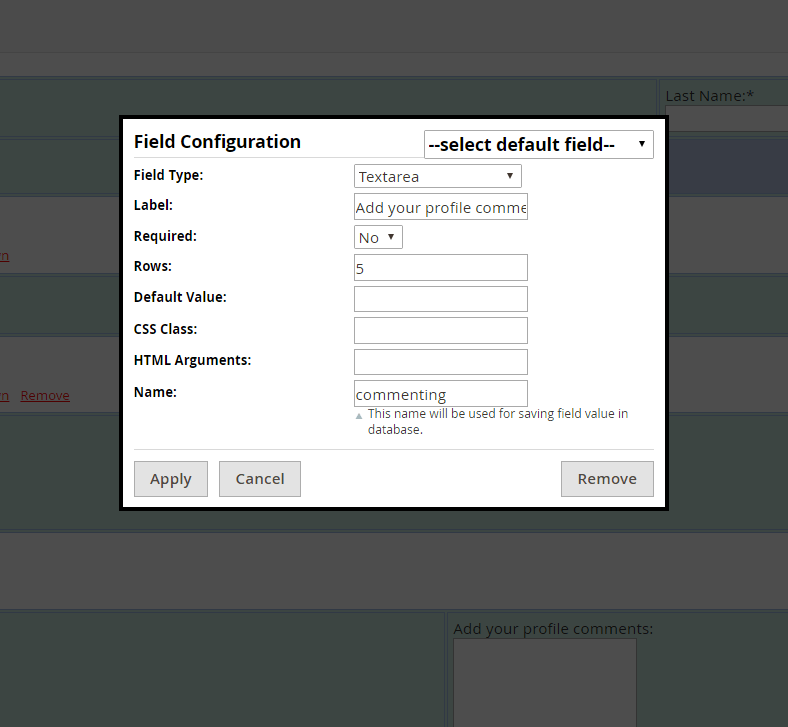
Now let's add another custom field using "Textarea". Choose "Textarea" in dropdown "Field Type". In the "Label" property enter "Add your profile comments". Make the field optional choosing "No" in "Required". Enter "5" in "Rows". As the "Name" property is required enter "commenting". Others properties are optional. Then click "Apply".
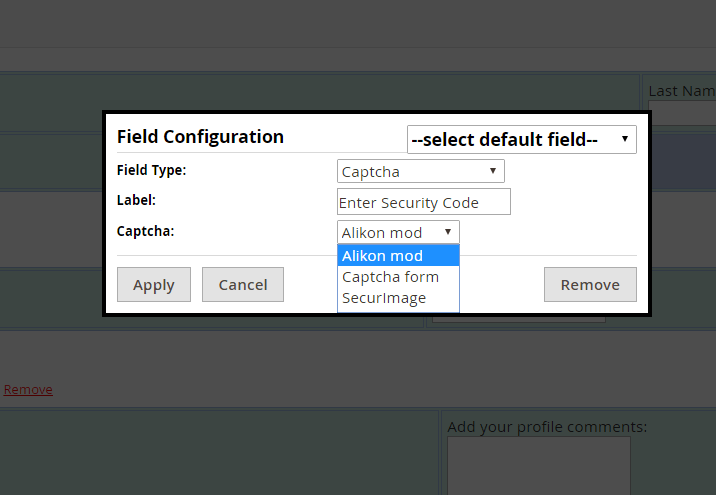
The extension also allows to set bot protection during the registration process. There are three variants of Captcha available in the extension. Let's create one more section called "Bot Protection". In an empty cell click the "Edit" icon. This field is required. Choose "Captcha" and then enter "Enter Security Code" in "Label". Select captcha's type "Alikon mod". Click "Apply" to save the field.
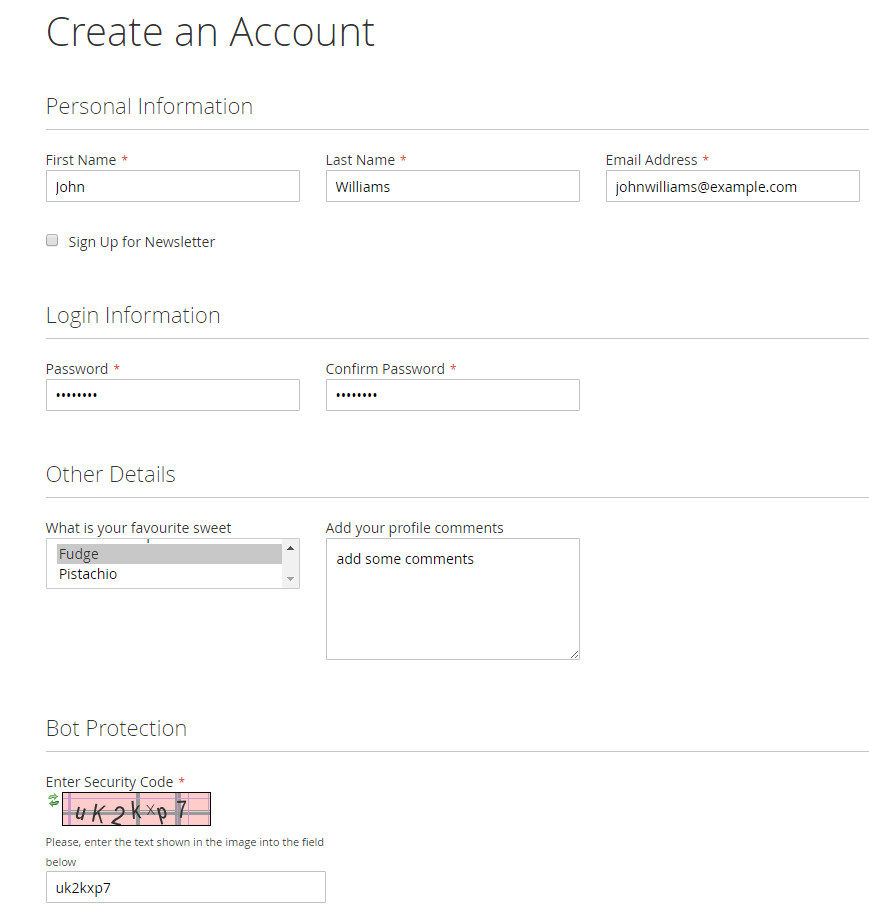
Now let's go to the Frontend and create an account. You can see the main section with the names, email and password and also the custom fields. Fill in necessary information. Then click the "Create an Account" button.
Using the extension the registered customers can edit the additional information on their Dashboard following Account Dashboard -> Account Information. They can change the custom fields, the names or email. To save all changes the customers should click "Save". Admin can also edit fields in the customers' accounts following CUSTOMERS -> Customers -> All Customers -> {some customer} -> CUSTOMER INFORMATION -> Custom Registration Fields.
Using the Registration Fields Manager extension for Magento 2 you can add more fields to the registration form. The extension provides a visual registration form editor. Add new fields, or reorder existing ones by dragging them to a new place. Group fields into sections on a long form. You can easily create new custom fields based on different field types. Set either a field is optional or required. Thus you can extend customers' profiles and make the registration process more fruitful. Our Video Tutorial about the Registration Fields Manager extension for Magento 2. |