Username
Password
Remember Me
Log in
Forgot your password?
Forgot your username?
Forgot your username?
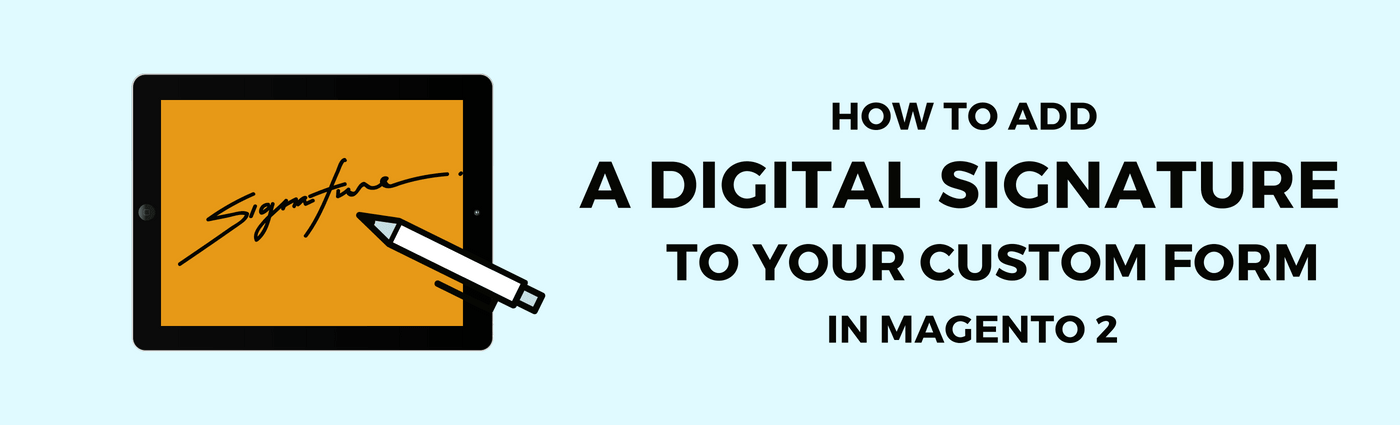
How to Add a Digital Signature to Your Custom Form in Magento 2 |
| Magento 2 Extensions |
| Written by ITORIS Team, 2018-06-28 |
|
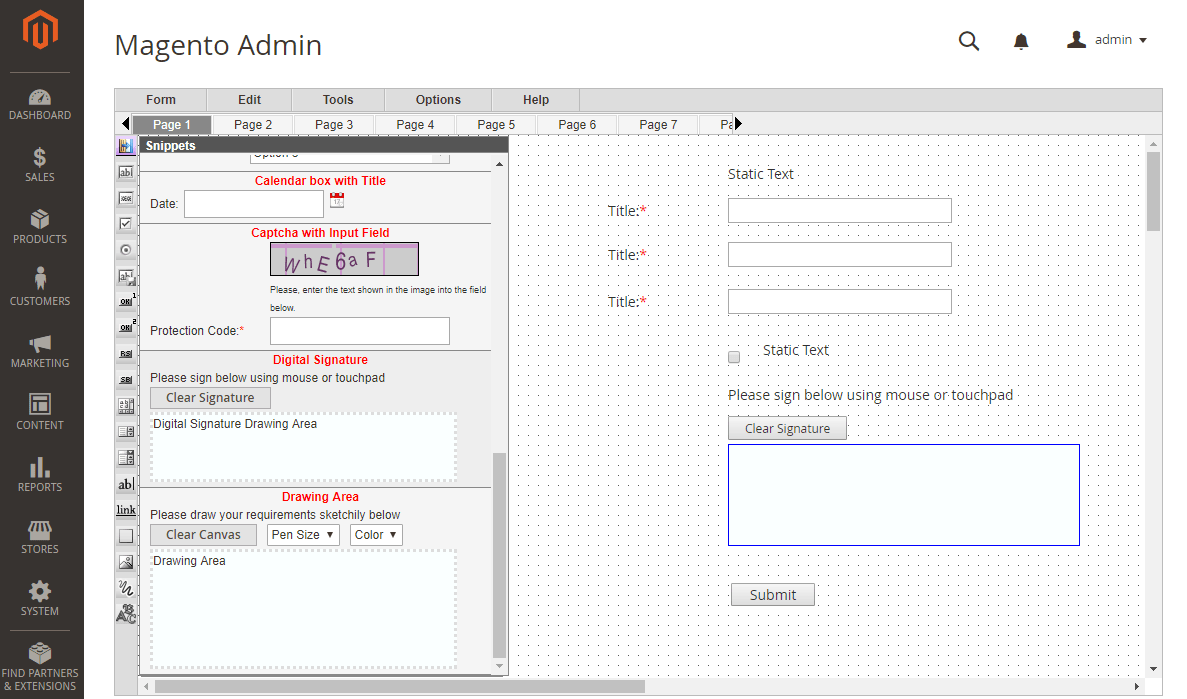
A digital signature is used to ensure the authenticity of electronic documents, messages, etc. Once the digital signature is implemented into your website, the tons of paper work will be reduced, clients will get emails with signatures within minutes, and all signed documents will be delivered quickly and in time. No matter where your business is, you can allow clients to sign agreements distantly saving time and money. The Advanced Form Builder extension for Magento 2 provides the digital signature tool allowing to add a signature to custom forms. A digital signature can be easily customized from backend, converted into images and inserted into the email templates or PDF. Sign documents with one click, deliver a unique user experience by generating fast and fruitful results. How to Insert a Digital Signature into FormsTo embed a digital signature in your form, create a custom form following CONTENT > SmartFormer Gold > Form Manager > Create Form. Drag necessary elements from the toolbar to the working area. You can find our guide on how to create a custom form in Magento 2 using SmartFormer Gold. To insert the signature, do the following: 1. At the top of toolbar find the ready-to-use group of elements or snippets, drag and drop the "Digital Signature" snippet (including the drawing canvas, the DIV element and static text) to the working area. Or you can create the drawing area by your own by choosing element "Drawing Canvas" from the toolbar. That element also allows to add the digital signature functionality.
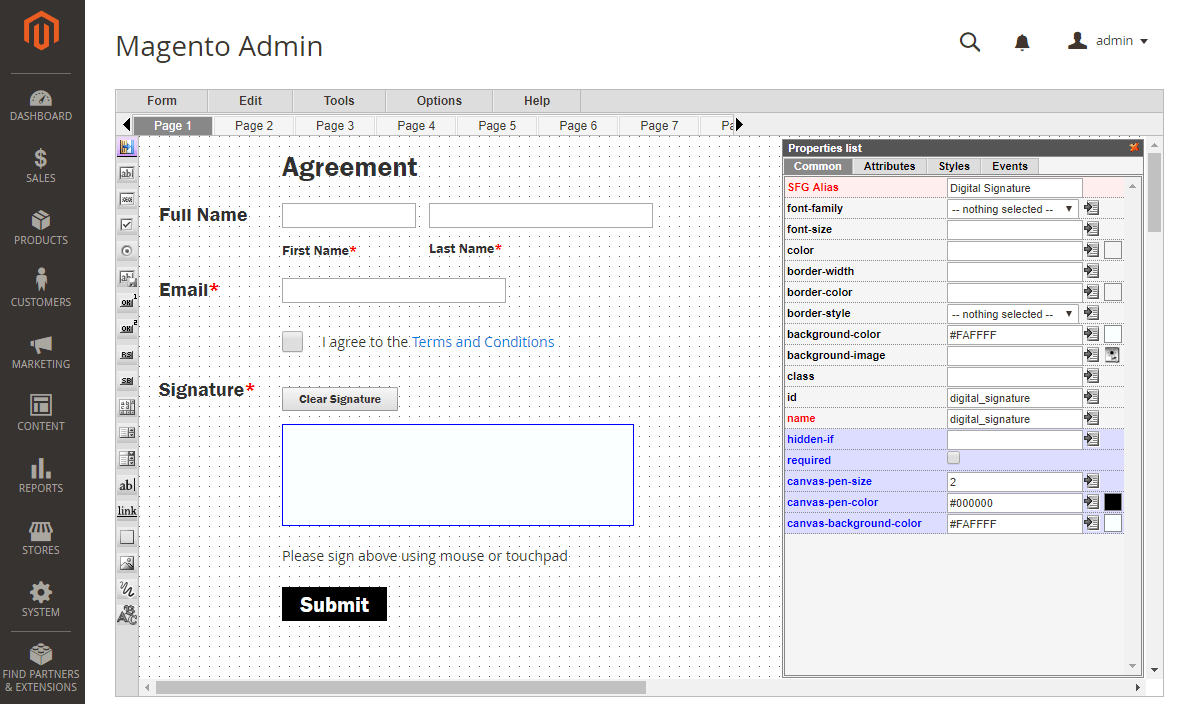
2. After all elements were placed on the area, enter the unique "SFG Alias" and "Name" to connect the form to the database and save the entered data and signature. For example, "Name" - digital_signature, "SFG Alias" – Digital Signature. You can also specify the pen size, its color, or change the canvas background color and insert image in the "Common" properties. You can also make the element required or hidden by specifying the conditions.
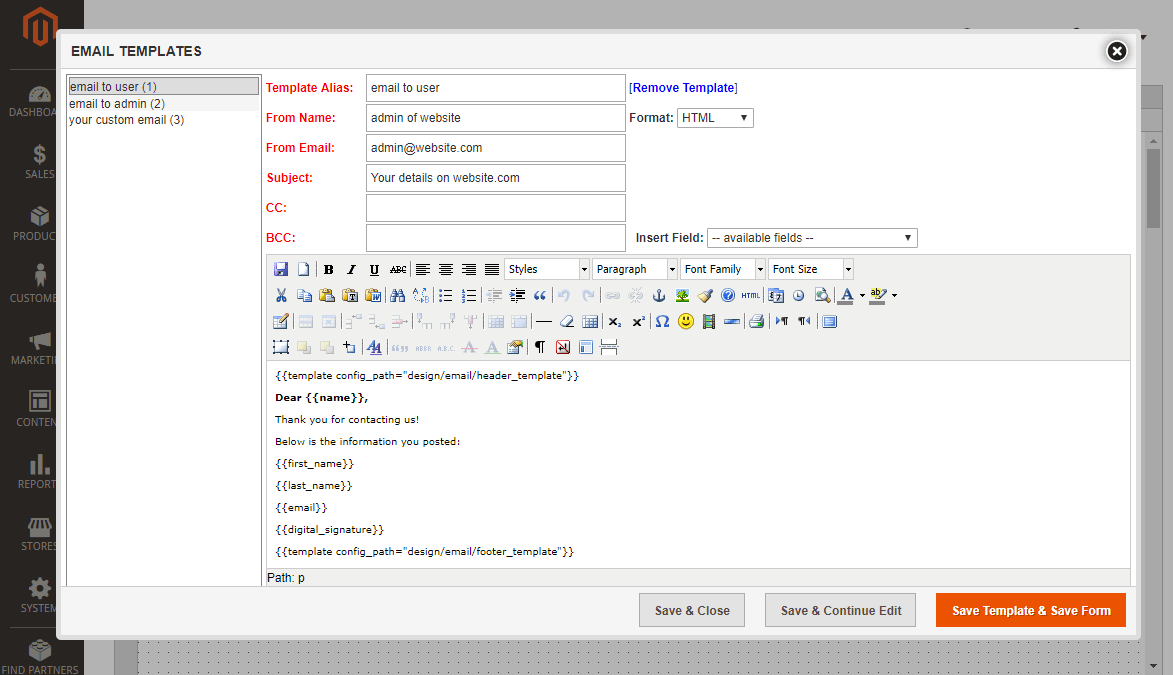
To save the customers' data, a new database table should be created following: 1. Select Tools > Database Designer. 2. Click button "Generate Automatically" to create a new database table or click "add field" to add a created element to the database manually. Enter a unique table name and click "Commit". 3. After the table was created, save the form and close it. If you need to make the signature be available for emails, for example for contracts or agreements, do the following: 1. In the "Submit" button's properties enable the email notifications for users or admin after the form is submitted. 2. Go to Tools > Email Templates. Select an email template where the signature's image should be displayed. By default the variable {{%all_data%}} is added to each email template and includes all entered data. 3. If you create a new template you need to pick the necessary fields from the "Insert Field" dropdown. The variable with the digital signature will look as follows {{digital_signature}} 4. Set the rest of properties and save the template. 5. Save the form.
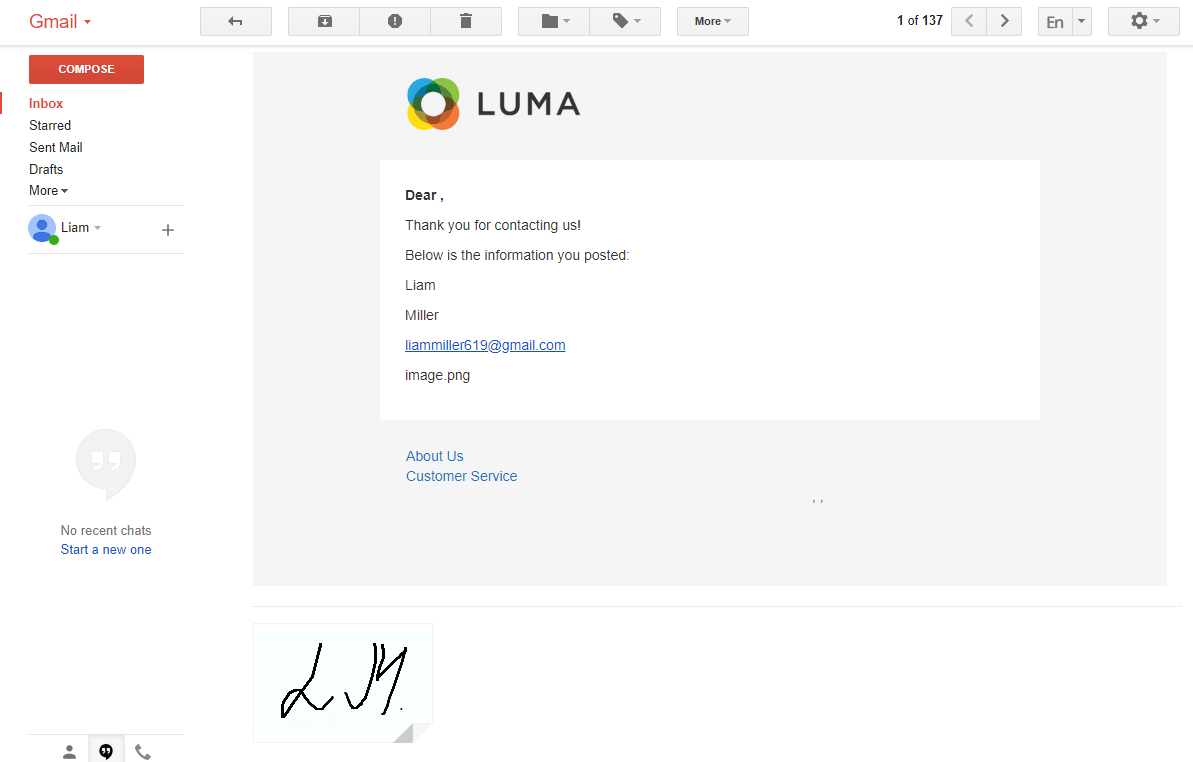
The signature will be attached as an image to the customer's email.
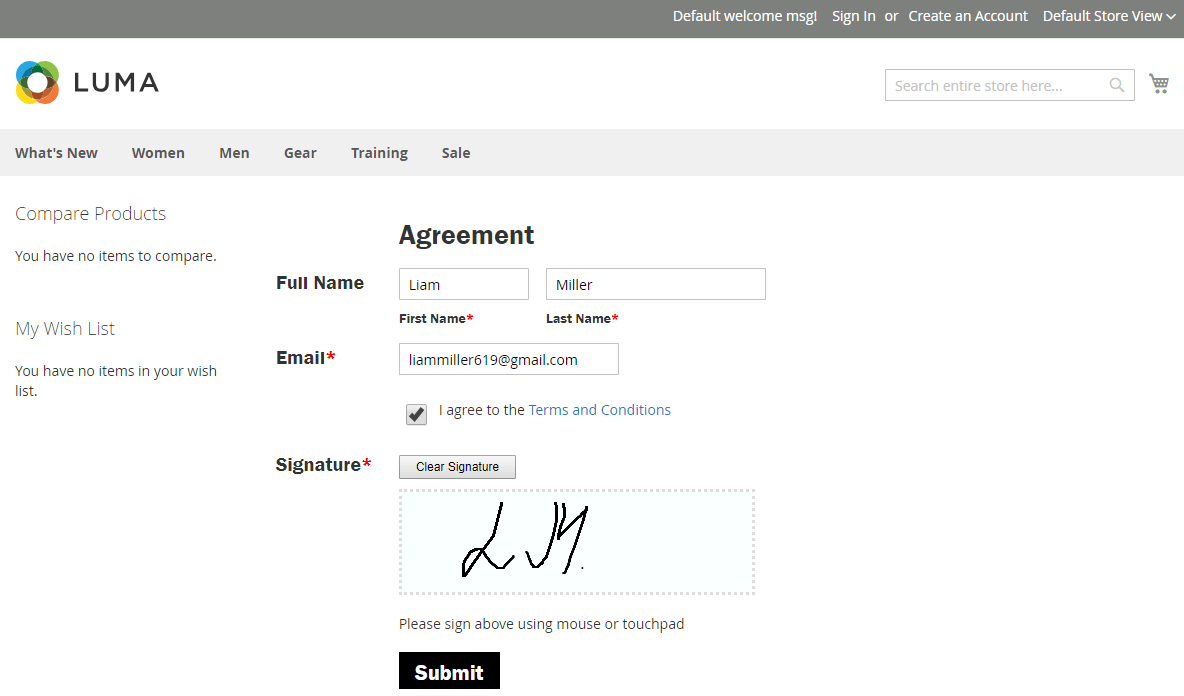
How to Preview the FormTo see the created form, open it on preview by clicking the link in "Direct URL to the form" on the grid with all created forms. You can fill in necessary data to see how the submitted information will look in backend. Add your sign using the mouse. To clear the area you can use the "Clear Signature" button. Once the form has been filled in and the signature has been added, click button "Submit".
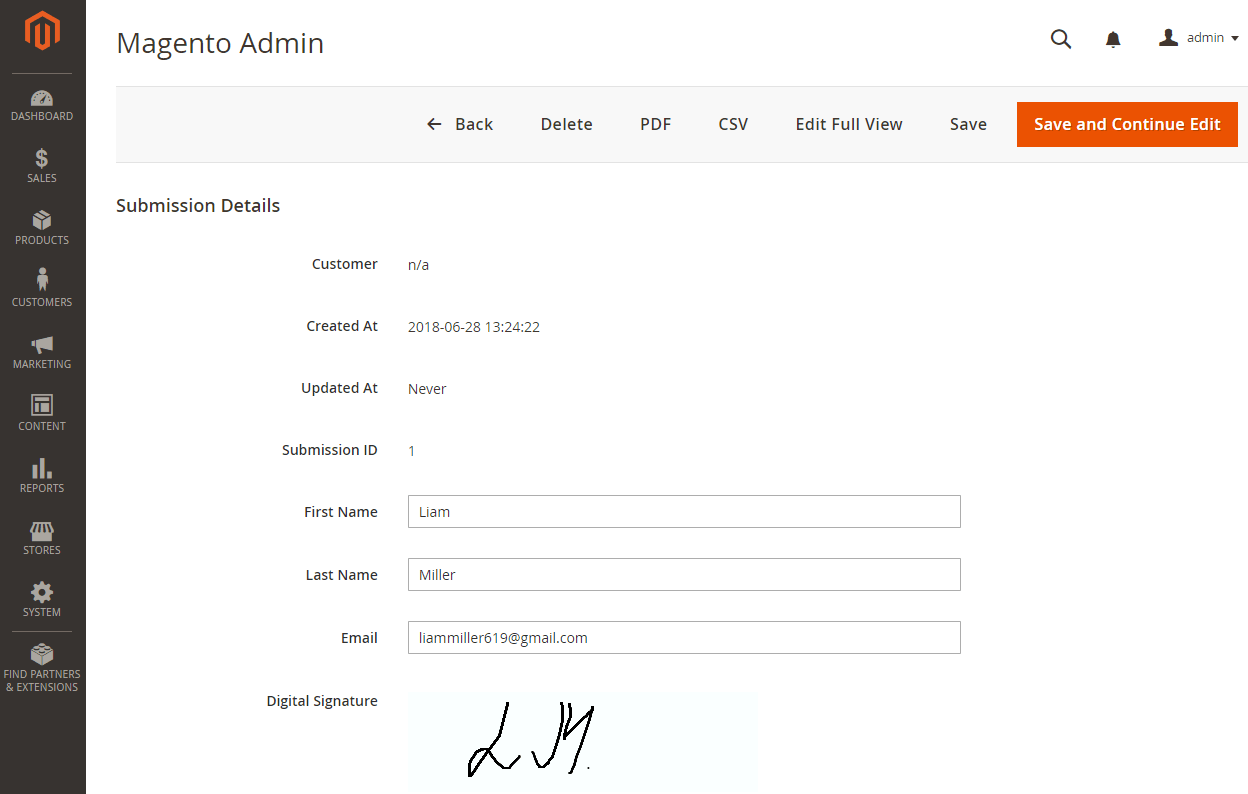
The signature image and entered data will be saved and available in Backend. You can also manage the submission, edit the data or export the form via PDF or CSV directly from the grid with all submissions. This is how the submitted information looks in backend:
|