Username
Password
Remember Me
Log in
Forgot your password?
Forgot your username?
Forgot your username?
How to Create a Custom Form using the SmartFormer Gold extension for Magento 2 |
| Magento 2 Extensions |
| Written by ITORIS Team, 2017-07-26 |
|
Providing customer service based on trust creates an opportunity for maintaining long-term relationships with your clients. How can you collaborate with customers allowing to make their voices heard? Creating custom forms is one of the key aspect to stay in touch with your potential consumers. Add contact and feedback forms that make you stay aware of issues users can face, create surveys to make sure you are offering the right products and services, run an online newsletter form to keep you clients coming back. The Professional Form Builder for Magento 2 handles with various types of forms customizing them in your own way. SmartFormer Gold is developed to create and design forms of any complexity level, store customer data, customize email templates, change validation rules, and more. There will be provided several articles giving the detailed SFG features’ overview. More information you can find in the User Guide. Now let’s create a simple custom form for a preliminary estimate request. After the plugin has been enabled, find the forms’ list as follows: CONTENT -> SmartFormer Gold -> Form Manager. Click button “Create Form” above the forms’ grid to open the SmartFormer Gold editor. The editor consists of the customizable working area, the available list of elements and snippets on the toolbar and useful options and tools in the menu bar. To create a multi-page custom form, use the scrolling bar below the menu. Let’s complete the following steps and create the Estimate Request Form: Build the Form’s BaseAfter you open the editor, choose the first page and select the appropriate elements on the toolbar by drag-n-dropping to the working area. You can also use the ready-to-use group of elements or snippets available at the top of toolbar to simplify adding elements to the form.
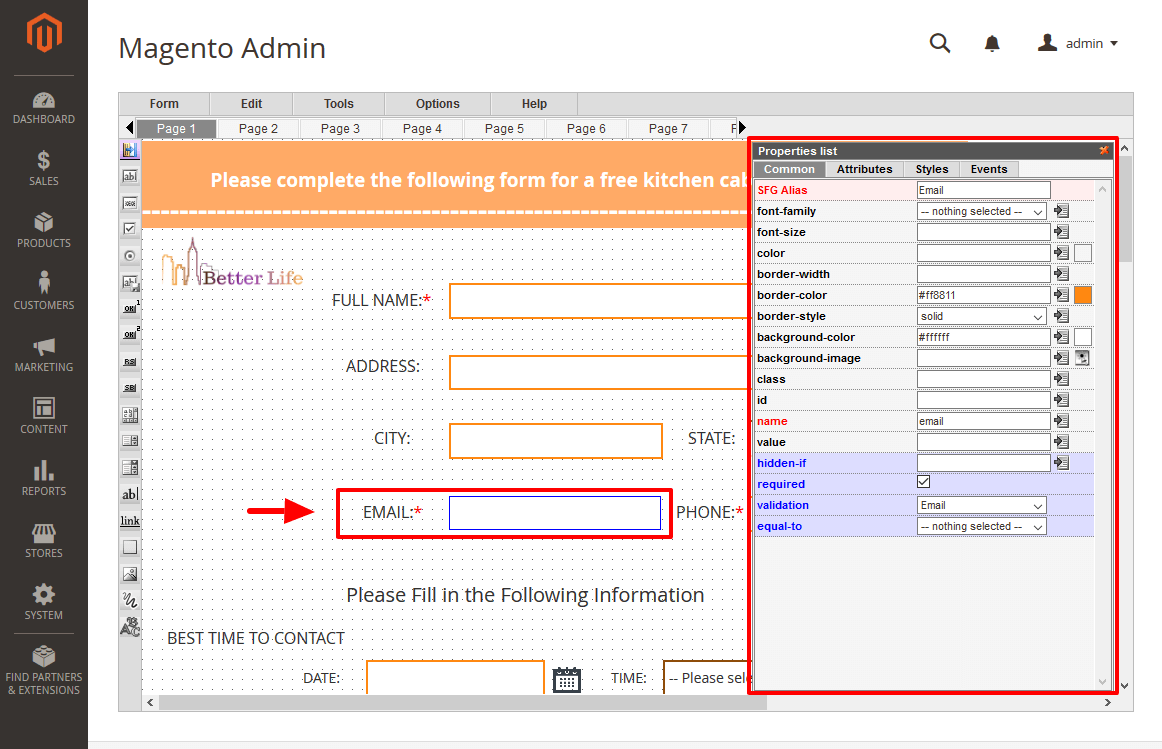
Add Common and Unique Properties to Each ElementThe SFG extension provides ability to customize elements by editing unique and common properties using attributes, styles, or events. To make the properties list available, click the chosen element. The properties box will allow you to change the font and its size, add color and other settings that vary from one to another element. Let’s check out some of them. The highlighted “Email” field includes snippet “Required Input box with Title”. Edit “Title” by changing its font size and adding content. Then choose field. In the “Common” properties list enter clear “SFG Alias” visible in all reports and emails after the form is bound to the Database, add required “Name” to define the element on the form and connect it to the DB. You can also customize the element’s border, font or color. The PHP editor is available next to each element for advanced use. In the “Unique” properties mark the “Required” checkbox, choose “Email” in “validation” to verify the entered customer data.
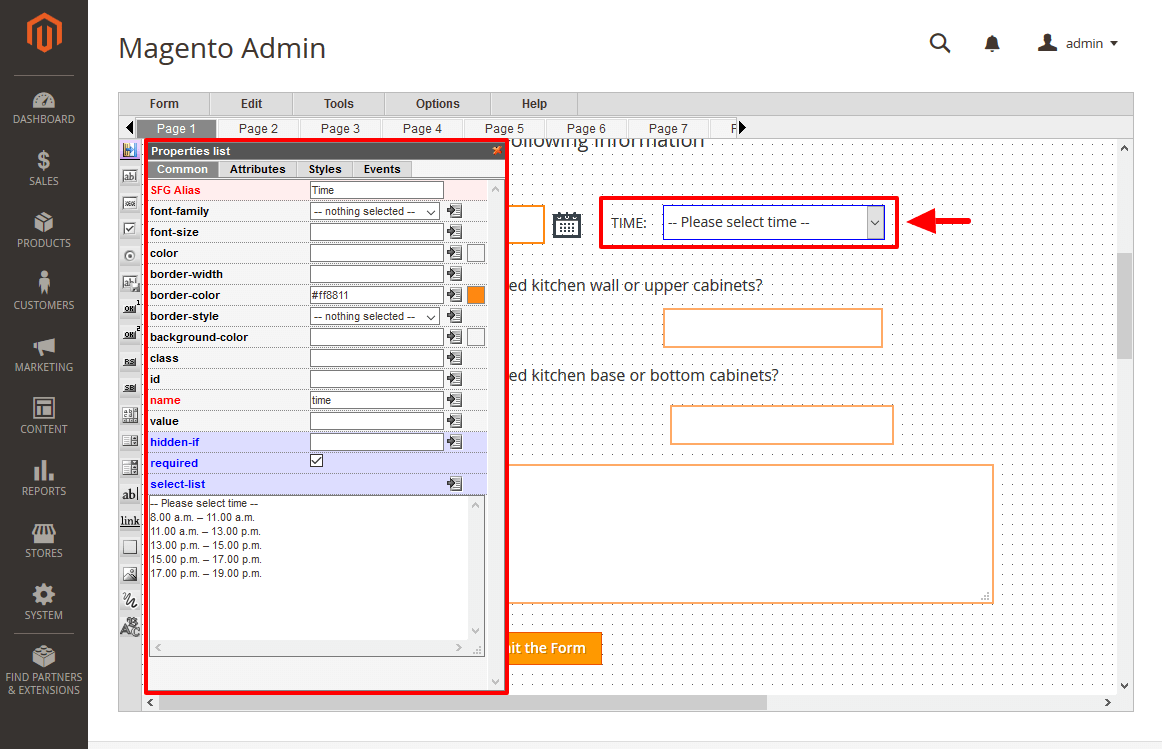
Now let’s see how to configure dropdown “Time”. Choose “Select Box with Title” in the snippets. Set the same common properties as mentioned above changing “SFG Alias” and “Name”. Check “Required” and create a list in the “select-list” property in the following format: [*][value|]text -- Please select time --8.00 a.m. – 11.00 a.m. 11.00 a.m. – 13.00 p.m. 13.00 p.m. – 15.00 p.m. 15.00 p.m. – 17.00 p.m. 17.00 p.m. – 19.00 p.m. If you put the asterisk (*) in the beginning of a line, the option will be selected by default: -- Please select time --8.00 a.m. – 11.00 a.m. 11.00 a.m. – 13.00 p.m. 13.00 p.m. – 15.00 p.m. 15.00 p.m. – 17.00 p.m. *17.00 p.m. – 19.00 p.m.
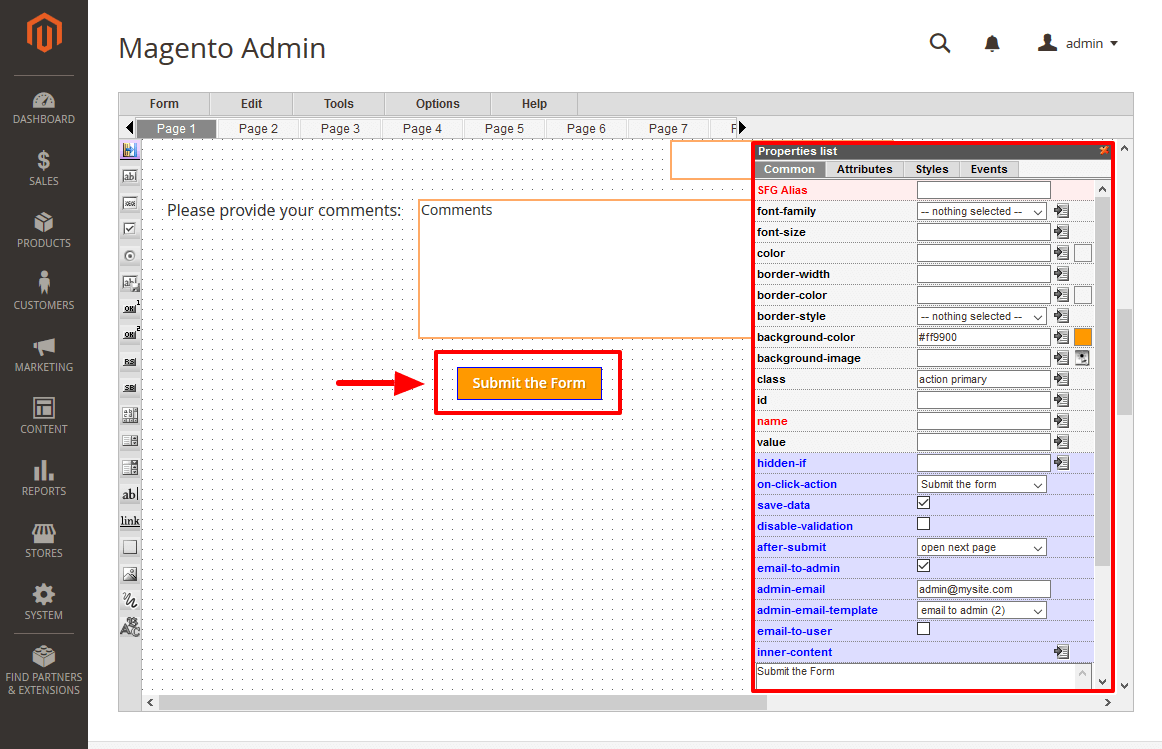
And the last element “Button (type 2)” will help to submit the form and send emails to admin or customers.
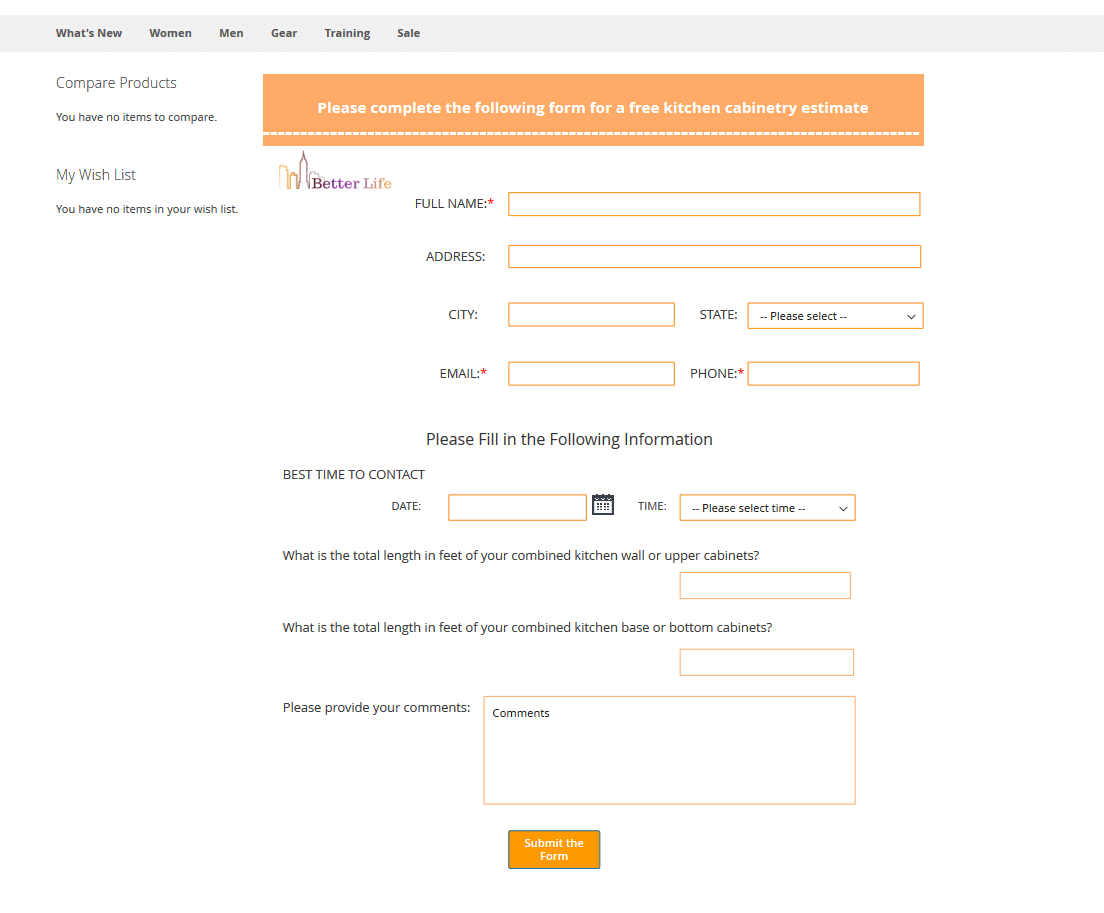
In the “Common” properties enter value “Submit”. In dropdown “on-click-action” choose “Submit the form” and mark “save-data” to make the submitted information available for admin. Then choose “open next page” in dropdown “after-submit” to show the “Thank You” message after submission. To notify admin after the form is submitted, check “email-to-admin”, then enter the email and choose the template. After all elements are added and our first page is ready, click the second page and write message using element “Static Text”. Align the ElementsThe last step is elements’ alignment. The extension helps to align elements horizontally and vertically that simplifies putting tags in an exact line. You can also cancel these alignments as follows: choose “Options” in the menu bar and uncheck “Stick Effect”. This is how our form looks on Frontend.
The SmartFormer Gold extension for Magento 2 is aimed to help storeowners to create advanced custom forms, add Captcha or digital signature, set conditional logic, covert forms to PDF. There is no need to write the additional lines of code to create simple forms. Or if your company requires to add professional and complex custom forms, developed with tons of features for advanced use, SmartFormer Gold will be the best solution. Learn more about how to create a contact form using SmartFormer Gold in our video tutorial. |