Username
Password
Remember Me
Log in
Forgot your password?
Forgot your username?
Forgot your username?
Easy Management of Multiple Wishlists in Magento 2 |
| Magento 2 Extensions |
| Written by ITORIS Team, 2018-06-08 |
|
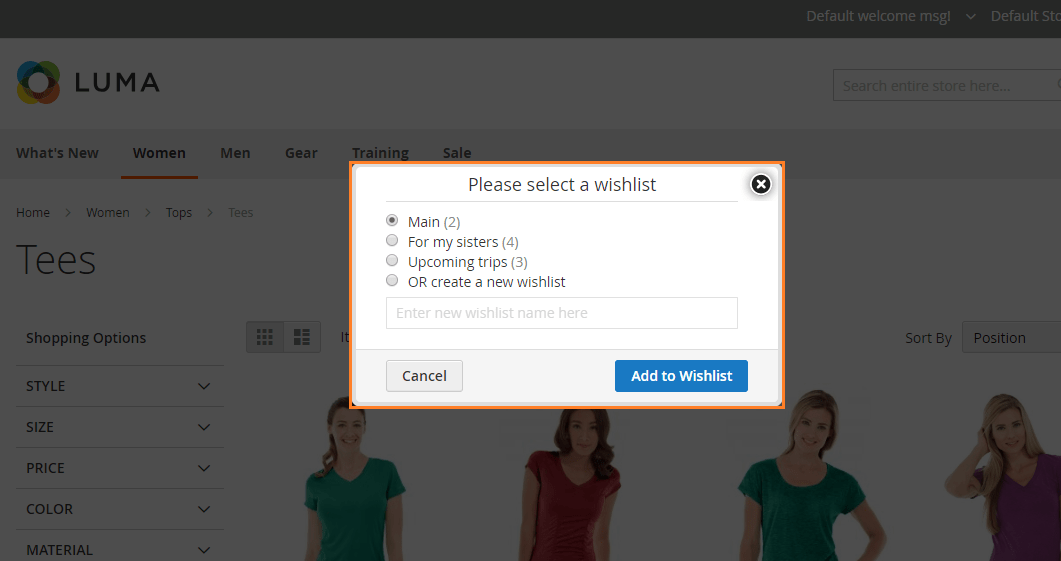
Wishlists give customers opportunity to enjoy the shopping experience by organizing products and planning user's budget before making a purchase. Multiple wishlists help customers create different wishlists for certain events. Are you going on a trip and want to complete the summer outfit or need to buy presents for your family in one store? By default Magento 2 creates one list with favorite products that can mess user's experience up, as all products are collected in one list only. Creating separate lists with favorite products will save customers' time and organize all items for different occasions. The Multiple Wishlists extension for Magento 2 allows to create specific wishlists for different events such as business trip, picnic, birthdays, gym equipment and more. All lists are stored on the customer dashboard. Admin can also manage all lists or create new ones from the customer account in backend. What are the Benefits of Multiple Wishlists?Add products to unique wishlists. Found cool jeans and t-shirts? Going on a picnic, but still don't know what shoes to get? Multiple Wishlists allow to put products into separate customizable wishlists with unique titles and organize necessary information on the customer dashboard. Share wishlists with family and friends. Your customers can easily share wishlists with everyone by email. Thus, users will get quick feedback and help from different people. Manage wishlists from backend. Admin gets the full control over all multiple wishlists that can help to track what products are added to the lists, allowing to copy, move products between wishlists or create new ones. Multiple Wishlists on FrontendAfter the extension was activated, customers can create wishlists and add products via the popup. To add products to wishlists, do the following: 1. Login as a customer, add your favorite product to the wishlist. 2. In the appeared popup choose a list to move your product to, or create a new wishlist by selecting "OR create a new wishlist" and entering a custom title. 3. Then click button "Add to Wishlist". You can read more about how to create a multiple wishlist in Magento 2 in our blog.
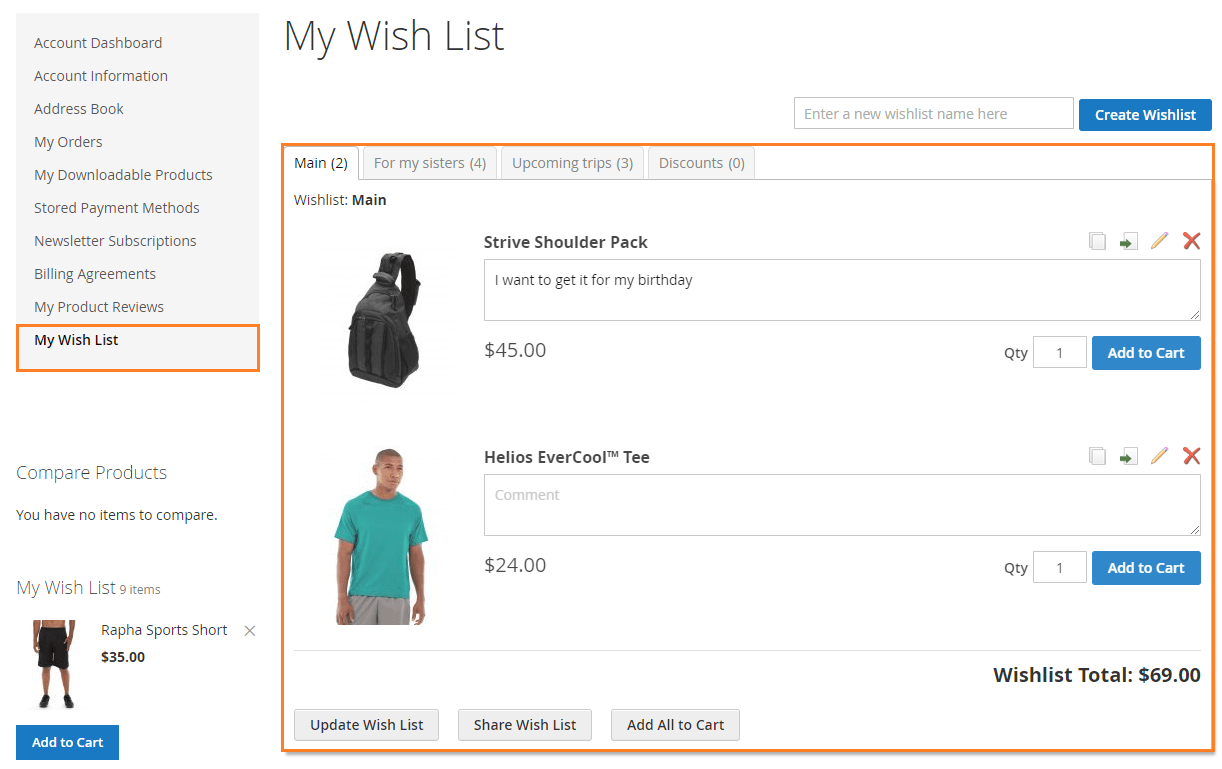
Multiple Wishlists on the Customer DashboardOnce your customer has added products to the wishlist the separate section with all wishlists will appear on the customer dashboard following Account Dashboard > My Wish List. All created wishlists are organized in tabs, which are completely customizable and have unique titles. Customers can create a wishlist on the frontend and customer dashboard. To create a wishlist on the dashboard, do the following: 1. Enter a unique name for your list, for example "Presents for my mom's birthday". 2. Click button "Create Wishlist". The newly created tab will be empty allowing customers to choose products from catalog and product pages. The extension also allows to rename, remove wishlists, add comments to each product in the list. Do you want to see the final calculation of all product per one wishlist? The extension enables the detailed calculation below each list summarizing how much customers will spend. Customers can also manage products between wishlists, for example, copying, moving to other lists, removing or update product attributes or quantity. Do you want to show the chosen options and attributes per product in the wishlist? Just hover over the "See Details" text below the necessary product and all data will be shown in the popup. All products can be moved from each wishlist to the shopping cart in bulk or separately. The extension also allows to leave products in the lists after adding to cart if other settings are not specified.
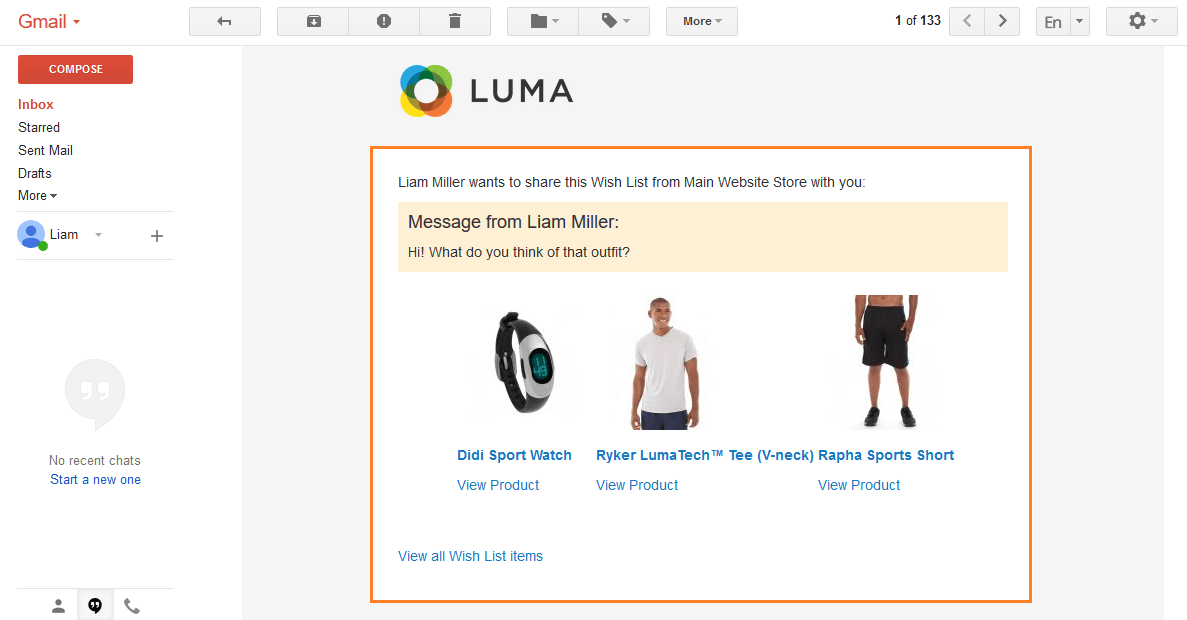
Let your customers share wishlists with third parties by enabling the "Share Wish List" button below each list. Users can enter multiple emails on a separate page as well as leave custom messages. This is how the real email will look like:
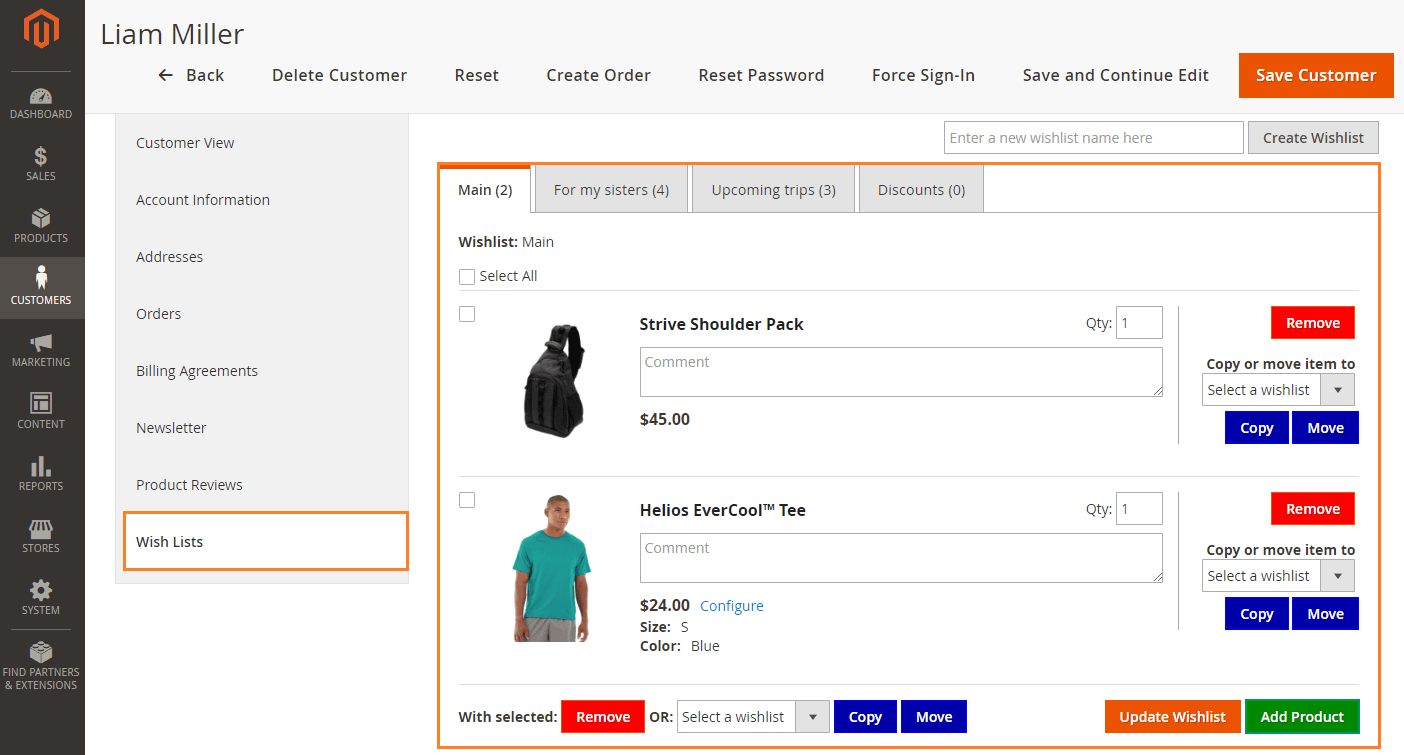
Multiple Wishlists in Admin ConfigurationManaging customers' wishlists from backend will give you opportunity to track what customers' favorite products are or help them organize or add more products to the lists. You will find the section with customers' wishlists following CUSTOMERS > All Customers > select {customer} > CUSTOMER INFORMATION > Wish Lists.
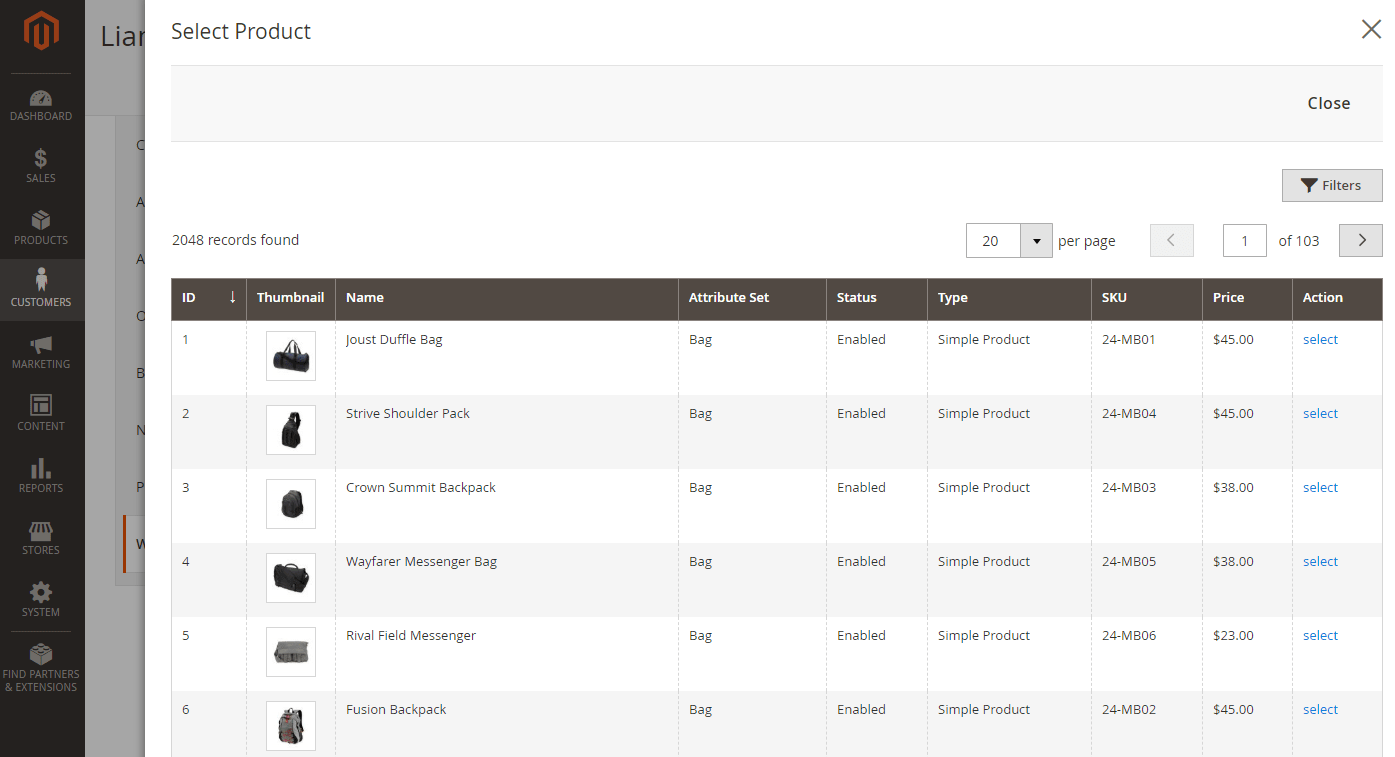
Admin can apply the same actions: copying and moving products between lists, creating, renaming or removing wishlists. What is more you can add products from backend and use the mass action tool to manage multiple products in bulk. To add products to the wishlist, do the following: 1. Click the "Add Product" button in the chosen wishlist. 2. Find a necessary product in the appeared popup. 3. Click the "Select" link.
You can also edit the customer's comment or add your own in the text field. If the customer adds a configurable product to the wishlist you will see the chosen attributes or have the ability to configure them. The mass actions buttons available below each wishlist allow to remove multiple items in bulk or copy and move products between existing lists. To apply the mass action and manage the products between lists, do the following: 1. Mark checkboxes next to necessary products. 2. Select a wishlist to apply the mass action to. 3. Choose one of the following mass actions: remove, copy or move products. |