Username
Password
Remember Me
Log in
Forgot your password?
Forgot your username?
Forgot your username?
|
Magento Help Desk for Magento User Guide
PurposeThis document is a User Guide for Help Desk extension for Magento. It describes how work with the extension. This module is an advanced out-of-box ticket support system with the variety of settings and all expected support features included. System RequirementsThe extension works under Magento from 1.4.x and higher. The extension works with Apache 1.3.x and higher, PHP 5, Linux or IIS. The extension’s correct work is guaranteed with the following browsers:
The correct work with other Magento versions, other browsers and Apache/PHP versions is not guaranteed. InstallationAll our Magento extensions and templates are installed via IToris Installer.
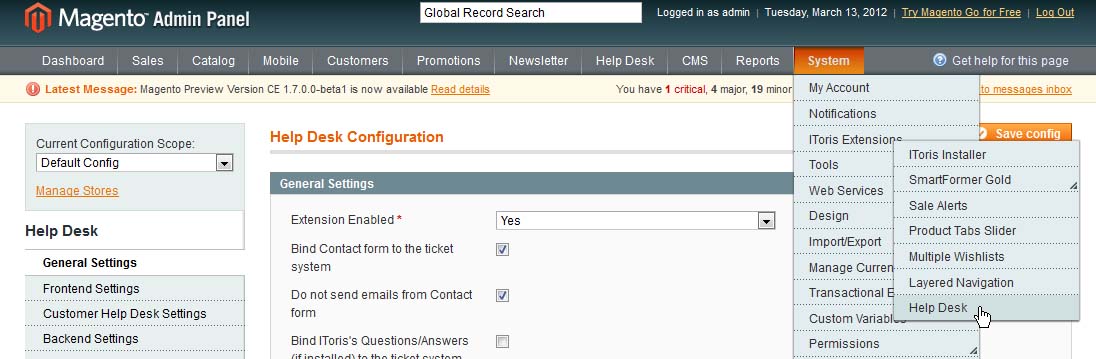
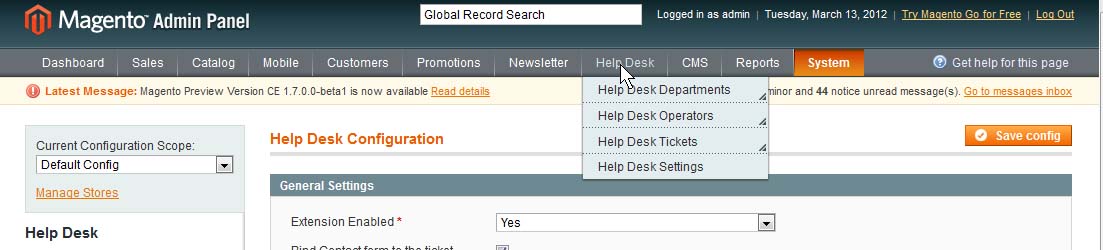
You will see a new menu after the installation - Help Desk. There will be ability to manage departments, operators, tickets and general settings there.
LicenseHelp Desk moduleis website-dependent. By ‘website’ here we understand the website in Magento terms. Under one Magento installation one license key of the extension can activate all stores/storeviews. within one website. If your configuration has several Magento websites - a separate license will be required for each. General Settings
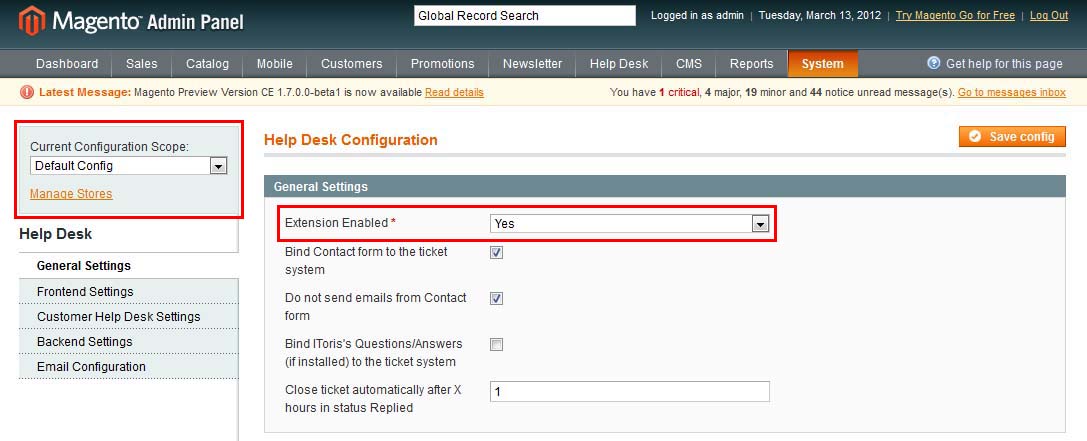
To see general settings select System –>IToris extensions –> Help Desk or Help Desk –>Help Desk Settings Extension Enabled - when yes is selected, the module will be available on the front-end. Current Configuration Scope - if you need Help Desk module to work on some stores only, please enable the extension for these stores, leaving it disabled for the others. On the left there also go the tabs with other Help Desk’ settings and configuration. Languages’ SettingsDifferent languages can be used for different stores in the module. By defaults the module is provided in English. To translate it for stores please open app/locale/en_En in your Magento and find Itoris_HelpDesk.csv file there. Copy the file to the locale you need and open the copy for editing. The file will contain each phrase twice. Translate the second part of each phrase and save the changes. Support Form
There are 3 places to settle support form. You can select one place, two places or all three places together:
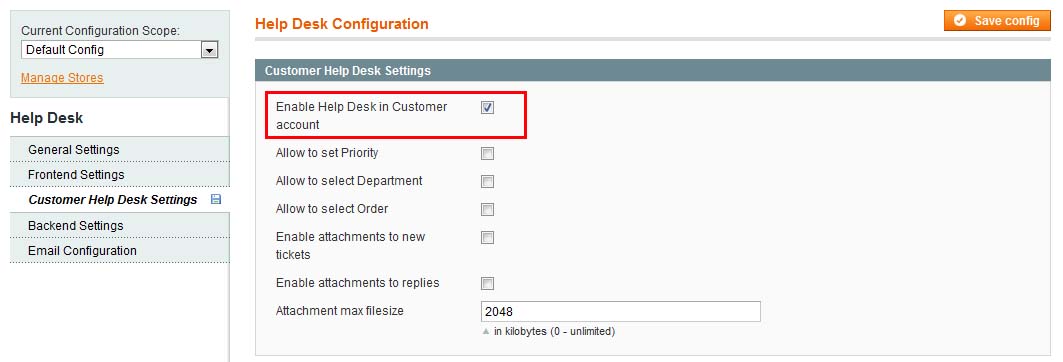
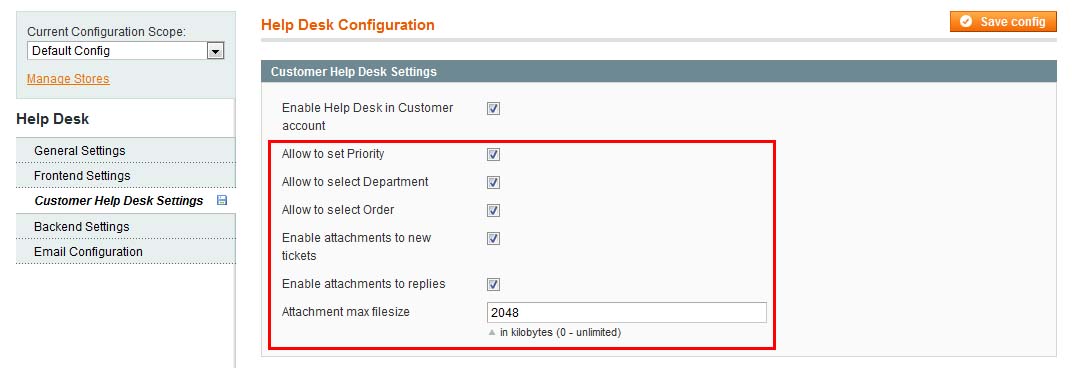
Support Form in Customers’ DashboardSupport form can be added to customers’ account area. The form will be added there together with the rest of support functionality - History of replies, ability to view old tickets, etc. To do it please select Help Desk –>Help Desk Settings . Then from the left tabs select Customer Help Desk Settings
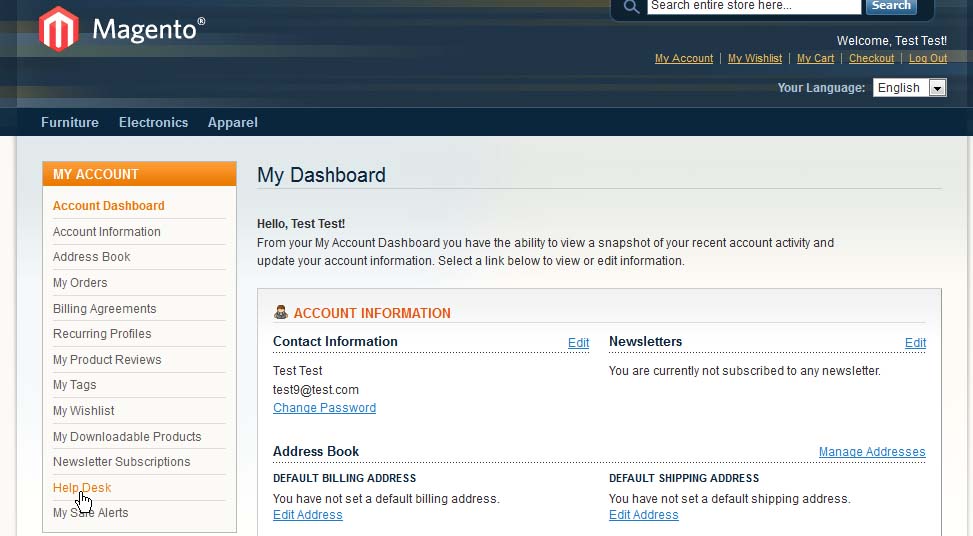
Check Enable Help Desk in Customer account checkbox. This will create a new tab in customers’ accounts - Help Desk - where support form and support history will be available:
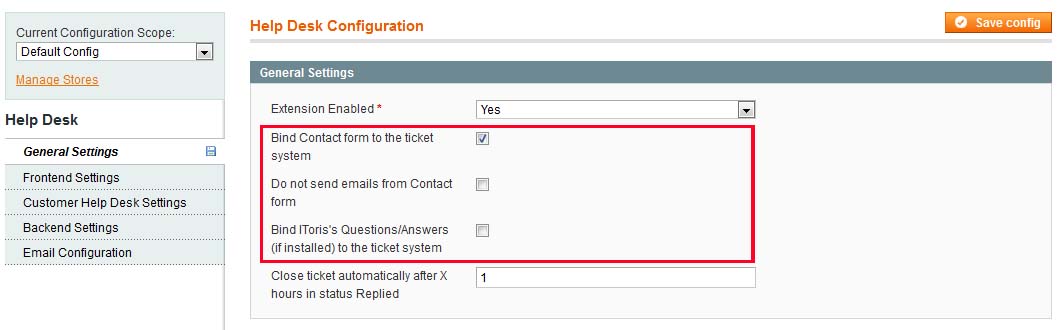
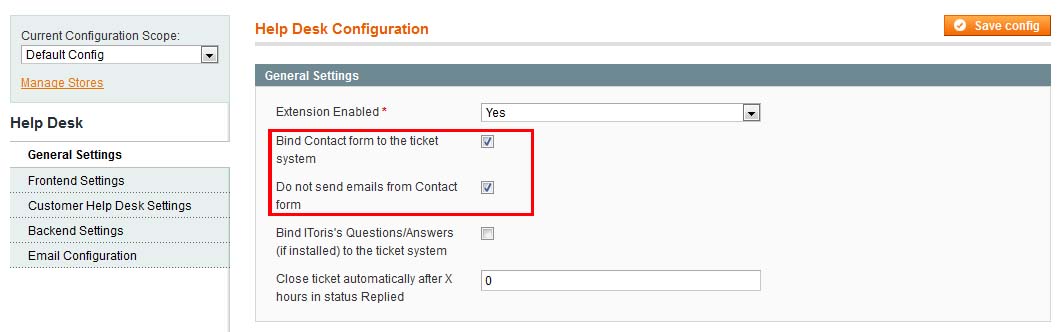
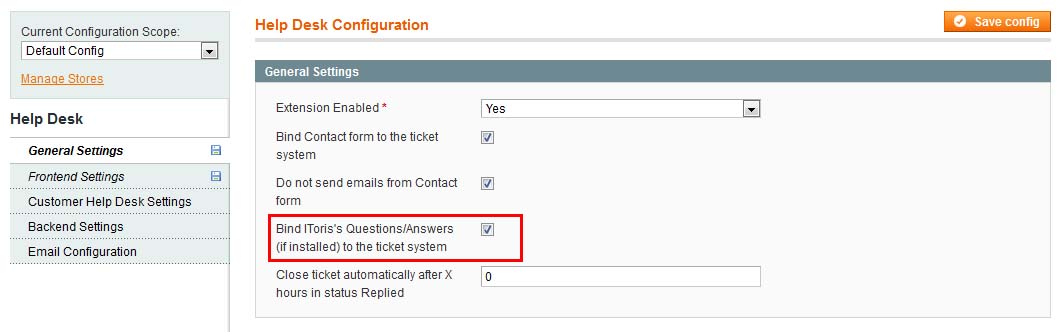
Support FormContact Form as Support FormYou can make default Magento Contact Us form as support form. To do it select Help Desk –>Help Desk Settings . Then from the left tabs select General Settings. Check Bind Contact form to the ticket system checkbox. Contact Us form has its own emails. It is recommended to switch them off, so that as now contact form works as support form, only support emails are sent and no duplicates are created. To switch off standard contact emails check Do not send emails from Contact form checkbox.
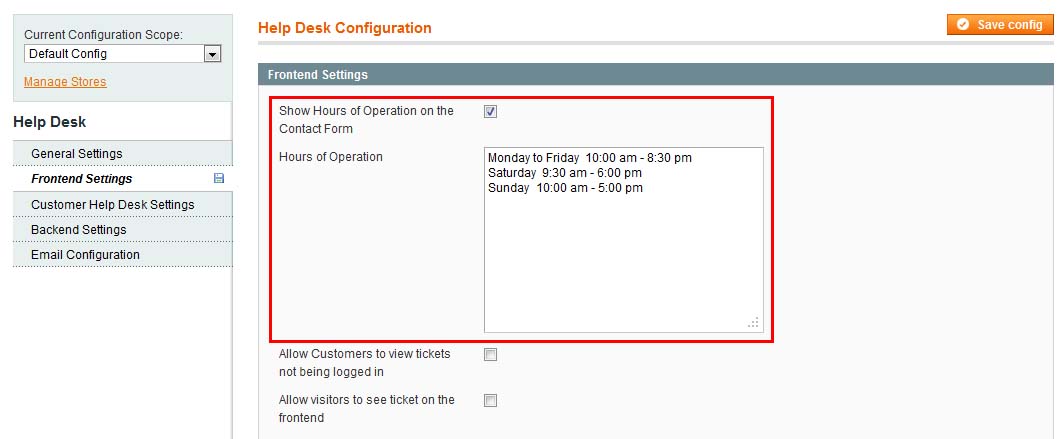
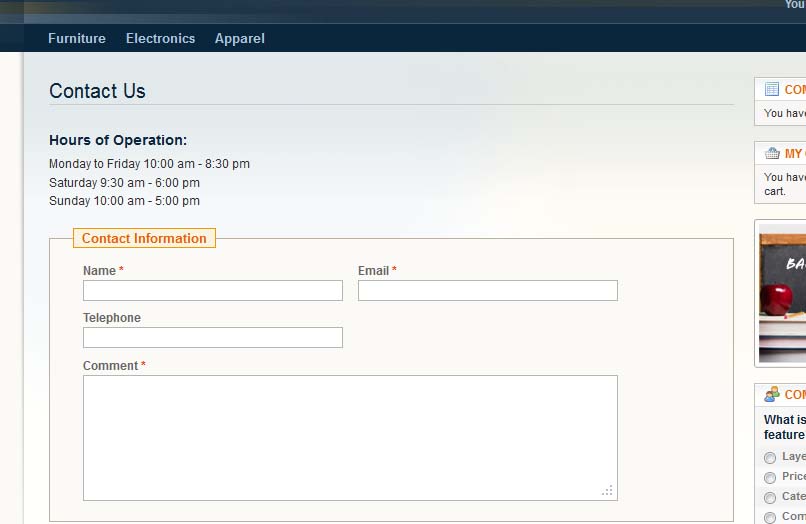
There is ability to add hours of operation over contact form. Do to it select Help Desk –>Help Desk Settings . Then from the left tabs select Frontend Settings. Check Show Hours of Operation on the Contact Form checkbox and enter the hours of operation in the area below:
Your customers then will see contact form this way:
When they submit their data in this form - new tickets will be created in Help Desk. Questions and Answers on Product Pages as Support FormsIToris provides a module for Magento Questions&Answers. This module creates a new area on products’ pages where there questions and answers on the product are provided. Customers can see them, ask new questions and receive replies from other customers and/or administrators. PLease see Q&A module's official page for more details. Questions&Answers can be combined with Help Desk so that when customers ask new questions about products, these questions are handled out as support requests. To make Q&A form work as support from please select Help Desk –>Help Desk Settings . Then from the left tabs select General Settings. Check Bind IToris's Questions/Answers (if installed) to the ticket system checkbox.
Customers’ SettingsHelp Desk in Customers’ AccountsThere are several settings to manage the customers’ access and use of Help Desk. To provide customers with ability to see the history, have access to previous replies and old tickets, please add Help Desk functionality to the customers’ accounts. To do it please select Help Desk –>Help Desk Settings . Then from the left tabs select Customer Help Desk Settings and check Enable Help Desk in Customer account checkbox. You have perhaps done this already if you have bound support form to customers’ account. Options when Support Tickets are CreatedWhen new tickets are submitted there are several settings to be switched on/off depending on your support style.
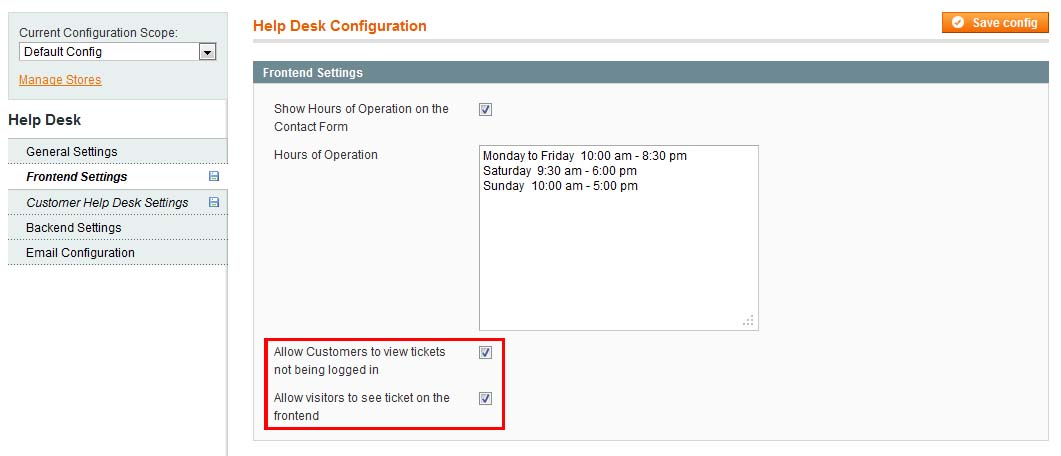
Access Settings (Visitors/Customers)There is ability to set if both visitors and customers will have access to Help Desk - or account is required to use the functionality. To manage these settings please select Help Desk –>Help Desk Settings . Then from the left tabs select Frontend Settings
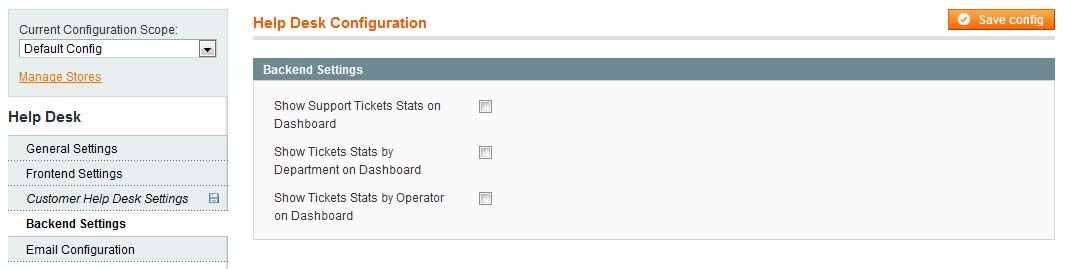
Allow Customers to view tickets not being logged in - once a reply has been posted by an operator, the customer will receive email notification (please select this in Email Configuration). There is ability to insert hash URL in this email - customers will click it and see the reply. If this setting is selected, then customers will see this reply without logging in. If this setting is not selected, then customers should login to see the reply Allow visitors to see ticket on the frontend - there is ability to support visitors (that have no account on your website at all). If you select this setting, please make sure you insert text of the reply message in emails sent to visitors (in Email Configuration). Statistics in Dashboard (back-end)To open these settings please select System -> IToris Extensions -> Help Desk or Help Desk –>Help Desk Settings Then select Backend Settings tab on the left.
These settings deal with statistics to be displayed in admin area. There are several statistics blocks, some or all of them can be displayed. Show Support Tickets Stats on Dashboard - there will be a box displaying how many tickets there have been totally, how many of them need reply, are closed, are replied, etc. Show Tickets Stats by Department on Dashboard - one more box where statistics will be divided by departments Show Tickets Stats by Operator on Dashboard- one more box where statistics will be divided by operators To add statistics to the dashboard please activate the settings as make some alterations in the dashboard’s file <?php echo $this->getChildHtml('helpdesk_stats') ?>
There are 5 places where this line can be inserted; this will change the location of the statistics on the dashboard. These places are marked in the code below. Please select one out of 5: <div class="dashboard-container">
<?php echo $this->getChildHtml('store_switcher') ?>
<table cellspacing="25" width="100%">
<tr>
<td>
<!-- add the line here -->
<?php echo $this->getChildHtml('sales') ?>
<!-- or here -->
<div class="entry-edit">
<div class="entry-edit-head"><h4><?php echo $this->__('Last 5 Orders') ?></h4></div>
<fieldset class="np"><?php echo $this->getChildHtml('lastOrders'); ?></fieldset>
</div>
<!-- or here -->
<div class="entry-edit">
<div class="entry-edit-head"><h4><?php echo $this->__('Last 5 Search Terms') ?></h4></div>
<fieldset class="np"><?php echo $this->getChildHtml('lastSearches'); ?></fieldset>
</div">
<!-- or here -->
<div class="entry-edit">
<div class="entry-edit-head"><h4><?php echo $this->__('Top 5 Search Terms') ?></h4></div>
<fieldset class="np"><?php echo $this->getChildHtml('topSearches'); ?></fieldset>
</div >
<!-- or here -->
<td>
...
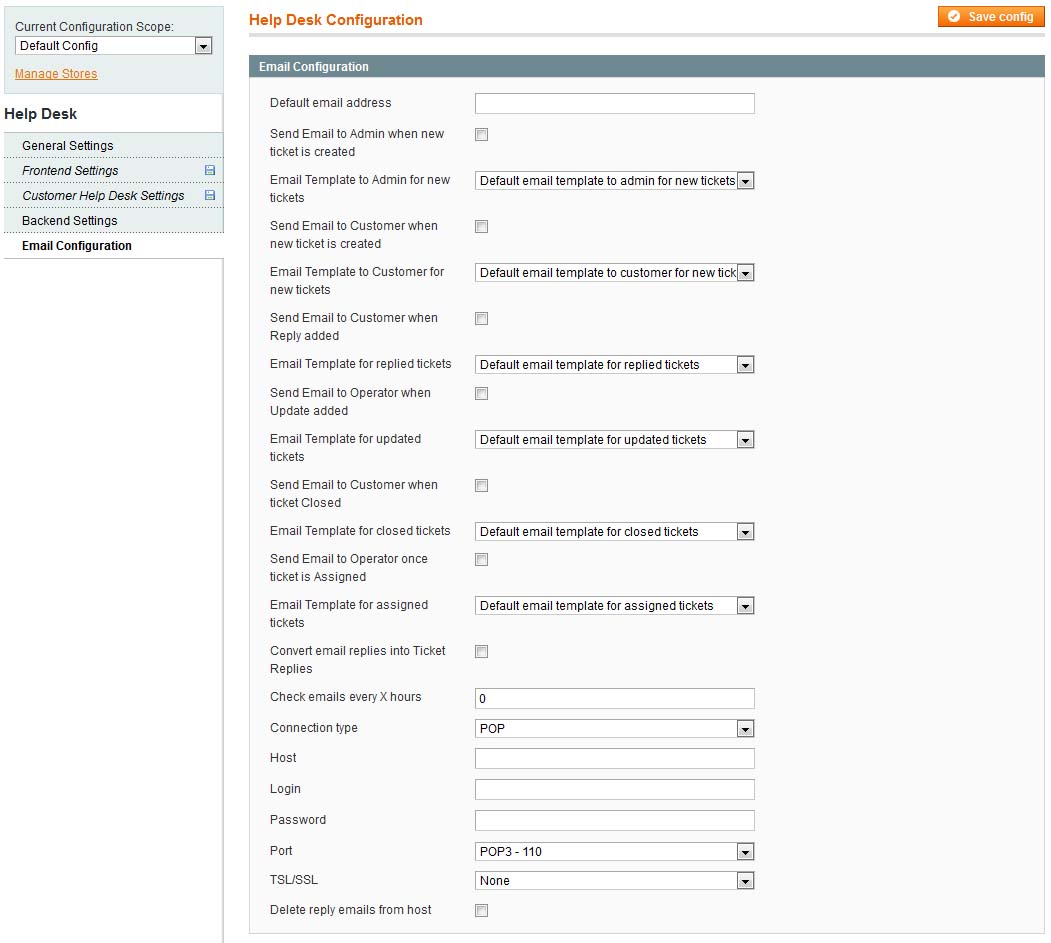
Emails’ SettingsHelp Desk allows using standard Magento email templates’ functionality for support emails. You can create new email templates and bind them to Help Desk functionality. Default email templates are created already, you can use them as they go, or change, or use any new ones. To manage emails’ settings please select Help Desk –>Help Desk Settings . Then select Email Configuration tab on the left.
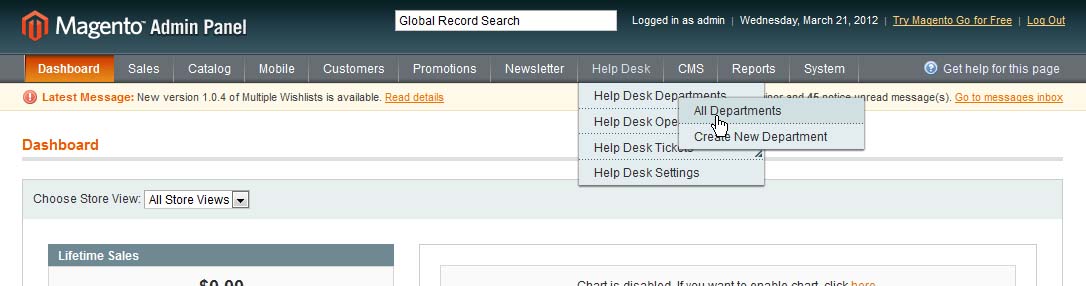
Default email address is the address from which your customers will receive all email notifications. Send Email to ... when … - check the checkboxes for the cases when you want emails to be sent - to administrator, to operators, to customers. Email Template … - these drop downs are for selecting the email templates to be used when emails are generated. There are pre-set email templates created already, they can be edited or new ones can be created and assigned. Convert email replies into Ticket Replies - this setting allows customers to reply via emails. Received replies will be parched and converted into ticket replies. Check emails every X hours - native Magento cron will be used to check the received emails with the frequency set. The low block of settings manages the connection to the mail server. Please select/set them according to the server’s settings. After the initial preferences have been selected, now support structure can be organized. DepartmentsThere is ability to create as many departments as needed. Each department will be responsible for their part of support. You can also allow customers to select a department when a new ticket is submitted. Departments should have at least one operator assigned to it, there can be several operators. Departments’ ListTo see the list of departments select Help Desk -> Help Desk Departments -> All Departments
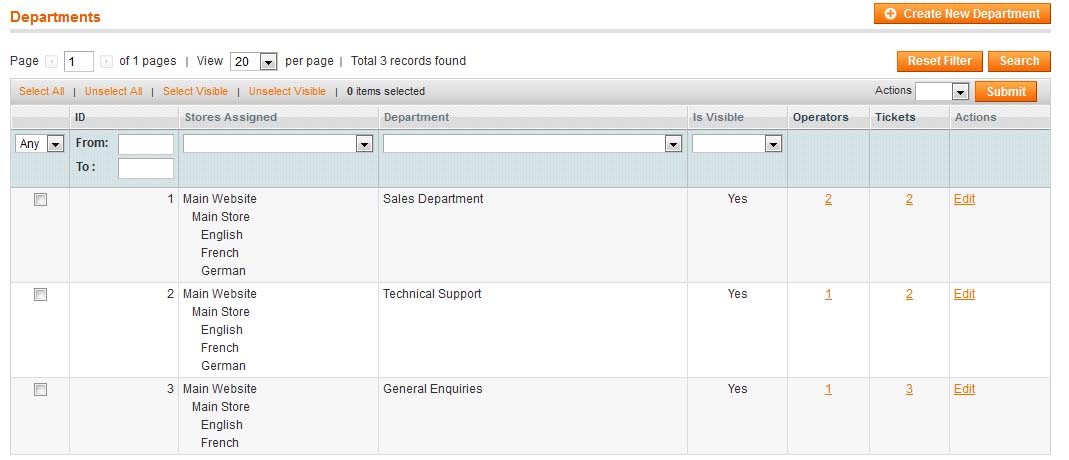
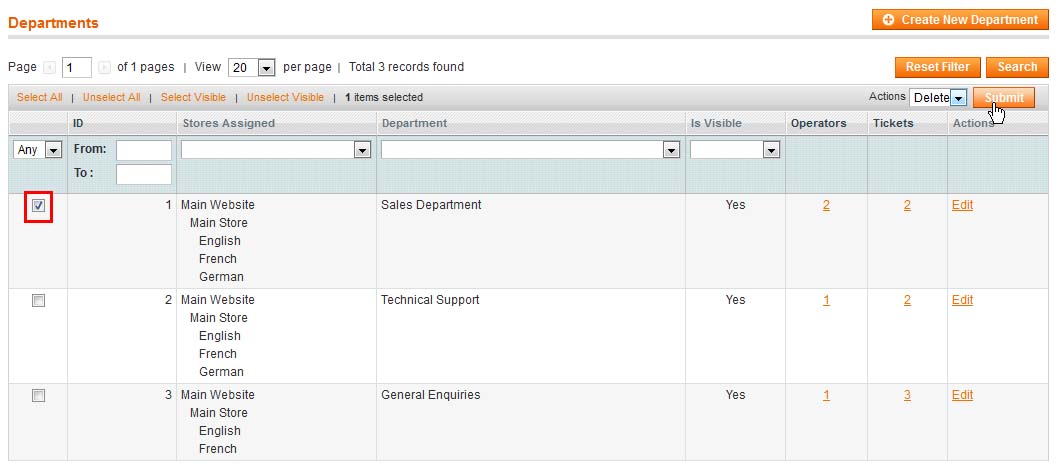
You will see all departments existing and their basic information.
There will be departments’ names, which stores they are assigned to, number of operators in each department, number of assigned tickets, etc. All standard Magento filters are available on the page, so when a list is large there is sorting and search available. Create a New DepartmentTo create a new department select Help Desk -> Help Desk Departments -> Create New Department or press Create New Department button from the list of departments.
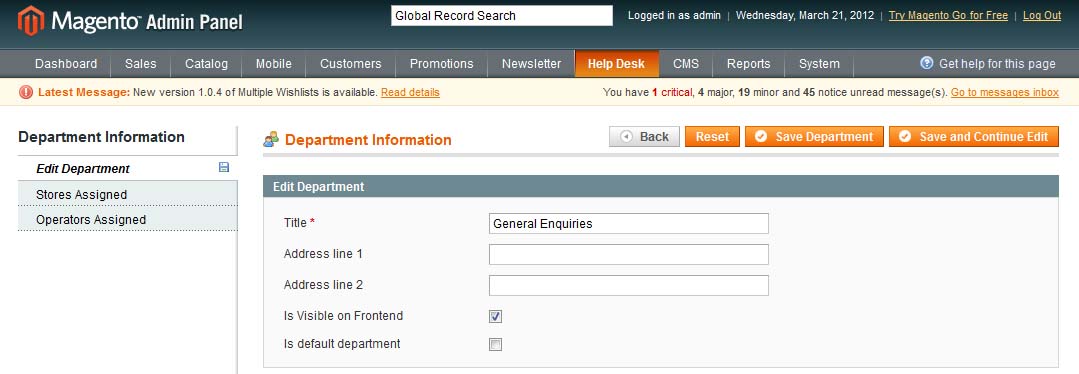
Enter the department’s title and select if it should be visible on the front-end and should be default. There is also ability to enter the department’s address if required. Two additional settings’ tabs allow to assign the department to stores and assign operators to the department.
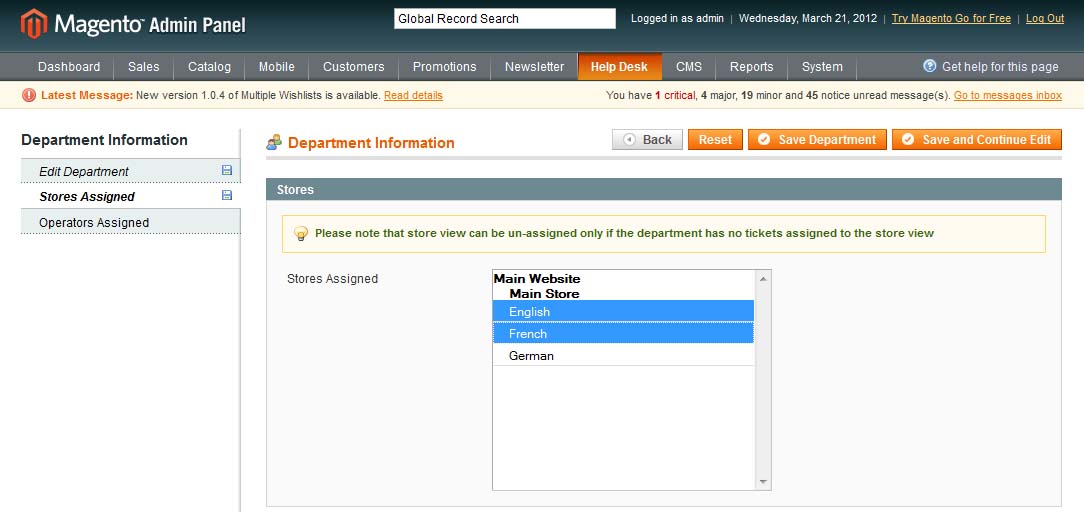
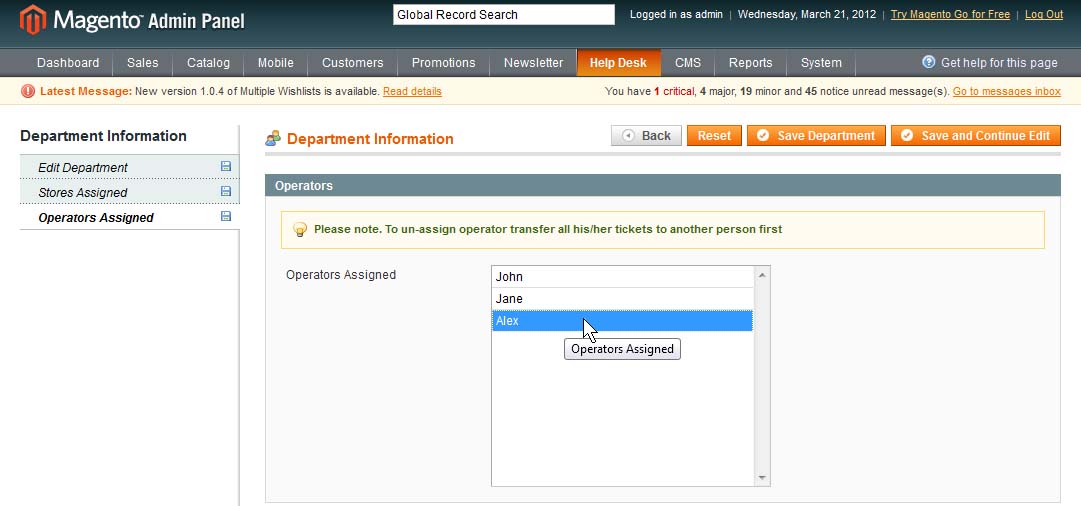
Only selected or all stores can be bound with the department. If the list of operators has been created already, there is ability to connect operators to the department. Otherwise this can be done later on. When Operators Assigned tab is selected, all available operators will be displayed. You can select all or some of them.
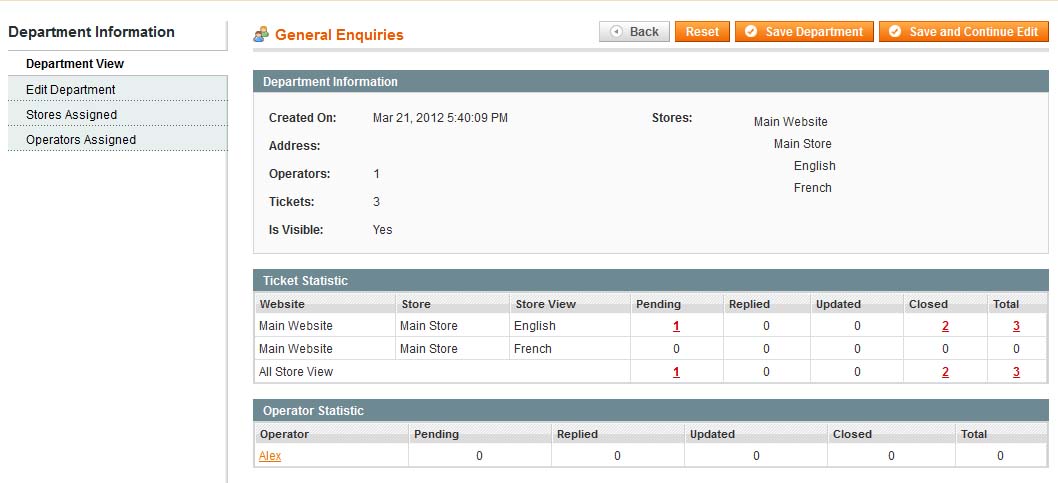
Save the changes and the department is ready. Create all other departments you need the same way. DepartmentsEdit DepartmentsWhen you open up a department for editing, you will see the same as when a new department is created plus one more new tab - Department View:
Delete DepartmentsTo delete a department please un-assign all operators and tickets from it first. Then check it in the list of departments, select Actions=delete and press Submit button.
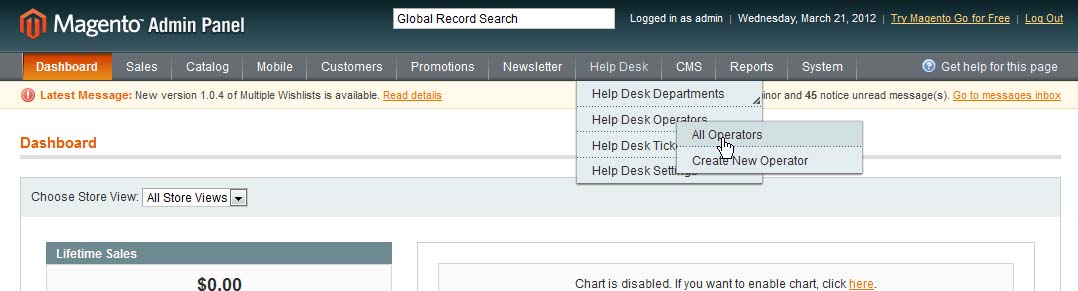
OperatorsOperators are administrators that are bound to a selected department or several departments. Operators can reply submitted tickets, manage them. They will have access to the tickets from their departments; can assign new tickets to themselves or other operators from their department. They will receive email notifications on replies and updates. All operators can potentially view any tickets as well as reply on them and assign them, as operators have administrative permissions. Ability to organize support by departments, operators and tickets is provided for convenient management, so that no support requests are lost. With a good-structured support department the notifications will be received by the operators you need, tickets will be sorted out by departments and statistics will show what needs to be handled out. Operators’ ListTo see the list of all existing operators please select Help Desk -> Help Desk Operators -> All Operators
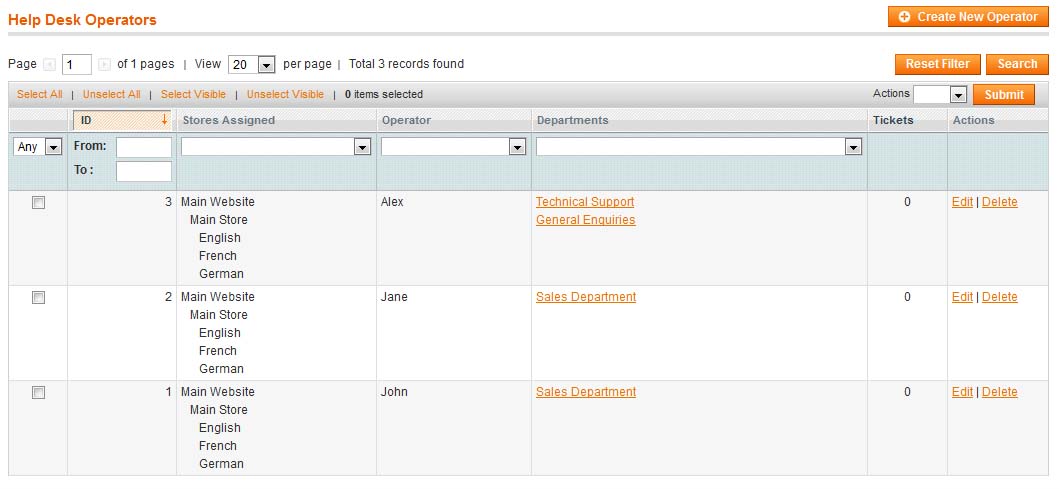
You will see all operators as well as general information about them - to which department(s) they are connected, how many tickets are assigned to them directly, etc.
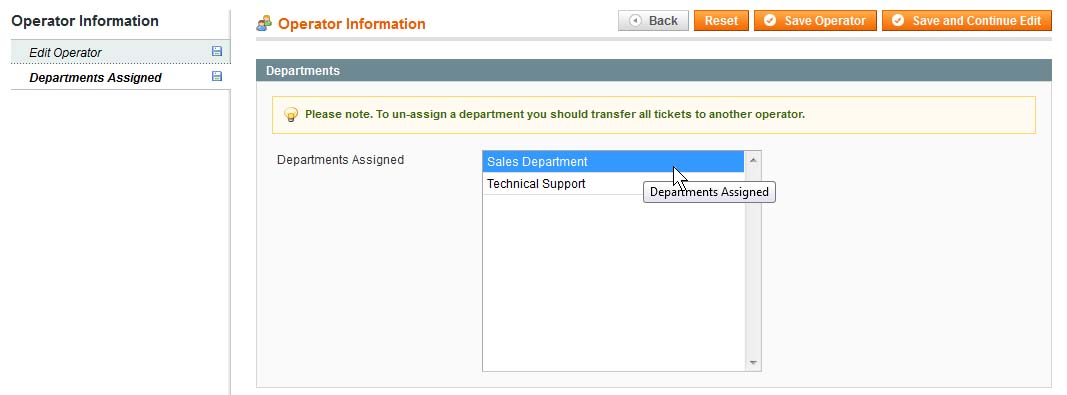
Create a New OperatorTo create a new operator please make sure first that the admin profile for this operator has been created already. Select Help Desk -> Help Desk Operators -> Create New Operator or press Create New Operator button from the list of operators.
Enter a title to be used to identify the operator and select the admin’s profile. Then switch to Department Assigned tab and assign the department(s) to the operator. N.B. - this can be done in operators’ profiles as well as in departments’ details. Select all departments where this person will work as an operator:
Save the operator’s details to apply the changes. OperatorsOperators are administrators that are bound to a selected department or several departments. Operators can reply submitted tickets, manage them. They will have access to the tickets from their departments; can assign new tickets to themselves or other operators from their department. They will receive email notifications on replies and updates. All operators can potentially view any tickets as well as reply on them and assign them, as operators have administrative permissions. Ability to organize support by departments, operators and tickets is provided for convenient management, so that no support requests are lost. With a good-structured support department the notifications will be received by the operators you need, tickets will be sorted out by departments and statistics will show what needs to be handled out. Operators’ ListTo see the list of all existing operators please select Help Desk -> Help Desk Operators -> All Operators
You will see all operators as well as general information about them - to which department(s) they are connected, how many tickets are assigned to them directly, etc.
Create a New OperatorTo create a new operator please make sure first that the admin profile for this operator has been created already. Select Help Desk -> Help Desk Operators -> Create New Operator or press Create New Operator button from the list of operators.
Enter a title to be used to identify the operator and select the admin’s profile. Then switch to Department Assigned tab and assign the department(s) to the operator. N.B. - this can be done in operators’ profiles as well as in departments’ details. Select all departments where this person will work as an operator:
Save the operator’s details to apply the changes. TicketsTickets are support requests submitted by your customers from any support form you have set. Initially they can be not assigned to any department. If you allow your customers to select a department when they submit tickets, then tickets will be assigned to the department. There is a ‘main’ administrator, whose email will be added in the settings. The administrator will receive all notifications and will assign tickets to departments and/or operators. Though any other operator can assign/un-assign tickets as well. Tickets have several statuses for easy management:
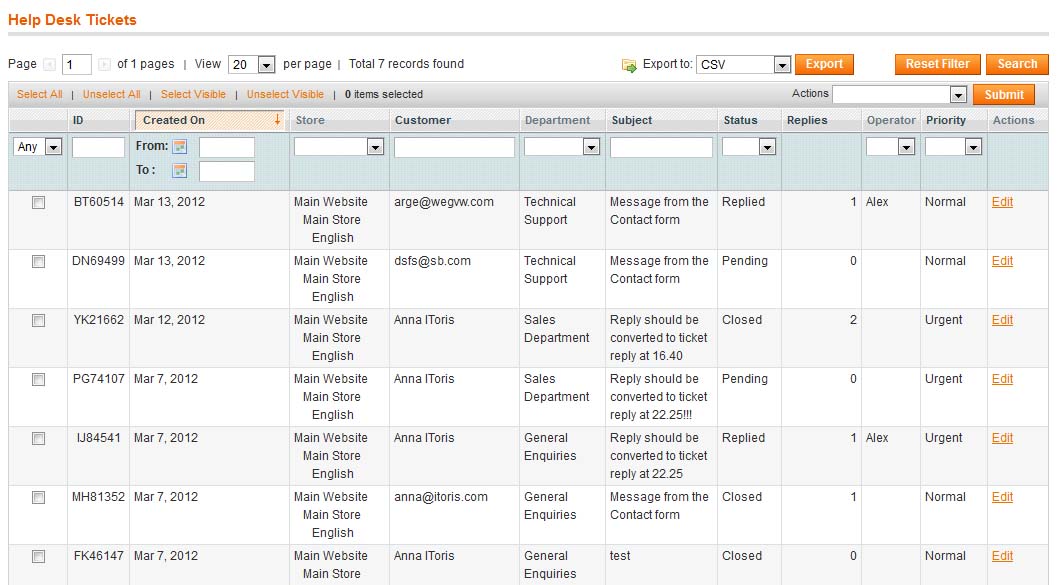
Tickets’ ListsThere is ability to view full list of tickets together or selected tickets only. To view all tickets together, select Help Desk -> Help Desk Tickets -> All Tickets
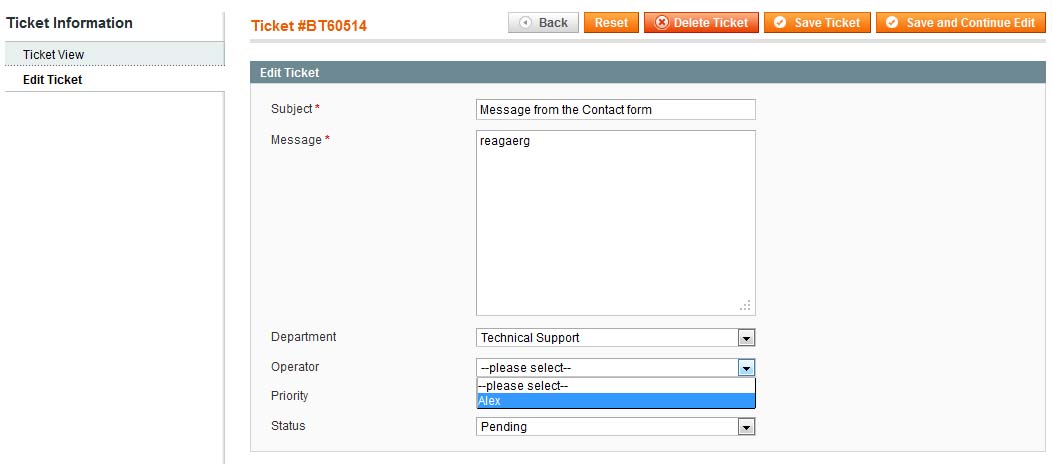
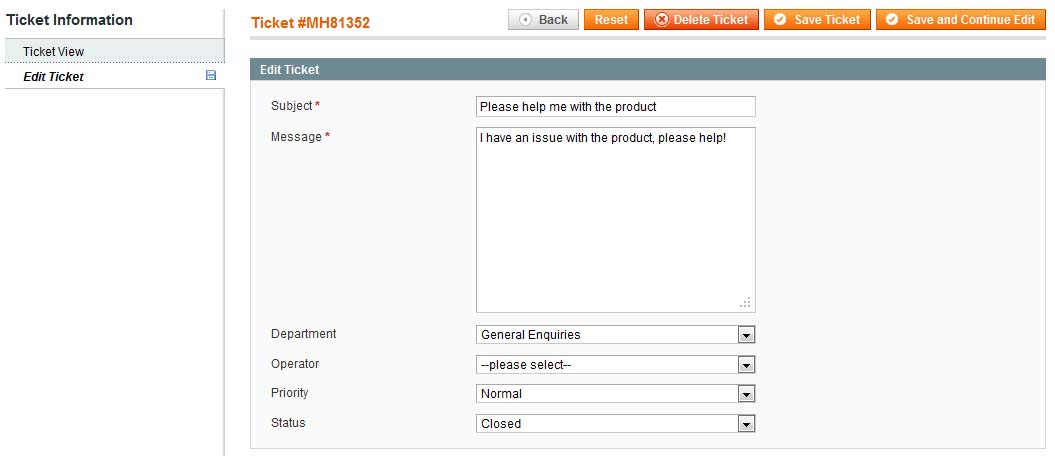
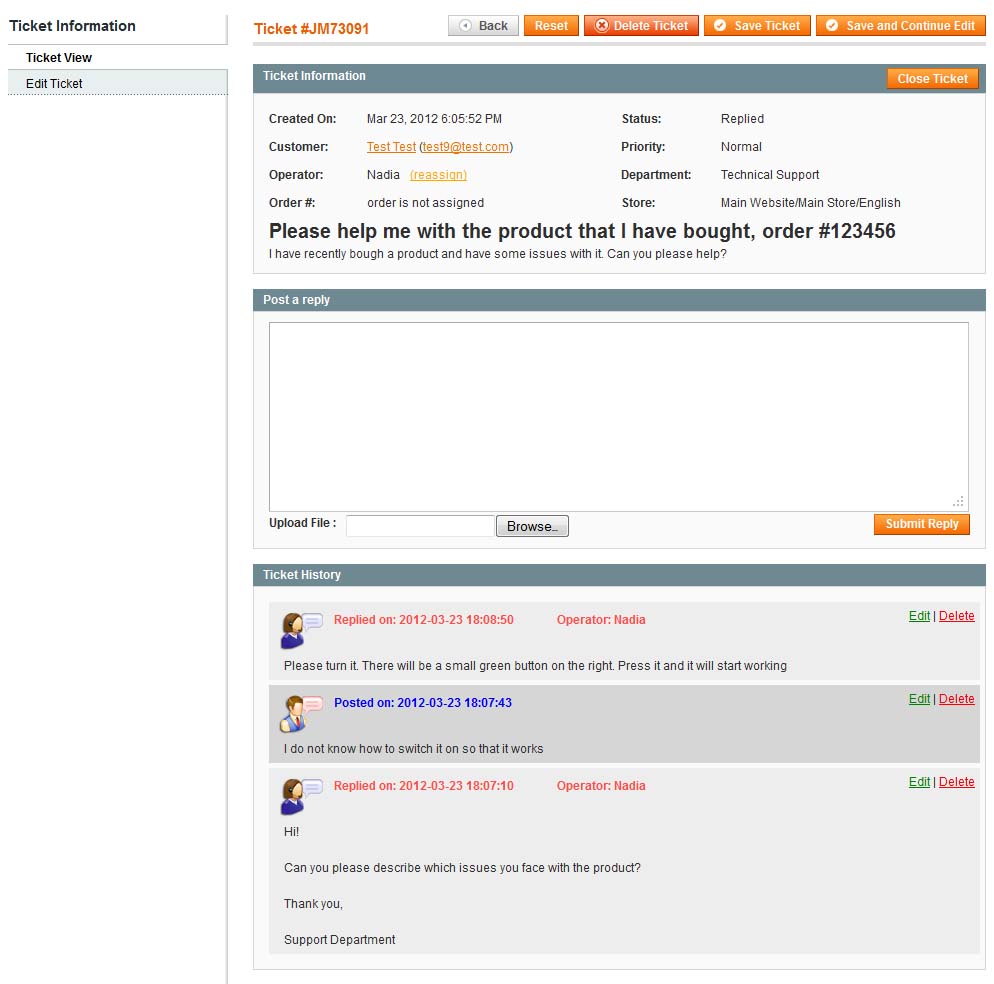
Full list of tickets will be displayed, with the departments/operators they are assigned to, their status, number of replies, etc. There are standard Magento sorting filters and search available. Administrators can open up any ticket to manage it or assign to operators/departments. Apart from the full list there is ability to view only the tickets that need replies. To open this list select Help Desk -> Help Desk Tickets -> Tickets Requiring Reply This list will display the tickets with pending and updated statuses only. Each operator is able to view the list with the tickets assigned to them only. To do it operator selects Help Desk -> Help Desk Tickets -> My Tickets TicketsAssign Tickets to Departments and OperatorsTickets can be assigned one by one, bulk assignment is also available. Once tickets have been assigned to an operator, they will receive email notifications in case you have selected this in the settings. To assign one ticket open it up for editing and select Edit Ticket tab
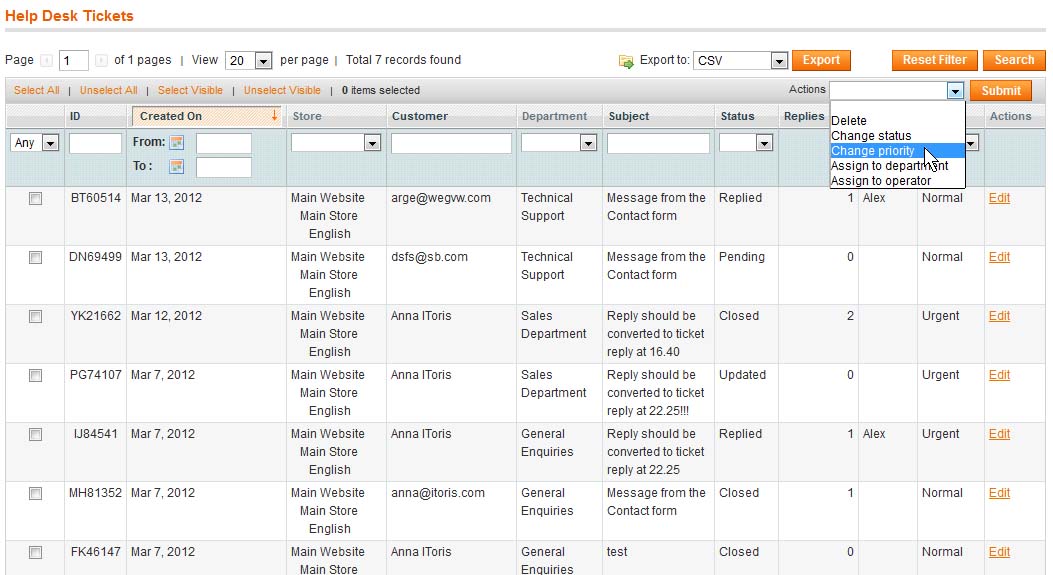
Here you can assign department or re-assign it if needed, assign one of the operators from the selected department. You can also edit the message and the subject if needed. To make bulk assignment open the list of tickets. Check the tickets to be assigned. Then select actions = Assign to Department and select the department. Press Submit button.
The same way tickets can be assigned to operators - check the tickets to be assigned. Then select actions = Assign to Operator and select the operator. Press Submit button. TicketsManage TicketsAdministrators, including operators, can apply any changes to the tickets - edit them, assign/un-assign them, change statuses manually, etc. Some actions are available only when a ticket has been opened up for editing, while others can be applied in bulk. When a ticket has been opened for editing, the following changes are available:
To apply bulk management open the list of tickets and check the ones you want to change. The following actions are available:
Reply Tickets. Tickets’ HistoryTo reply a ticket operators open it up. There will be full information about the ticket displayed on the view mode. Ticket Information area displays the date, status, operator assigned, and other information. It also displays the initial request’s subject and body. Below there is Port a Reply area, where operators enter their response. There is ability to upload images there (if this is selected in the settings). Below there is Ticket History section. It displays all communication history within this ticket - all replies of both customer and operator(s). Replies of operators and customers differ in color so that it is easier to percept. All replies within one ticket are collected in one chain. Both assigned operator and customer will receive email notifications when there are new replies available (if this has been selected in the settings).
|