Username
Password
Remember Me
Log in
Forgot your password?
Forgot your username?
Forgot your username?
How to Attach Files to Products in Magento 2 |
| Magento 2 Extensions |
| Written by ITORIS Team, 2018-03-12 |
|
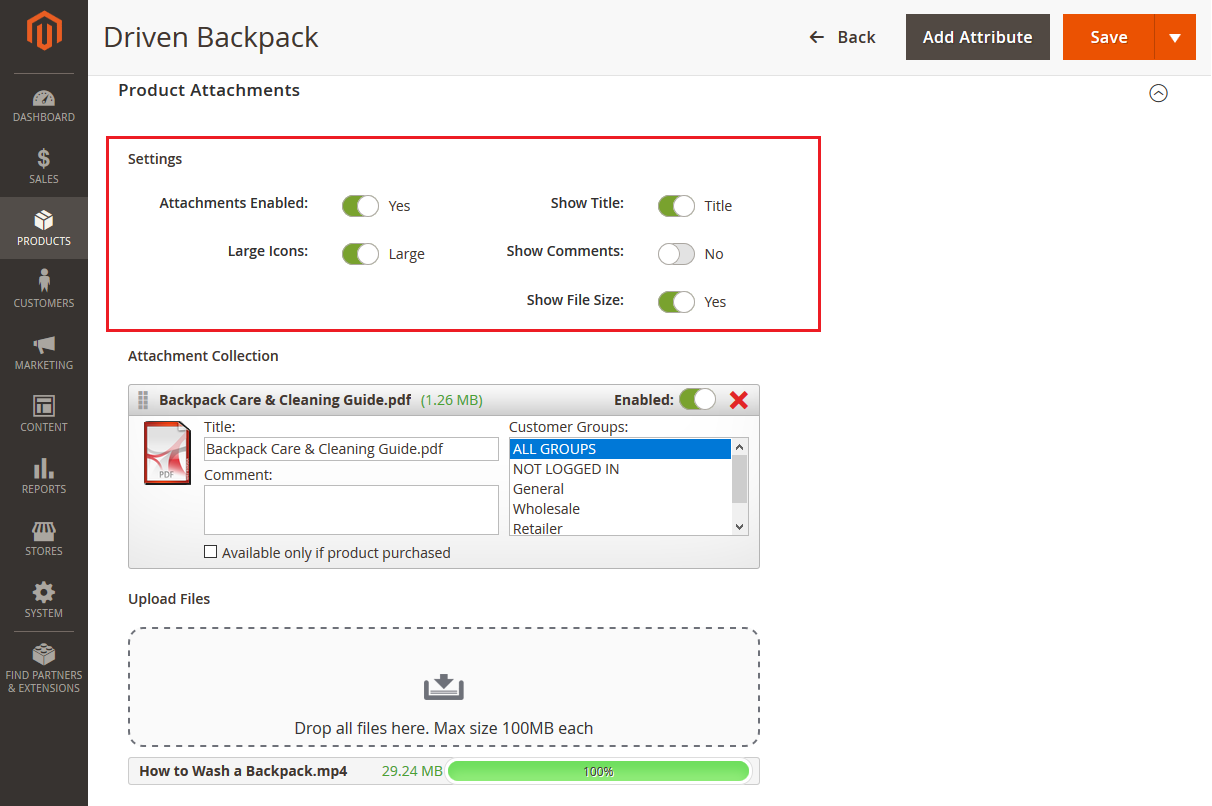
Presenting information about online products via different user guides, video tutorials, spreadsheets, price lists and illustrations will not only increase customers' interests, but give answers to the key questions about products. You no longer need to spend hours submitting standard answers. Place information within files directly on product pages available to all users. The detailed user guides, documents with useful tips and pictures will help customers find necessary information. The Product Attachments extension for Magento 2 is developed to attach files to multiple products in bulk or per product. Do you want to display custom files' icons? The extension allows to upload custom icons or use the system ones. The whole configuration is managed from backend as well. There is no need to upload similar files per product as the built-in repository allows to pick up files and apply them to products in one click. You can also use the mass actions tool allowing to copy necessary files from a chosen product and apply them to multiple products in bulk. It will definitely save tons of your time and help customers get necessary information per product. In this article we will examine different ways of uploading files from backend, its management and access per product. How to Add Attachments to a ProductThe extension includes various file formats and allows to attach files to products individually within the product settings. To add attachments choose PRODUCTS > select a product > Product Attachments. The settings are divided into three main sections configuring the attachments and their visibility. Let's go through each of them. A. Configure the main settings.
B. Upload Files.You can upload an unlimited number of files using one of the three main methods.
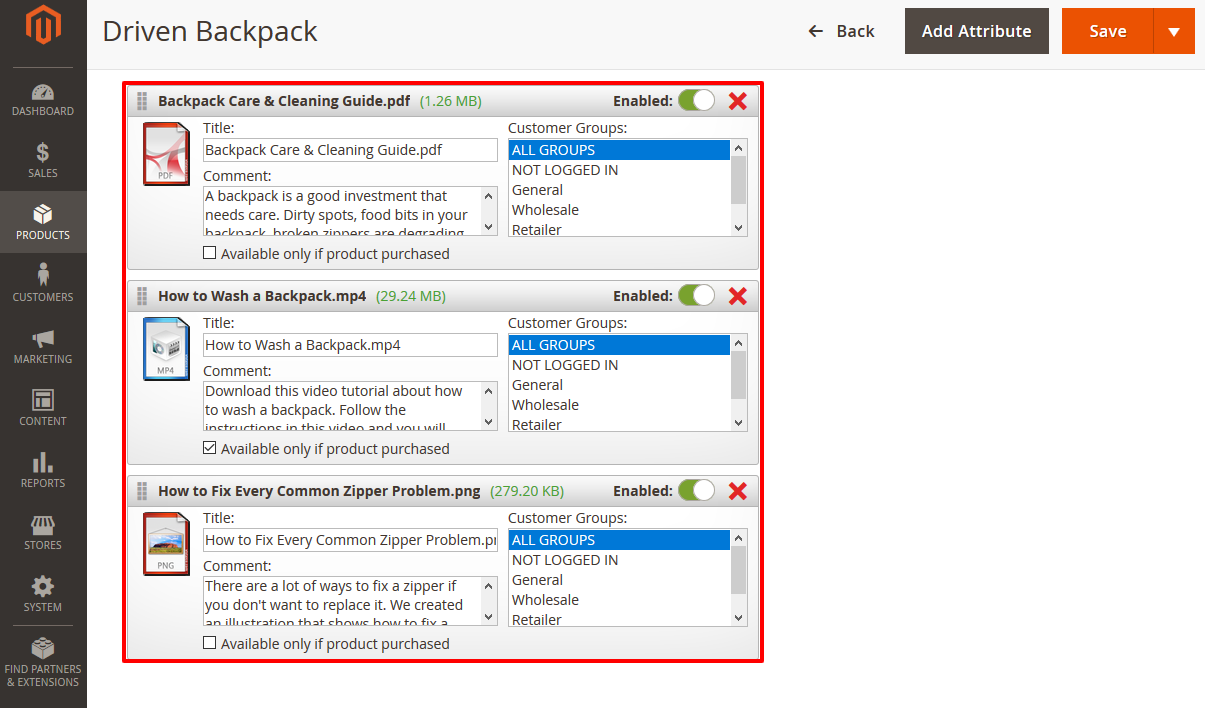
C. Manage the Attachments.The extension provides the separate boxes for each attachment allowing to set the individual configuration.
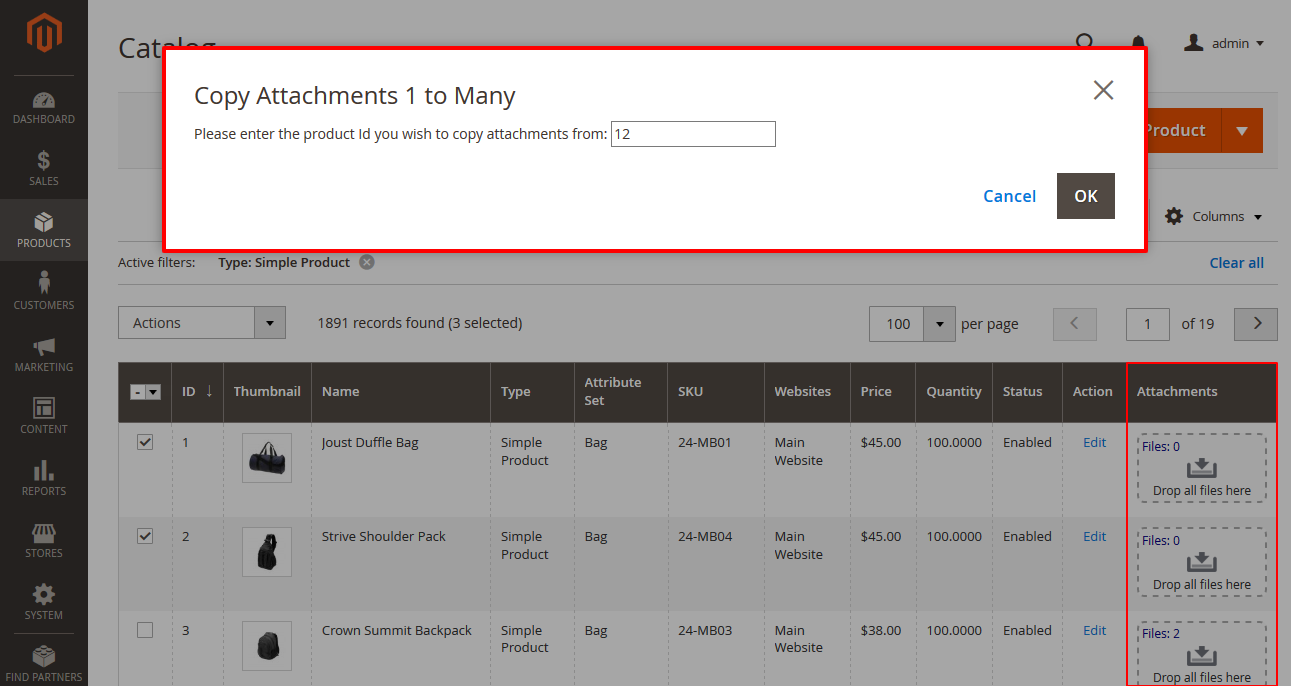
How to Manage Attachments for Multiple ProductsYou can add attachments to multiple products in bulk. For example, all headphones in your store require the same file "Resolving Headphones Problems". You can copy the file from one product and apply it to the chosen products.
After the extension has been enabled the additional column "Attachments" will appear in backend. You can drag and drop files in the column or choose attachments locally using the upload button as well. You can also unbind products from files via the global repository following STORES > Configuration > ITORIS EXTENSIONS > Product Attachments > File Repository. Click the "Unbind" link next to the product. Or click the "Remove" link next to the chosen file to delete the file from your store.
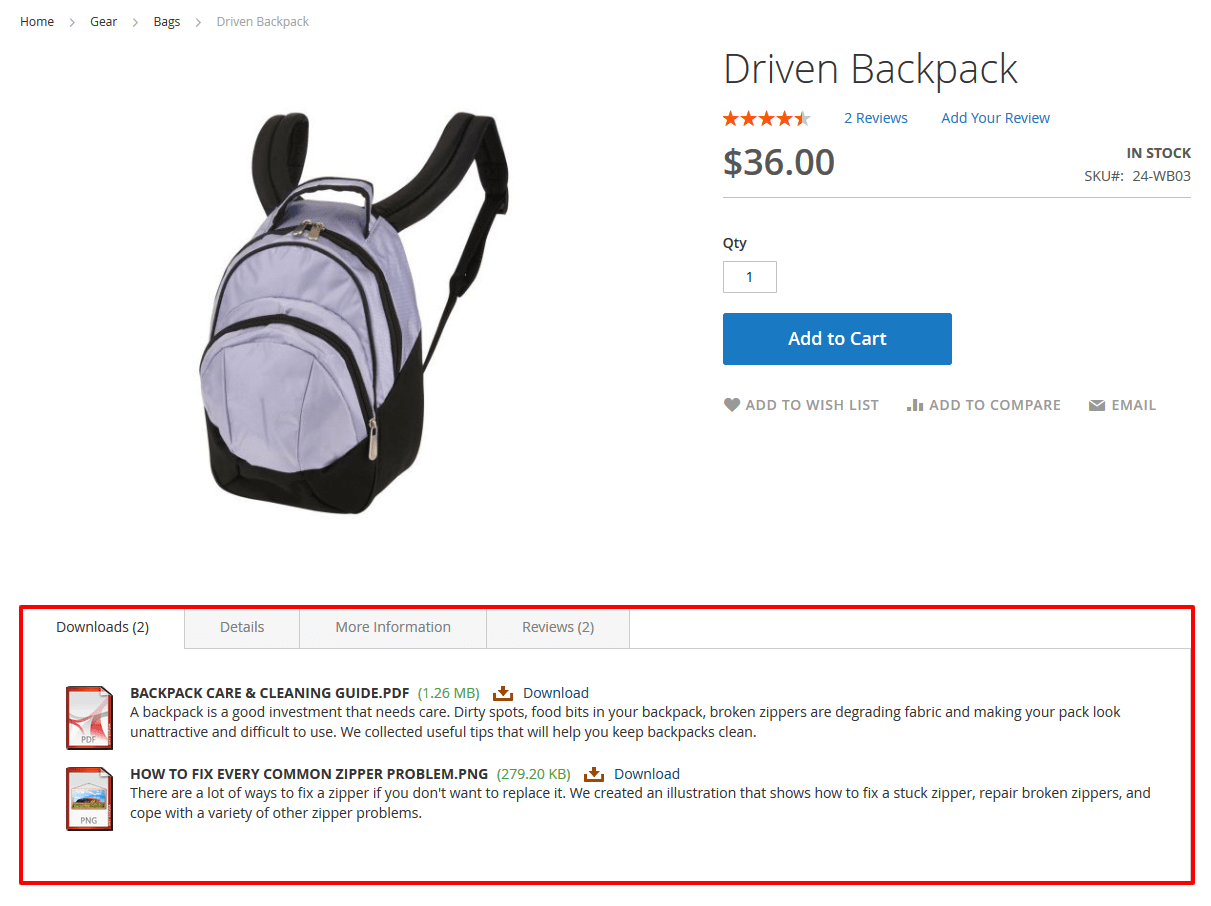
Attachments on Product PagesAfter you attach files to products the "Downloads" tab will be created on Frontend automatically. The number of downloads is displayed on the tab directly. You can change the size of icons, enable or disable its descriptions in backend.
How to Manage Attachments on DashboardIf attachments were marked as "Available only if product purchased" the files will appear in the "My Downloads" section on the Dashboard. After the customer has purchased the product with the hidden file and the order got the "Complete" status the file will be available for the user. You can leave a custom message below the file to inform the customer about the attached file.
|