Purpose
This document is a User Guide for Smart Login extension for Magento. It describes how work with the extension.
It can be so annoying to be redirected to a separate page so that to login or create a new account. Smart Login solves this problem perfectly - with this module your customers will be able to login or register from any page of your store and continue their work from there.
Yet if you want to set a redirect after login/registration - there are plenty of options available as well.
Smart Login extension extension creates good-looking modal windows for login and registration forms, so that your customers can login or even register while staying on the same page or being redirected where you want.
Installation
All our Magento extensions and templates are installed via IToris Installer.
Download IToris Installer and un-pack to the root of your website. It will then appear in menu System –>IToris extensions –> IToris Installer.
Open it and you will see all our Magento Extensions and Templates, both installed and available. You can install, update and un-install them with one click now.
Find Smart Login in the list of extensions and press Install button. It will ask for the license key that you will receive after the purchase. Enter the key and submit. The extension will be installed. It will be available in menu System –>IToris extensions –> Smart Login
License
Magento modules developed by IToris are provided with 2 license types - regular and premium.
Regulal license is partially encrypted. This license is website-dependent. By ‘website’ here we understand the website in Magento terms. Under one Magento installation one license key of the extension can activate all stores/storeviews. within one website. If your configuration has several Magento websites - a separate license will be required for each.
One license also supports a number of sub-domains for development/testing purposes in addition to the live website. Please see the full list of available sub-domains and additional information about the license in our Terms and Conditions
Premium license activates one Magento installation. All websites, stores and storeviews under one installation are covered with one license. Premium license is 100% open-source and is recommended for customizations.
You can switch the license from one domain to another – login to IToris website using the credentials you will receive after the purchase. Go to My Downloads area, find your key there and reset it from the current website. Then use it again to activate another website.
The license also includes free life-time updates for the extension.
Settings
Install Smart Login extension and open it in admin area (System –>IToris extensions –> Smart Login You will see Settings area:
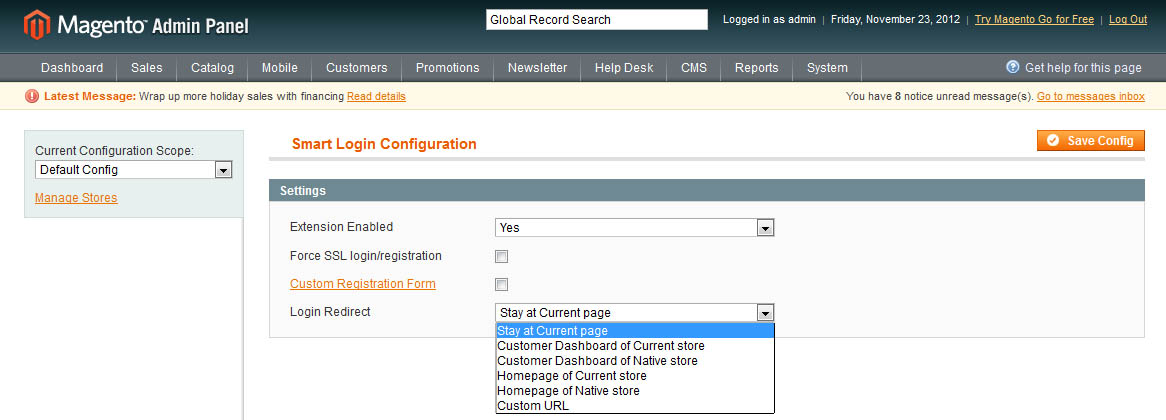
You can enable extension for all stores together - or for selected stores only. Choose the store(s), select Enabled =Yes and save the configuration.
If you check Force SSL login/registration - they will go via https:// protocol only.
If you have a custom registration form - created in Magento or using a 3rd-party module - you can add this custom form to the modal window. Check Custom Registration Form setting.
Please note, not all 3rd-party custom registartion forms will work correctly with Smart Login. We guarantee perfect work of Registartion Fields Manager module only, that allows creating any custom registartion from on Magento
Login Redirect - select where your customers should be redirectdd after login or registration:
- Stay on Current Page - default option. No redirect will be applied and the customers will continue on from the page where they were before login/registration
- Customer Dashboard of Current store - to the dashboard of the current store
- Customer Dashboard of Native store - to the dashboard of the store where the account was created
- Homepage of Current store - to the main page of the current store
- Homepage of Native store - to the main page of the store where the account was created
- Custom URL - to any custom URL you set (if you select this option, there appears a field to enter the URL)
Include Smart Login in Template
How to Add functionality to Header Area
As Magento templates can differ greatly, you will need to include Smart Login in your template.
To add the functionality to the header, so that new links ‘Log in’ and ‘Register’ appear in it please do the following:
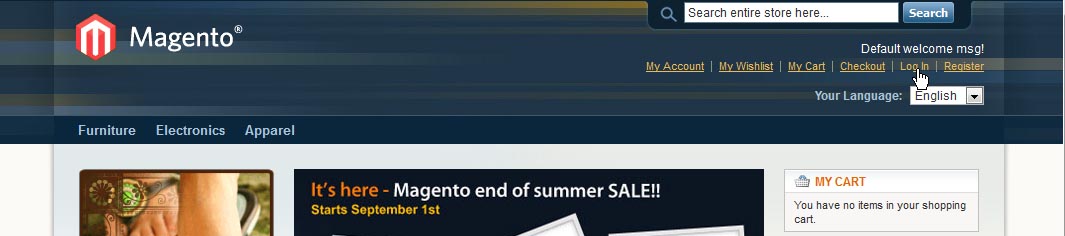
COMMUNITY EDITION
- Open app\design\frontend\default\{your_theme}\layout\customer.xml file of your Magento
- Find
<customer_logged_out>
...
</customer_logged_out>
in the file
- Insert the following between these tags:
<reference name="top.links">
<action method="removeLinkByUrl" module="customer">
<url helper="customer/getLoginUrl"/>
</action>
<action method="addLink" translate="label title" module="customer">
<label>Log In</label>
<url helper="customer/getLoginUrl"/>
<title>Log In</title>
<prepare/>
<urlParams/>
<position>100</position>
<aParams>
<onclick>if (showSmartLoginDialog) return showSmartLoginDialog();</onclick>
</aParams>
</action>
<action method="addLink" translate="label title" module="customer">
<label>Register</label>
<url helper="customer/getLoginUrl"/>
<title>Register</title>
<prepare/>
<urlParams/>
<position>110</position>
<aParams>
<onclick>if (showSmartRegisterDialog) return showSmartRegisterDialog();</onclick>
</aParams>
</action>
</reference>
<remove name="wishlist_sidebar"></remove>
<remove name="reorder"></remove>
- Save the file
- Clear Magento’s cache
ENTERPRISE EDITION
- Open app\design\frontend\default\{your_theme}\layout\customer.xml file of your Magento
- Find the block starting with
<default>
<!-- Mage_Customer>
<reference name="top.links">
and up to
<remove name="reorder"></remove>
</customer_logged_out>
- And substitute with the following:
<default>
<!-- Mage_Customer -->
<reference name="top.links">
<action method="addLink" translate="label title" module="customer">
<label>My Account</label>
<url helper="customer/getAccountUrl"/>
<title>My Account</title>
<prepare/>
<urlParams/>
<position>10</position>
</action>
</reference>
<!-- <reference name="header">
<remove name="top.container"/>
</reference> -->
<reference name="account.links">
<action method="addLink" translate="label title before_text" module="customer">
<label>register</label>
<url helper="customer/getRegisterUrl"/>
<title>register</title>
<prepare/>
<urlParams/>
<position>100</position>
<aParams>
<onclick>if (showSmartRegisterDialog) return showSmartRegisterDialog();</onclick>
</aParams>
<li/>
<before_text> or </before_text>
<after_text>.</after_text>
</action>
</reference>
</default>
<!--
Load this update on every page when customer is logged in
-->
<customer_logged_in>
<reference name="account.links">
<action method="addLink" translate="label title" module="customer">
<label>Log Out</label>
<url helper="customer/getLogoutUrl"/>
<title>Log Out</title>
<prepare/>
<urlParams/>
<position>2</position>
</action>
<action method="removeLinkByUrl">
<url helper="customer/getRegisterUrl"/>
</action>
</reference>
</customer_logged_in>
<!--
Load this update on every page when customer is logged out
-->
<customer_logged_out>
<reference name="account.links">
<action method="addLink" translate="label title" module="customer">
<label>Log In</label>
<url helper="customer/getLoginUrl"/>
<title>Log In</title>
<prepare/>
<urlParams/>
<position>1</position>
<aParams>
<onclick>if (showSmartLoginDialog) return showSmartLoginDialog();</onclick>
</aParams>
</action>
<action method="removeLinkByUrl" ifconfig="enterprise_invitation/general/registration_required_invitation">
<url helper="customer/getRegisterUrl" />
</action>
<!-- <action method="addLink" translate="label title" module="customer">
<label>register</label>
<url helper="customer/getRegisterUrl" />
<title>register</title>
<prepare/>
<urlParams/>
<position>100</position>
<li/>
<a/>
<before_text> or </before_text>
<after_text>.</after_text>
</action> -->
</reference>
<remove name="reorder"></remove>
</customer_logged_out>
- Save the file
- Clear Magento’s cache
If there is no such file in your template,
please open the directory \app\design\frontend\base\default\layout\ (Magento 1.4 and higher)
Find customer.xml file, copy it and paste to app\design\frontend\default\{your_theme}\layout\
Then complete 1-5
How to Add Functionality to a Static Block
If your template has no link header, the links or buttons can be added to any static block of your site.
Please do the following:
- Add ‘Log in’ link or button. Then add the following on-click handler
onclick="if (showSmartLoginDialog) return showSmartLoginDialog();"
- Add ‘Register’ link or button. Then add the following on-click handler:
onclick="if (showSmartRegisterDialog) return showSmartRegisterDialog();"
- Clear Magento’s cache
Front-end
After the extension has been installed and added to the template - your customers will have several functionality forms. The main one is Login form.
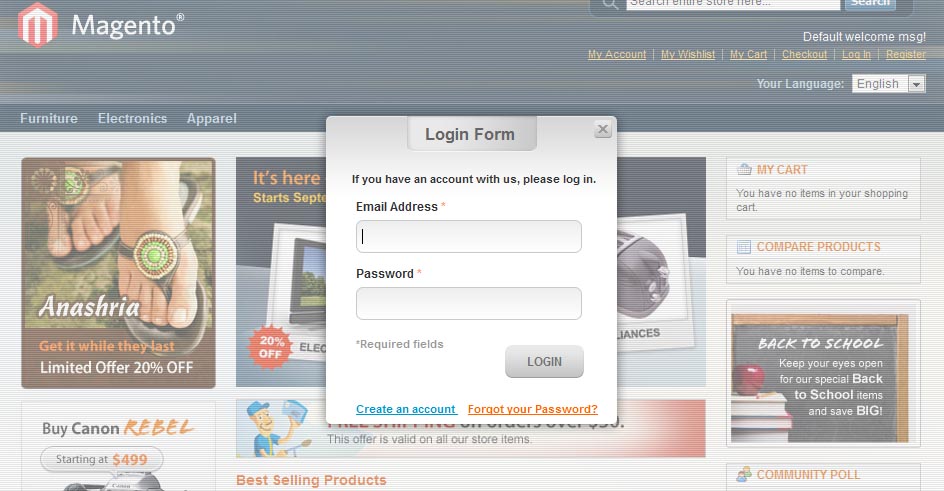
Login Form
Login from will be displayed in a small window over the opened page when ‘Log in’ link is clicked.
Customer will enter the credentials and press “Login” button - and will be logged in staying on the same very page.
As the form is available from the header there is no need to open a special login page, create redirects back to the page of interest, etc. - all happens on the selected page and your customers can continue their purchasing or browsing directly from the same place.
Registration Form
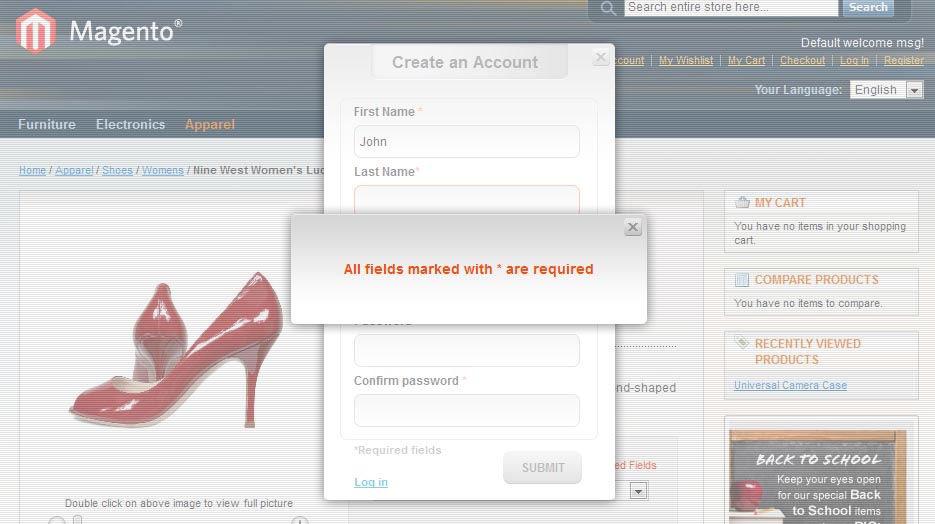
Apart from ability to login there is ability to create a new account using the same functionality. When ‘Register’ link is clicked - Registration Form is displayed in a small window:
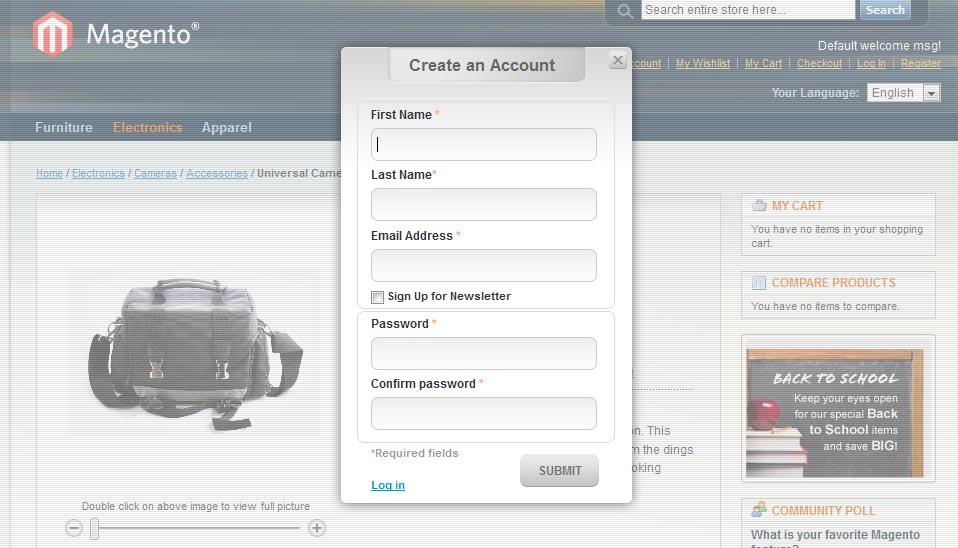
All standard Magento fields are available in the form. Once it is submitted a new account is created in a usual Magento way, yet again customers are not directed to another page, they are able to continue from the same place.
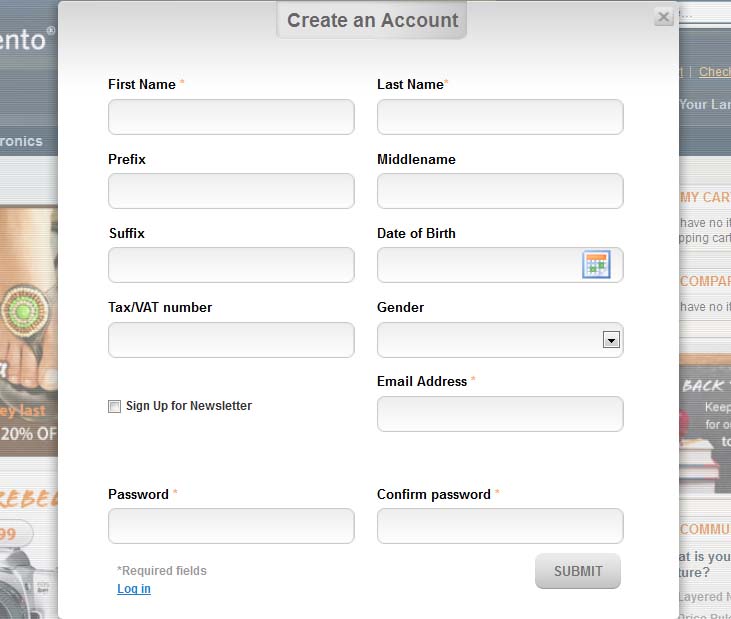
In case you have an ‘extended’ registration form or a custom registration form created with Registration Fields Manager module, with the additional fields and areas, it will work correctly as well:
Retrieve your Password Form
One more important form available in the module is ability to retrieve the forgotten password. It is available when “Forgot your Password?” link is clicked in Login Form:

Validation
In case incorrect data has been submitted or the require fields left empty - the error messages will be displayed. The errors will be the same as Magento uses, their style is adjusted to the functionality’s style: