Username
Password
Remember Me
Log in
Forgot your password?
Forgot your username?
Forgot your username?
|
Advanced PDF Plugin for Magento Forms User Guide
PurposeThis document is a User Guide for Advanced PDF plugin for SmartFormer Gold module, Magento. It describes how work with the plugin. Advanced PDF is a dependent plugin. It will work only together with SmartFormer Gold (Magento form builder), full version. This plugin has 2 main usecases:
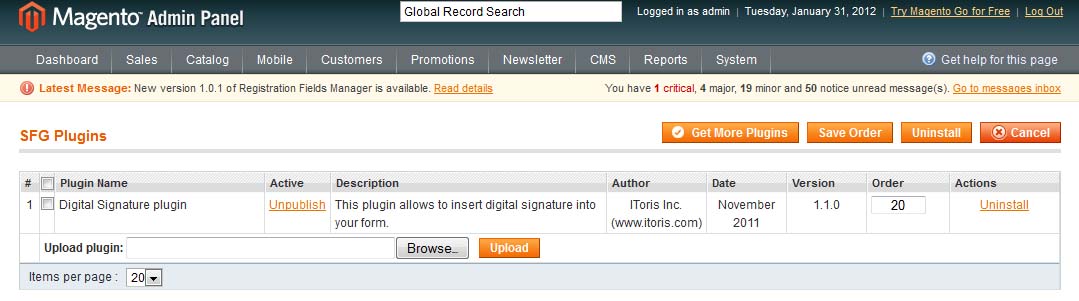
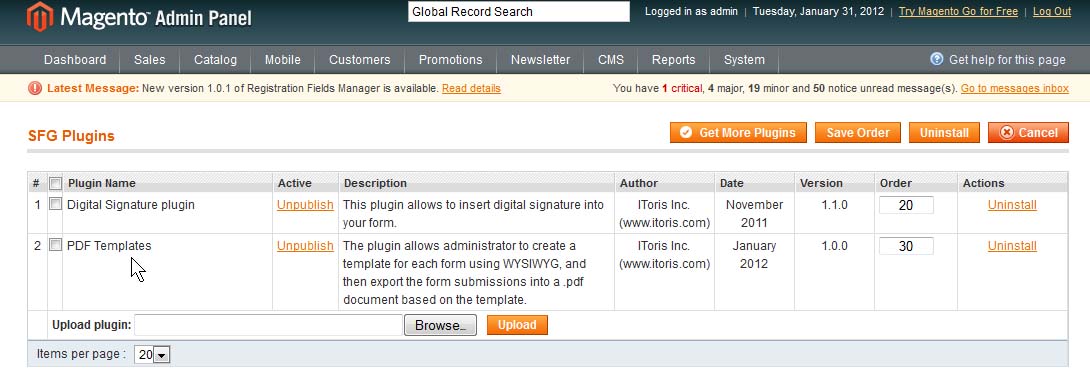
Combination of forms + plugin allows you to create form-based contracts and agreements that your customers populate directly on your website and then transfer into PDF documents. System RequirementsNo special system requirements are needed - Digital Signature is installable on any Magento version and will work with any browsers that SmartFormer Gold is compatible with. InstallationAdvanced PDF plugi is installable via a special area of SmartFormer Gold extension - plugin system. First of all, you will need SmartFormer Gold to be installed (more information on SmartFormer Gold installation). After the purchase of Advanced PDF you will receive an email with your credentials to //www.itoris.com Login and go to My Products. There you will be able to download your Advanced PDF plugin. Download it and save on your computer. Open admin area of your website. Select System -> IToris Extensions -> SmartFormer Gold -> Plugin Manager. You will see a special plugin area
Press Browse button, find your saved plugin and press Upload. Advanced PDF plugin will be installed.
LicenseAdvanced PDF plugin is provided under open-source commercial license. It has no any license keys, etc. - please feel free to install the plugin on as many Magento websites having SmartFormer Gold as you wish.
Settings
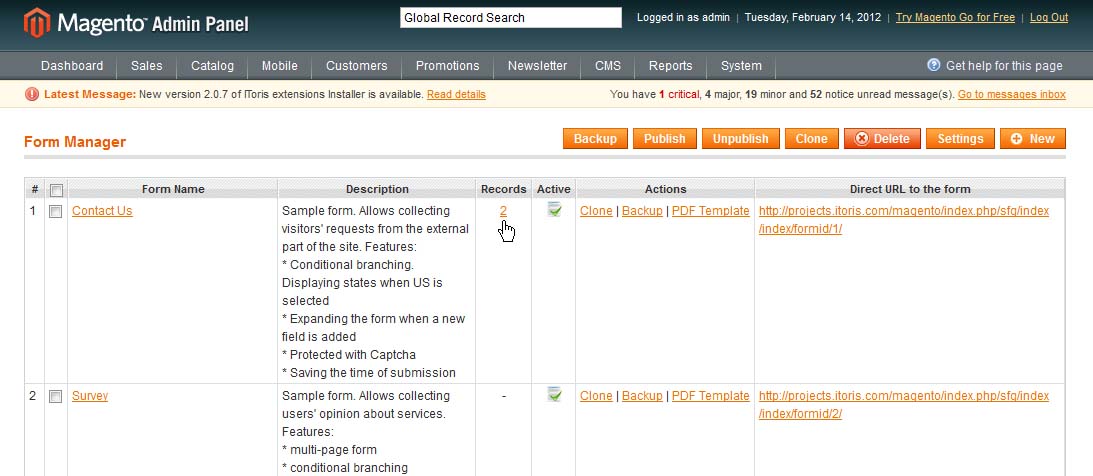
Simple PDF ExportThis is a simple table-based export. It can be used as an alternative to .csv export, providing submissions’ data as plain text. To export submissions to PDF files find the form you need in the list System -> IToris Extensions -> SmartFormer Gold -> Form Manager. You will see the number of submissions in Records column. Click this number to open the list of form’s submissions.
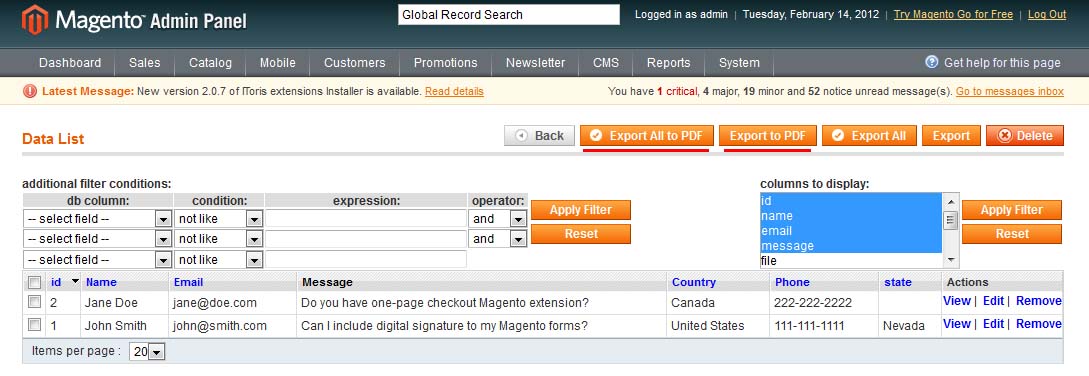
There are two new buttons now - Export to PDF and Export all to PDF If you need several selected submissions to be exported - check them and then press Export to PDF. If all submissions together - no need to check them, press Export all to PDF button. N.B. If you have accidentally broken HTML code here - remove all code from the area and save the changes - the default code will be restored. Above the list of submissions there are filters and sorting settings. Any of them (selected) will be taken into account during the export. E.g. if you have sorted out that only submissions having ‘@gmail.com’ should be displayed and see them only on the screen - only these submissions will be exported.
As a result of export you will receive simple table-based list of selected records (plain text):
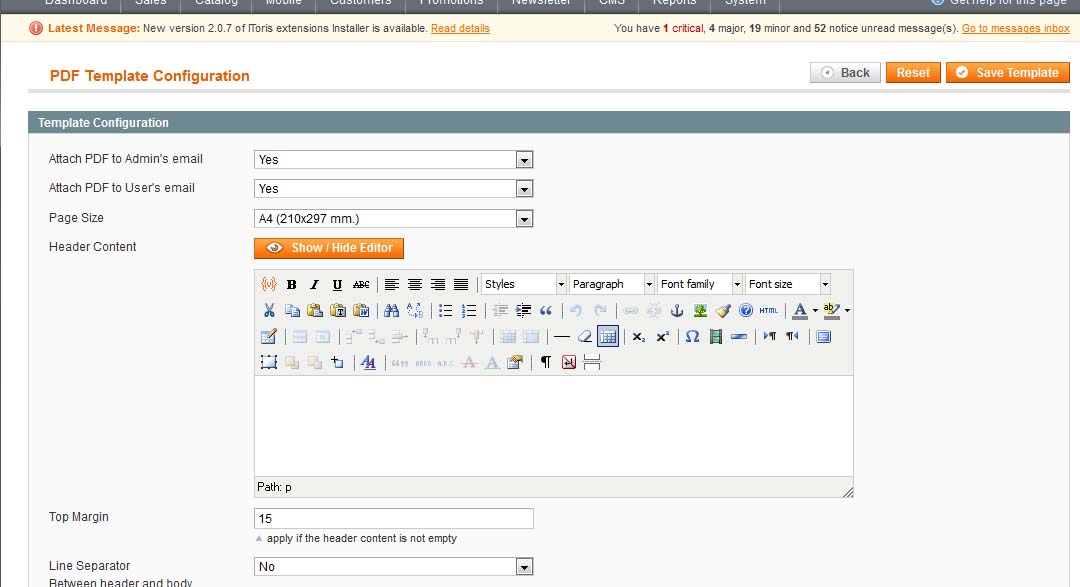
Good-looking PDF OutputAnother feature of the plugin is ability to create a good-looking decorated PDF output when a form is being submitted. To do it you will first need to create a template for PDF PDF Template CreationEach form will have its own PDF template. To create it select the form you need. In the Actions there will be ‘PDF Template’ link. Click it. You will see PDF Editors and settings. As this page is long it will be shown below part by part with the explanation of each setting:
The rest of settings deal with the look and style of the PDF output.
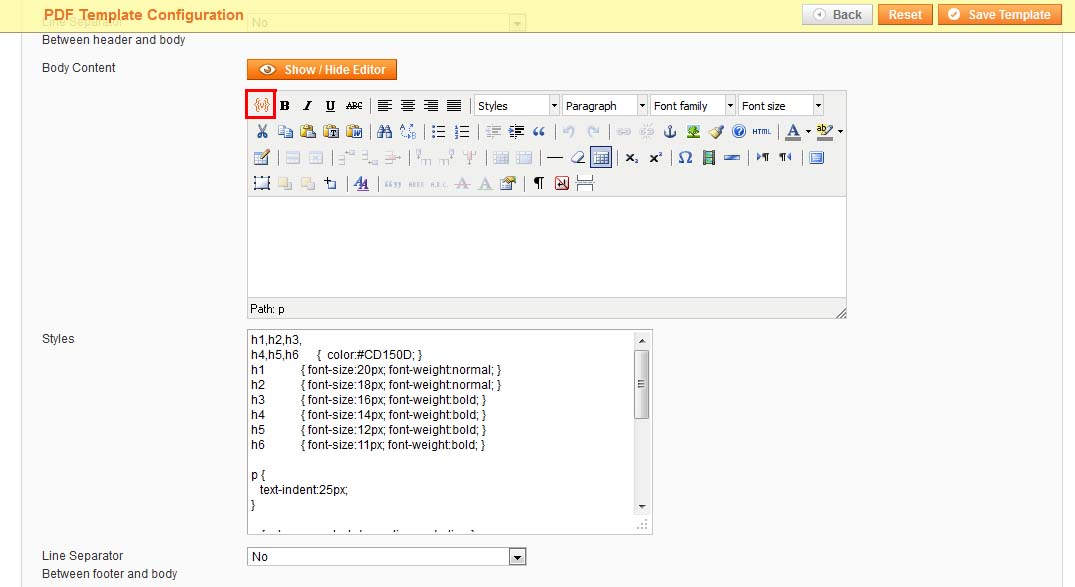
Below there are the main settings - the look of the PDF's body
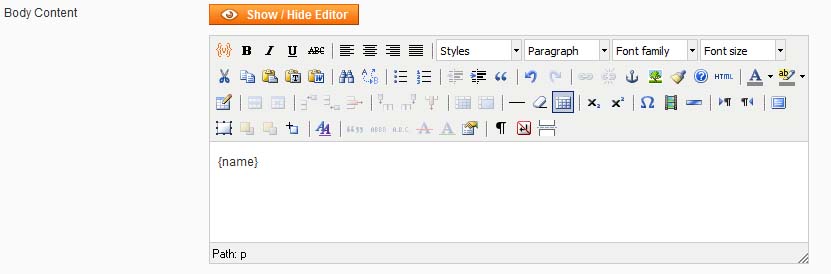
This editor has one more important icon - Insert Variables. You can add variables from the form to the PDF. E.g. if you form has Name field, and its inner name is {name}, if you add it to the PDF template it will be substituted with the real names entered by customers When you click Insert Variables icon, there is a new window with the full list of form’s variables. Select the one you need by clicking it and it will be added to the editor.
After the PDF template is ready press Save Template button to save the changes and settings.
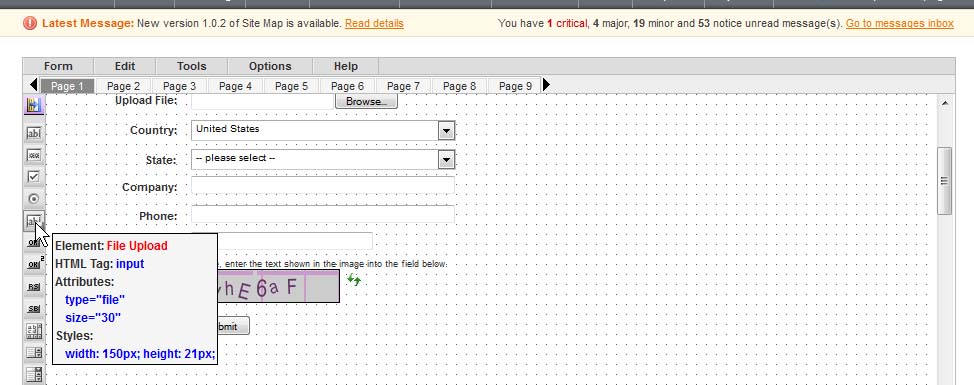
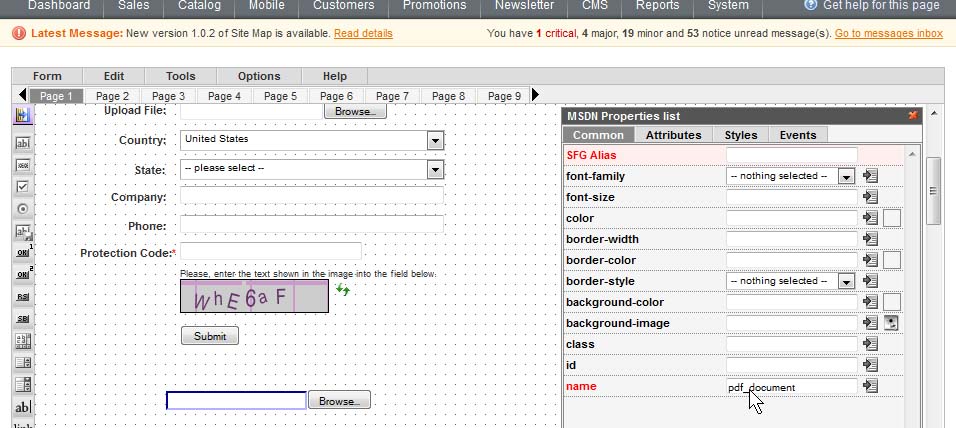
PDF Output to be Saved in Admin AreaTo attach PDF outputs to emails you will need to simply activate the setting. Yet if you wish the output to be saved in admin area automatically together with the submissions - please do the following: Add a new file upload element to your form.
Click it so that to see its properties. Enter name = pdf_document
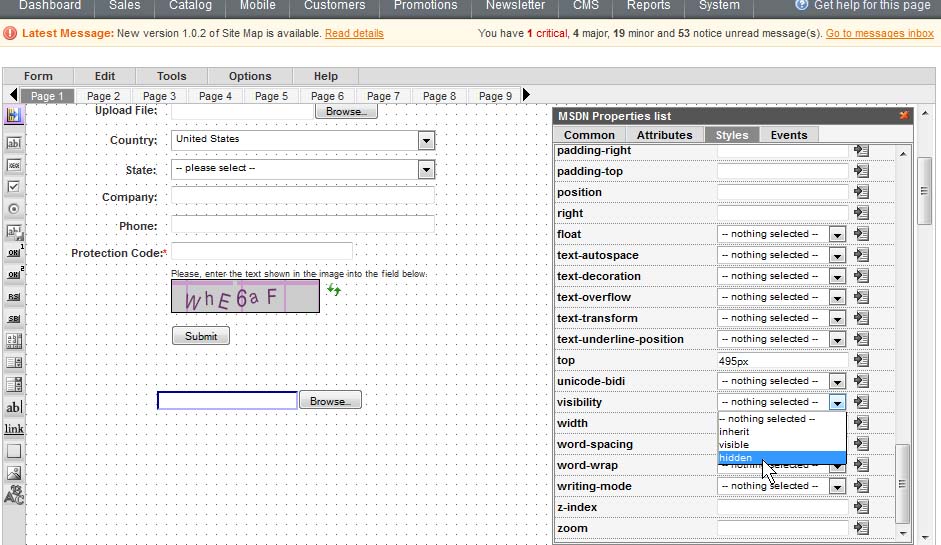
Select Styles tab in the properties. Select visibility = hidden. It will no longer be visible on the form, this is correct.
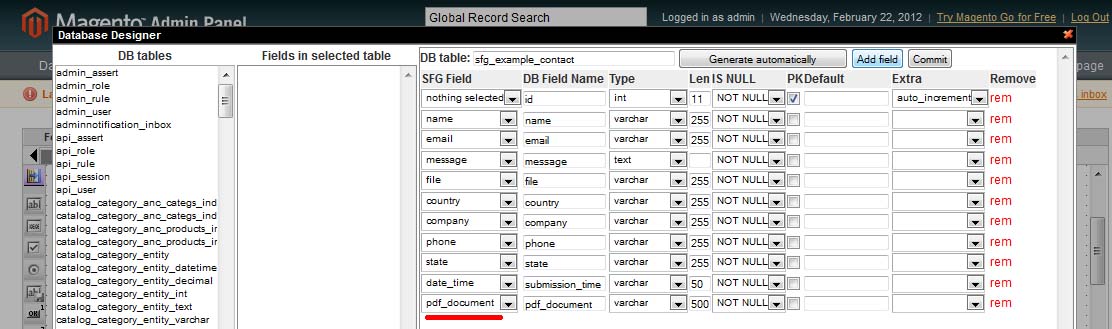
Then select Tools -> DataBase Designer. Press Add new field button. At the bottom of the list you will see a new field. Select the following properties:
Save DataBase Designer and close it. Save the form.
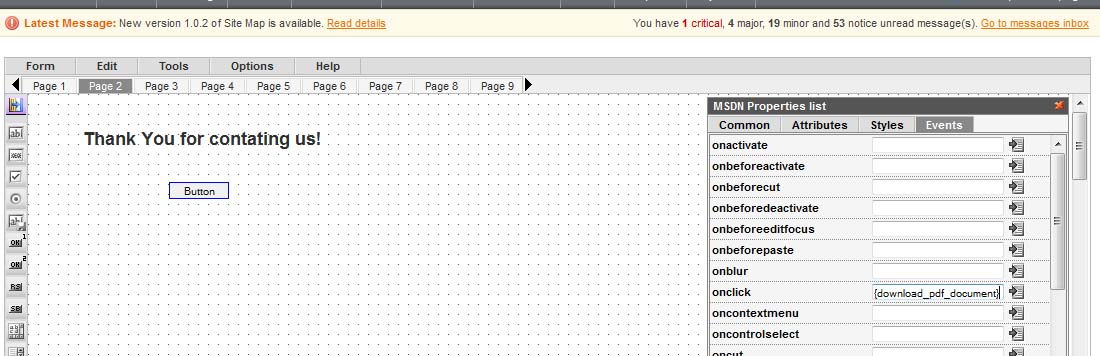
Add Ability to Generate PDF on the Front-endWith this ability your customers will be able to generate PDF output immediately after they have populated a form. To do it please add Button Type 1 at the last page of your form (normally Thank you page). Press it to see its properties. On the Events tab find onclick and enter {download_pdf_document}
Enter the button’s title (value) you need - what your customers will see. Save the changes.
|