Username
Password
Remember Me
Log in
Forgot your password?
Forgot your username?
Forgot your username?
|
Quick Checkout for Magento User Guide
PurposeThis document is a User Guide for Quick Checkout extension for Magento. It describes how work with the extension. This module creates a one-step checkout, so customers can enter all information together on one page and complete the order. Among advantages of the module there are:
System RequirementsThe extension works under Magento from 1.4.x and higher. The extension works with Apache 1.3.x and higher, PHP 5, Linux or IIS. The extension’s correct work is guaranteed with the following browsers:
The correct work with other Magento versions, other browsers and Apache/PHP versions is not guaranteed. InstallationAll our Magento extensions and templates are installed via IToris Installer.
LicenseQuick Checkout module is website-dependent. By ‘website’ here we understand the website in Magento terms. Under one Magento installation one license key of the extension can activate all stores/storeviews. within one website. If your configuration has several Magento websites - a separate license will be required for each.
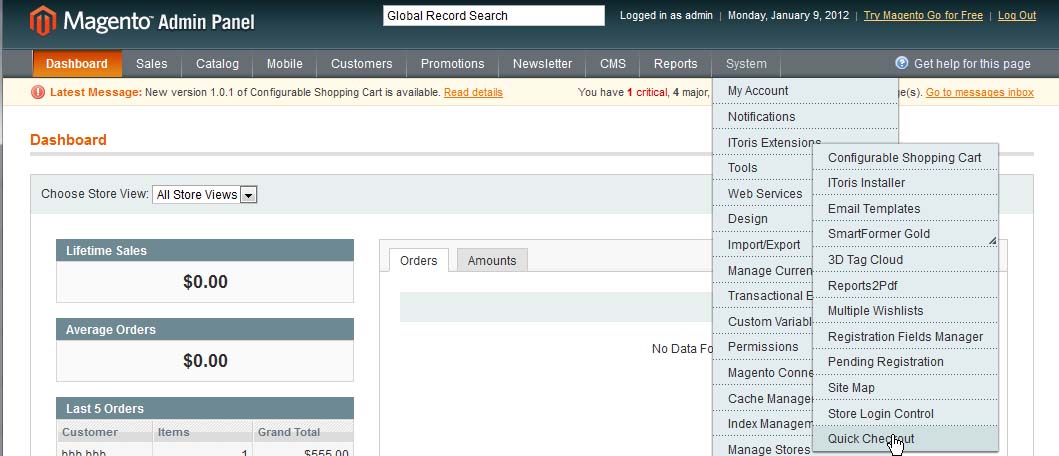
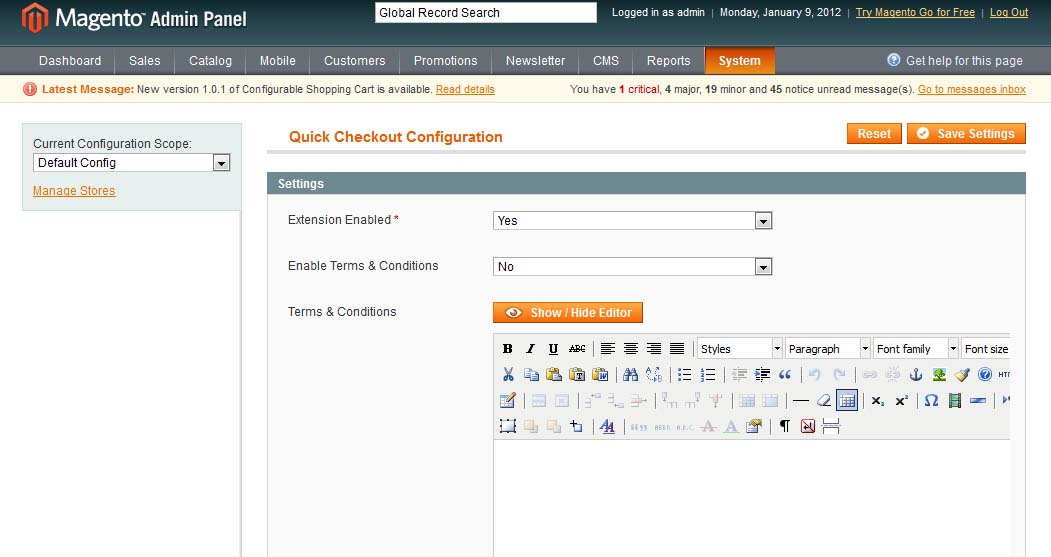
Settings
After any changes have been applied, settings need to be saved.
Extension EnabledTo activate the extension on your website select Extension Enabled = Yes. You can enable the extension for the selected stores only. To do it please select a store on the left. Uncheck ‘Use Website’ setting and select the setting for this store individually. Repeat the same for the rest of the stores. Terms & ConditionsEnable Terms & Conditions setting - allows to create Terms and Conditions box. This box will be displayed when Place Order button is pressed. Customers will need to agree to the terms and conditions so that to complete the order. Below there is a WYSIWYG editor for terms and conditions. If the setting is activated enter the terms and conditions the same way as CMS pages. Languages’ SettingsDifferent languages can be used for different stores in the module. By defaults the module is provided in English. To translate it for stores please open app/locale/en_En in your Magento and find Itoris_QuickCheckout.csv file there. Copy the file to the locale you need and open the copy for editing. The file will contain each phrase twice. Translate the second part of each phrase and save the changes. Front-end
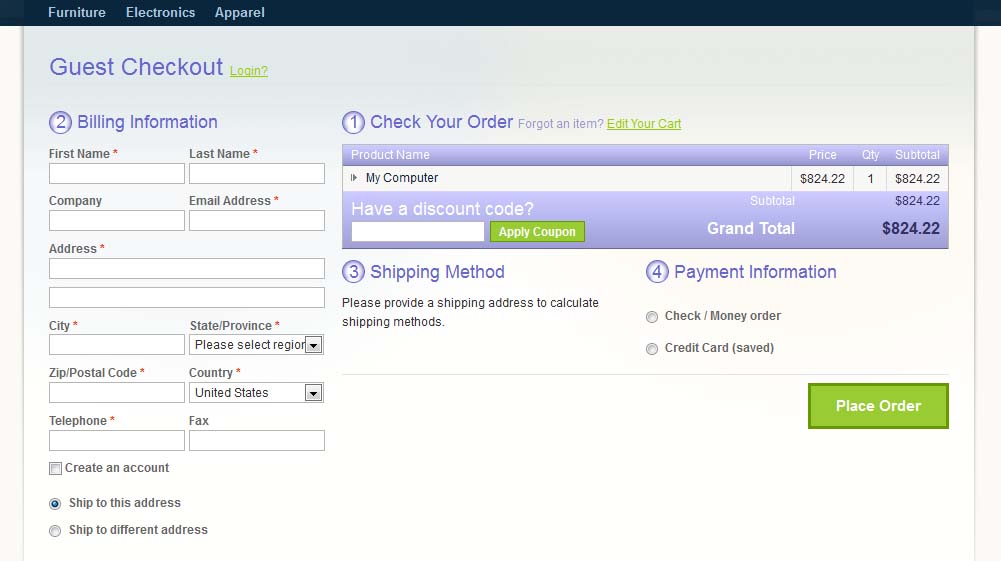
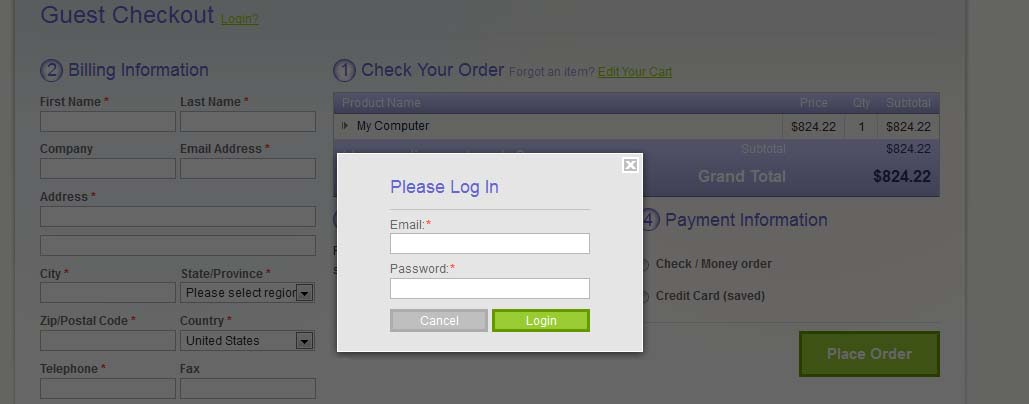
Login or Account CreationTo login customers press Login? Link on the top right. A modern-style login box is displayed. Customers can login and will stay on the same page.
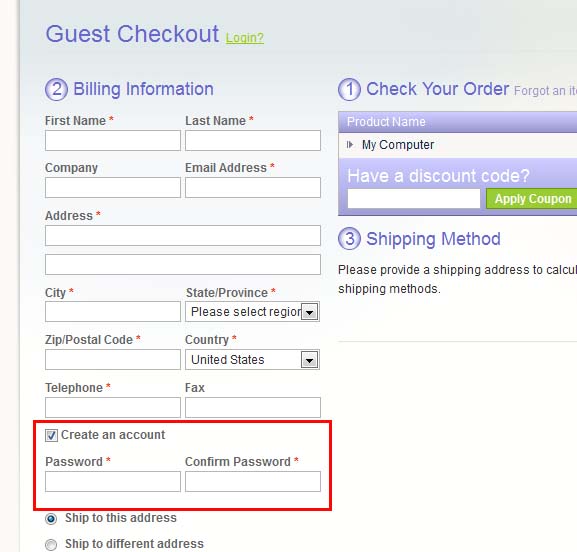
If a customer wants to create a new account, there is ability to do it provided. Customers enter their billing information and check Create an Account checkbox. This slides up a new area for account creation. Billing information and password fields will collect all required details and generate a new account.
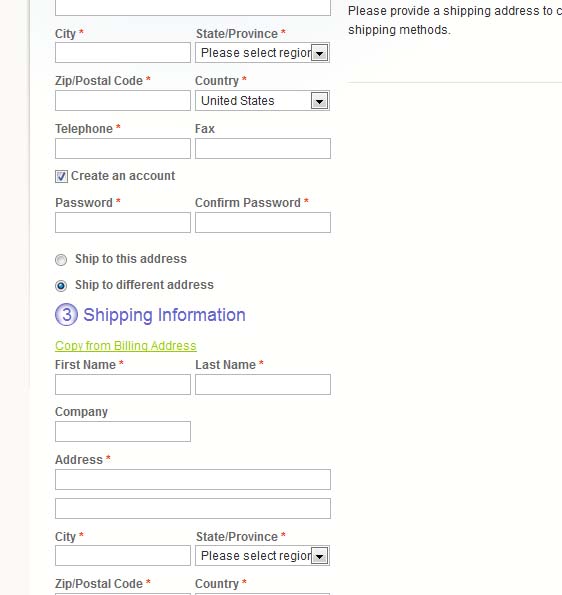
AddressessThere is ability to populate both billing and shipping addresses that do not always coincide - the same way as in standard Magento. Once Ship to Different Address radio button is selected - a new area for shipping address slides down. There is also a link Copy from Billing Address there that allows to copy billing address to shipping address.
Front-endShipping Methods and Fees
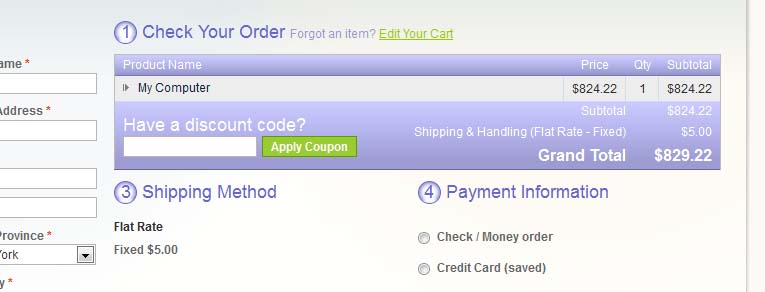
Once there is an address entered, the shipping details will be displayed.
OrderAll order details are available. In case there are products with additional options - customers can view the selected options as well.
Clicking on the product’s name slides down all its details.
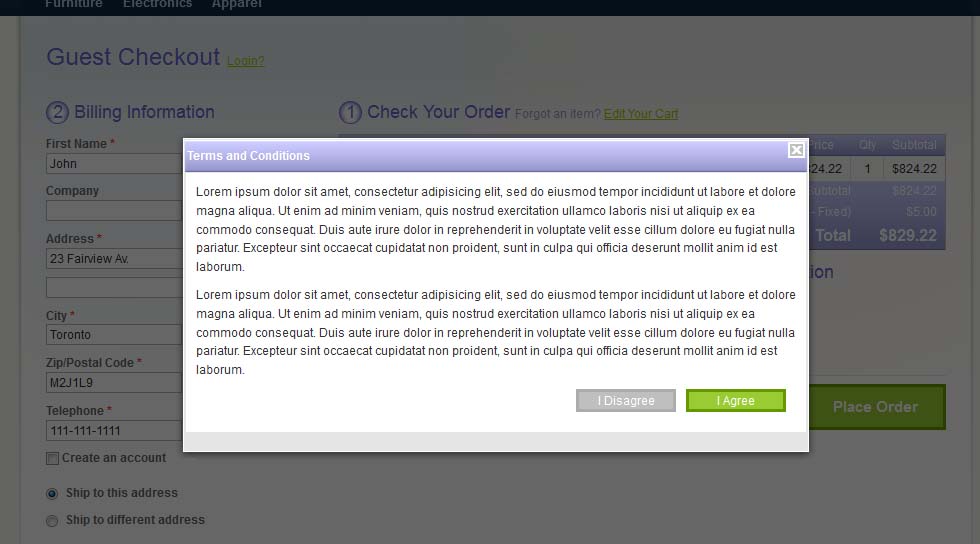
Below there is ability to apply coupon codes. It works the same way as in standard Magento apart from there is no page’s overloading. Payment InformationPayment options available depend on Magento settings. Customers are able to select the preferable option and complete the order. Terms & ConditionsIf you have enabled this setting and added Terms and Conditions’ text - once Place Order button is pressed they are displayed to the customers. Customers should press I agree button to complete the order.
|