Username
Password
Remember Me
Log in
Forgot your password?
Forgot your username?
Forgot your username?
|
Multiple Wishlists for Magento User Guide
PurposeThis document is a User Guide for Multiple Wishlists extension for Magento. It describes how work with the extension. Modern interface allows to create a new list directly from products’ pages when a product is added to a wishlist. In customers account the wishlist area is changed so that all lists are visible and easily accessible. System RequirementsThe extension works under Magento 1.3.x, Magento 1.4.x, and Magento 1.5.x and higher. The extension works with Apache 1.3.x and higher, PHP 5, Linux or IIS. The extension’s correct work is guaranteed with the following browsers:
The correct work with other Magento versions, other browsers and Apache/PHP versions is not guaranteed. InstallationAll our Magento extensions and templates are installed via IToris Installer . LicenseMultiple Wishlists is website-dependent. By ‘website’ here we understand the website in Magento terms. Under one Magento installation one license key of the extension can activate all stores/storeviews. within one website. If your configuration has several Magento websites - a separate license will be required for each.
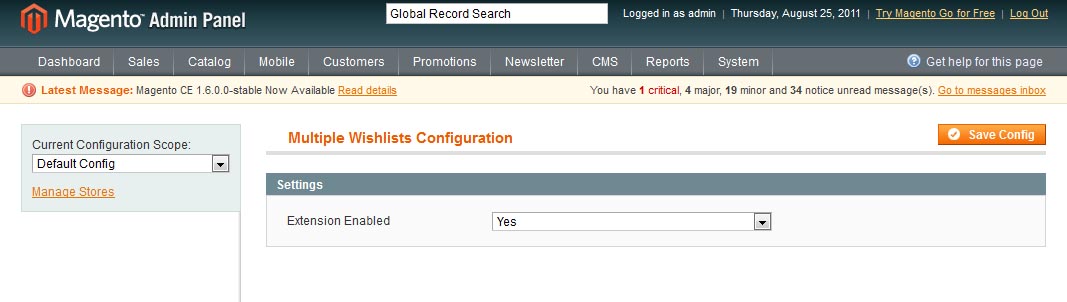
Settings. Activation/DeactivationInstall Multiple Wishlists extension and open it in admin area (System –>IToris extensions –> Multiple Wishlists). You will see the following setting:
To activate the extension on your website select ‘Enabled’ = Yes. Settings. Customers’ Wishlists in Back-endMultiple Wishlists extension also changes the customers’ wishlists in the accounts from the back-end. There is a new column added - Wishlist name - so that administrators can sort out wished products by wishlist’s name.
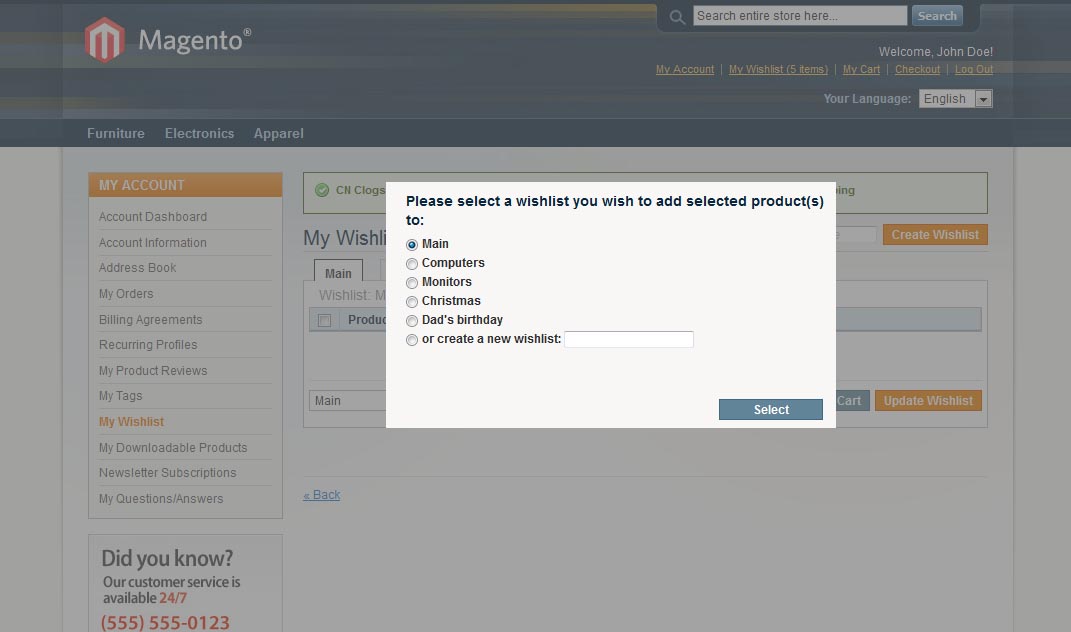
Front-end. Adding product to wishlistsWhen a customer clicks “Add to wishlist” link of a product - they see the following:
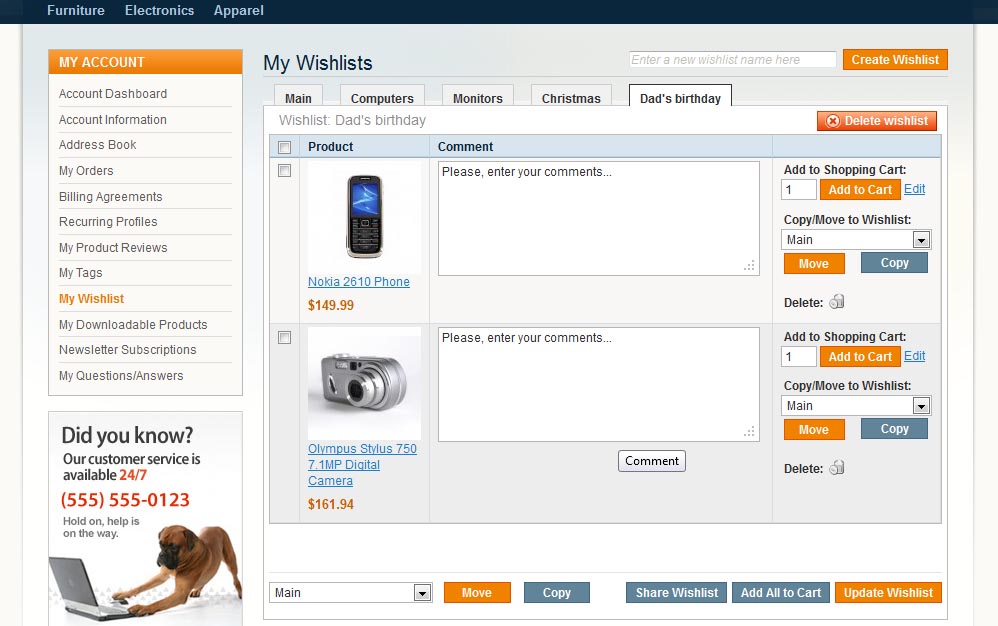
Customers can add the product to any of the existing wishlists or create a new one directly from here. Front-end. Customer’s Profile. My WishlistMy Wishlists area now provides ability to manage all wishlists.
There are tabs with the lists’ names on the top so that customers select which lists they want to manage. Apart from ability to create a new wishlist customers are able to move products from one wishlist to another one. Products can be moved one by one, or there is a bulk movement. Customers can delete products from wishlists, or delete the entire wishlists. Products can be copied from one wishlist to another one. In case there are more lists that the top pane can display simultaneously - there will appear a stroller so that customers view the lists they need. |