Username
Password
Remember Me
Log in
Forgot your password?
Forgot your username?
Forgot your username?
|
SmartFormer Gold Quick Start
Introduction - PurposeThis document is a Quick Start for SmartFormer Gold for Magento. Step by step it describes how to create a new form from scratch, bind it to DB, create email notifications, check submissions and add it to a website. It provides a detailed instruction and plenty of screenshots. This Quick Start does not cover all cases neither does it provide a detailed description of all settings and features available in SmartFormer Gold. For detailed information please check User Guide. This guide provides a general idea of how forms should be created and describes the order of creation a form.
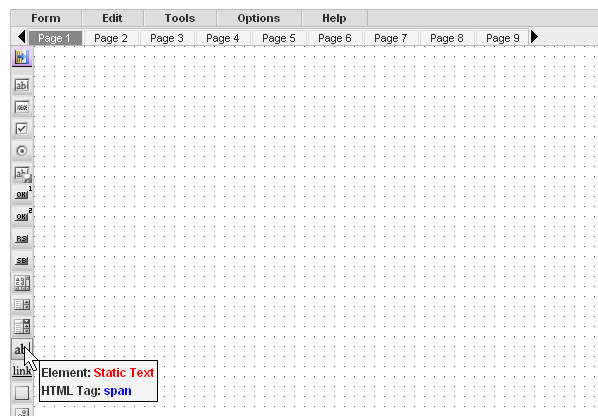
Work with SmartFormer Gold - Quick startBelow there is an instruction of how to create a new form from scratch. Create form’s skeletonOpen SmartFormer Gold in admin area. Press New button to create a new form.
You will see SmartFormer Gold’s Working area. On the right there are form elements to be added.
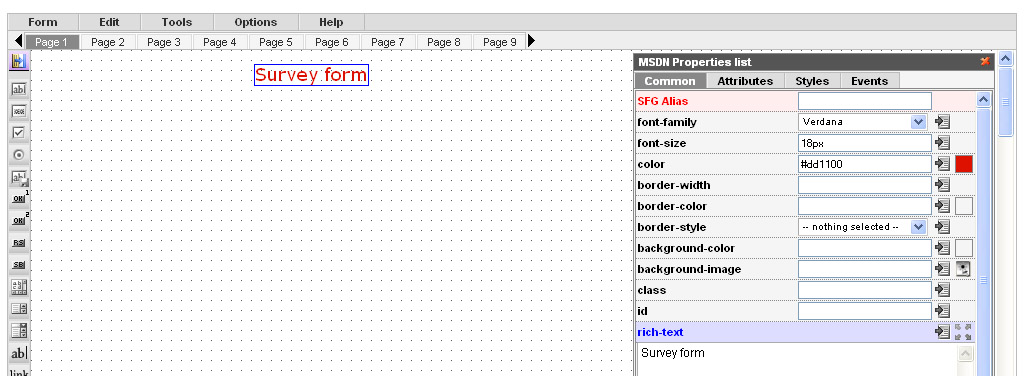
Select Static Text element to create a title of the form and drag it to the Working area.
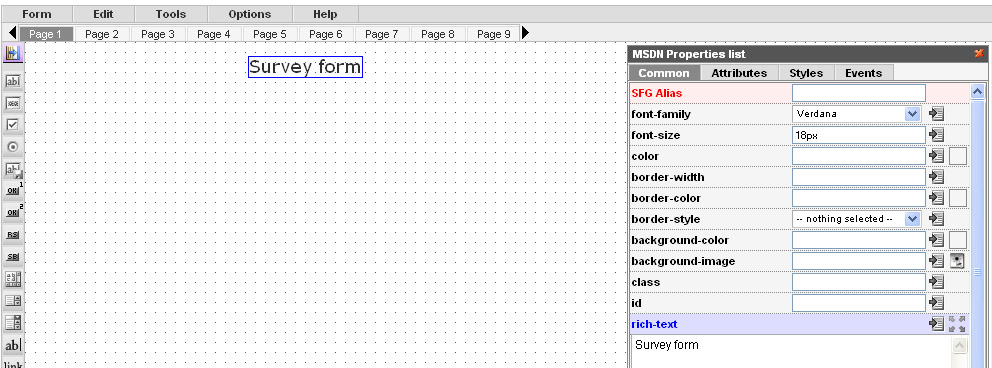
There will appear the Properties Box of the element.
Enter the title (where you see “Static Text”). Select a font (font-family), enter font size in pixels (font-size). All changes will be applied immediately.
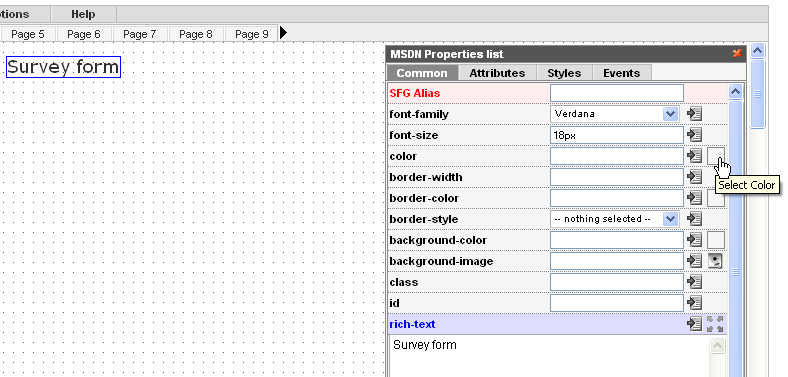
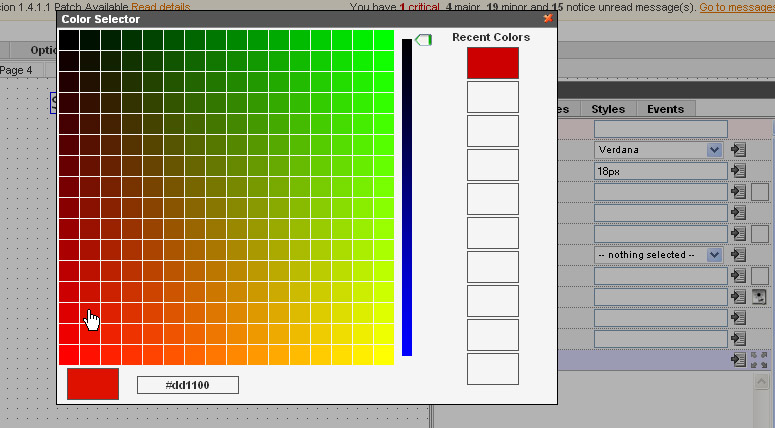
Let us also change the color of the title. To do it click the icon near color field. You will see Color Selector. Select a color.
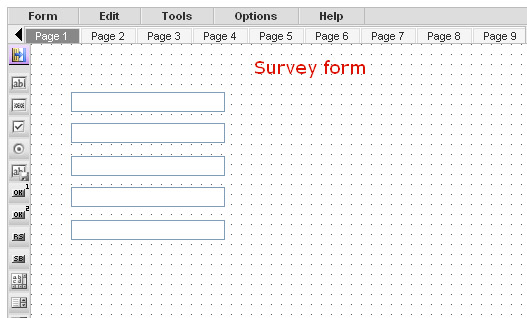
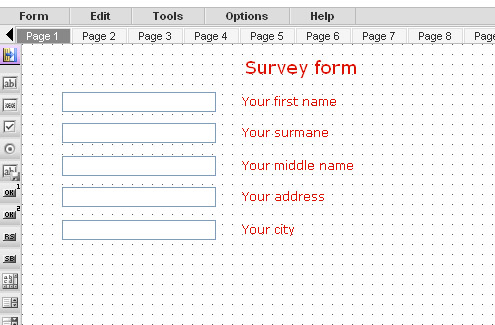
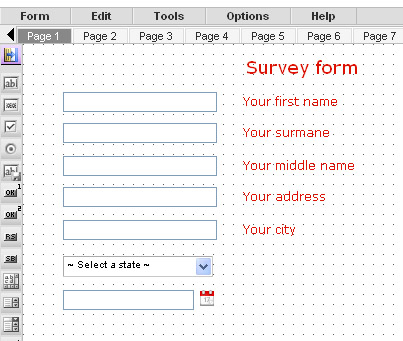
Work with SmartFormer Gold - Quick start - Create form’s skeleton (part 2)Now let us add several Input boxes. Drag them to the working area.
Add text labels (Static Text element) to them. This should be done the same way as with the title.
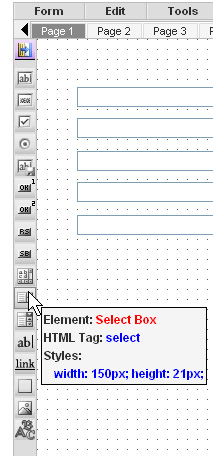
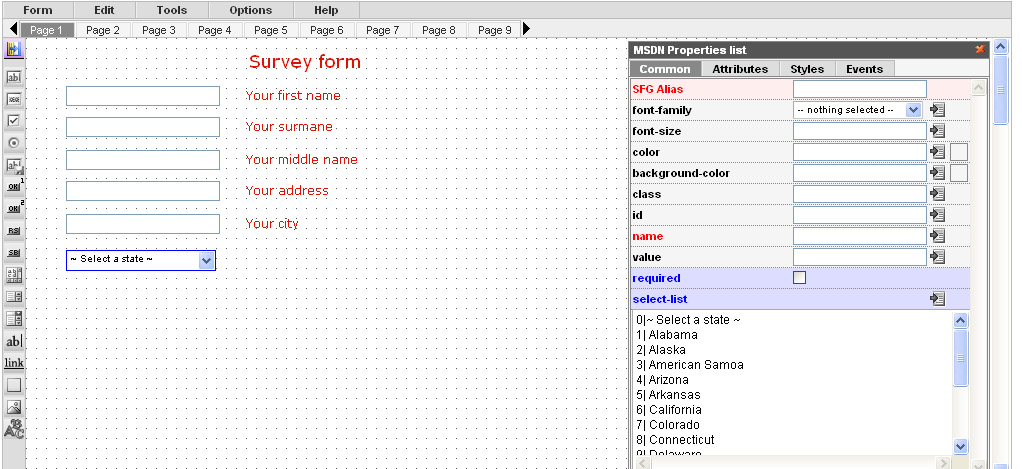
Let us add a drop down with the list of US states. Select Select Box element. Enter its options (states).
Add options in the following way: 0| value 1| value 2| value Etc. 0 – this option can not be selected. It can be used for some description (Please select). Value is what users will see.
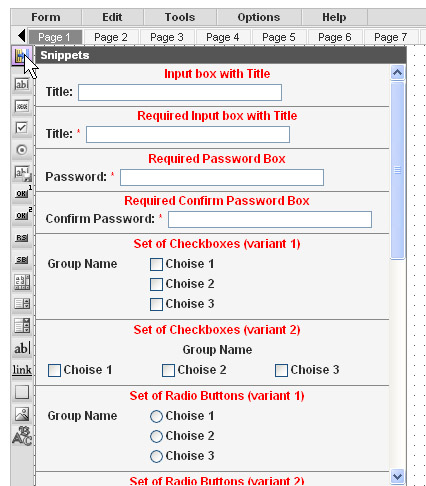
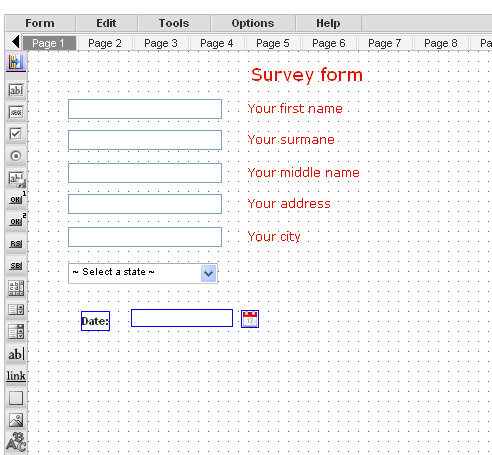
Work with SmartFormer Gold - Quick start - Create form’s skeleton (part 3)We will also add an input box with a calendar for users to select a date. This can be dragged from Snippets (combinations of most used elements). Click Snippets icon to see the list of snippets. Find Calendar Box with Title snippet and drag it to the working area.
Unselect date snippet (click any other place on the working area). Then select and delete its label (“date”) - press Del on your keyboard (we delete the label and create a new one of our own style). Any element of a snippet can be deleted separately. Adjust input box (select it and stretch) so that it suits the rest of elements.
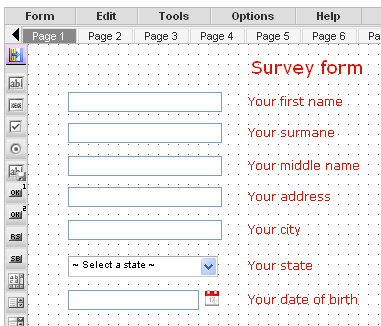
Add text labels to the drop down and input calendar.
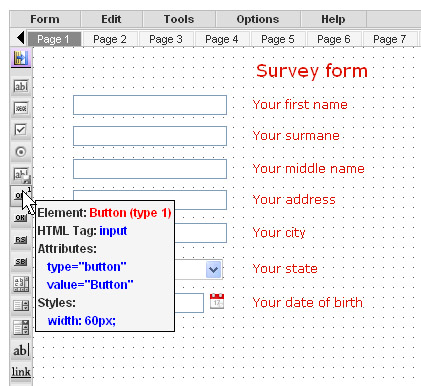
Add Button (type 1).
Add styles to it.
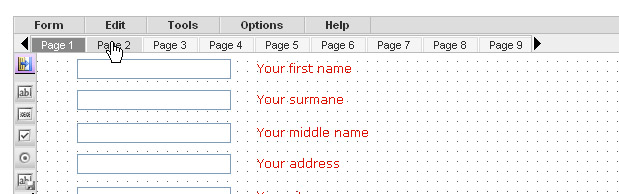
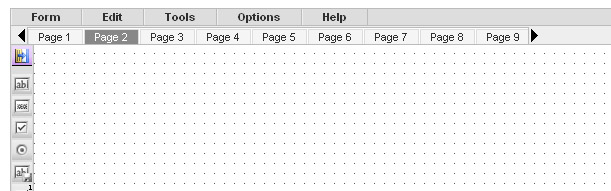
Work with SmartFormer Gold - Quick start - Create form’s skeleton (part 4)Now open the Page 2 of the form
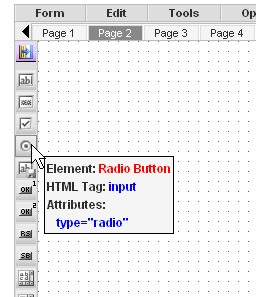
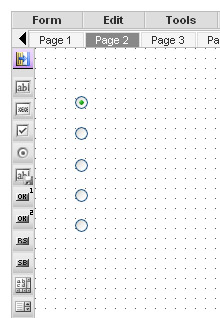
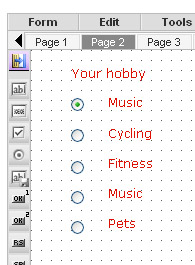
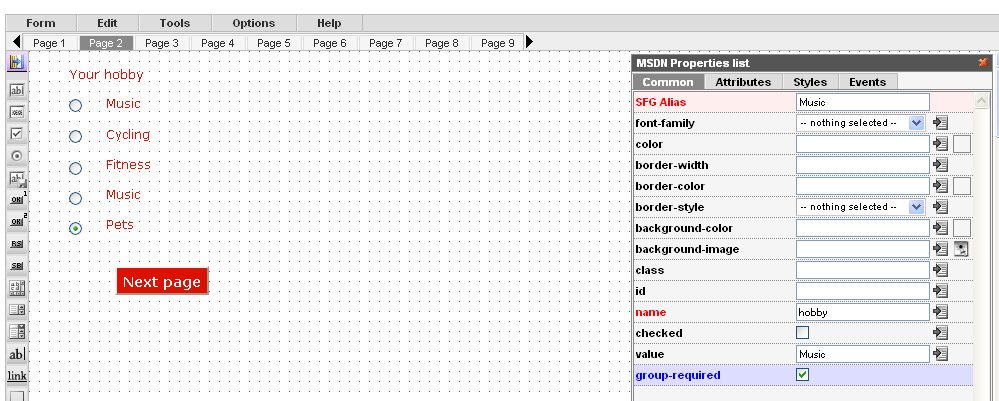
And continue there. Add a group of Radio buttons (several radio buttons one by one).
Add title and labels to them
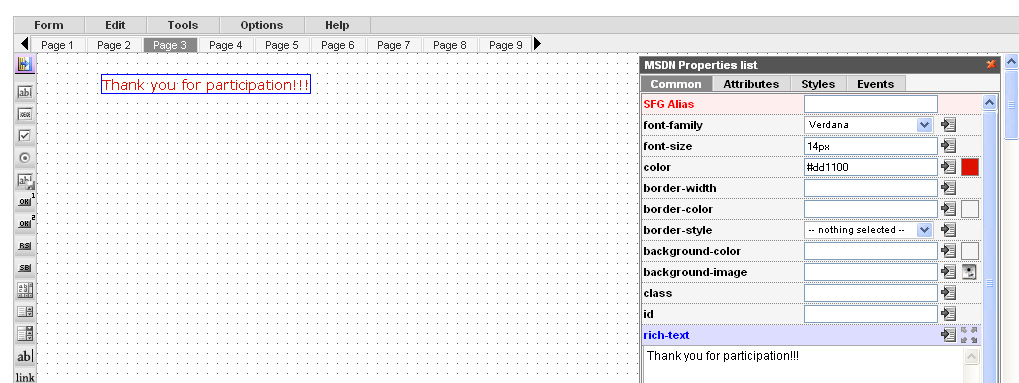
Quick start - Create form’s skeleton (part 5)Add a button to this page as well and open Page 3. This page will contain only “Thank you” message. Add Static Text and style it.
Our skeleton is ready. Let us continue.
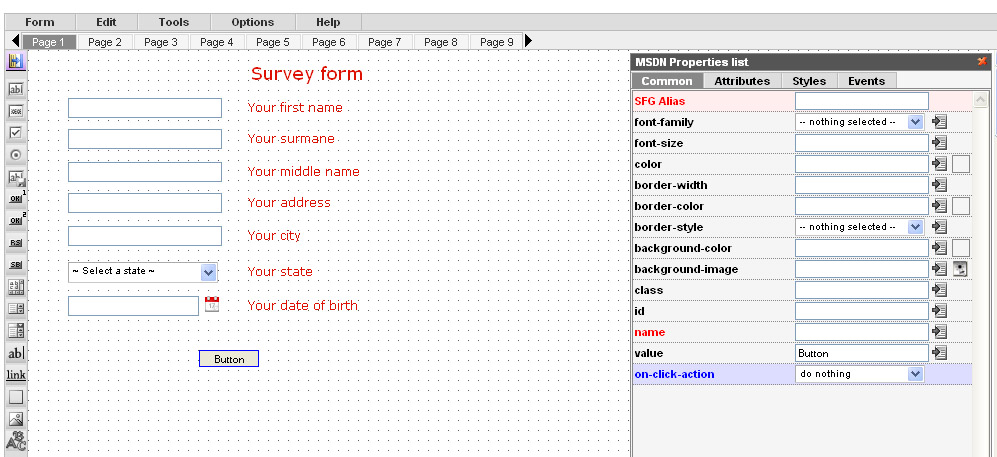
Quick start - Set the properties of elementsNow there goes a very important part. We should apply settings to our elements so that they behave the way we need.
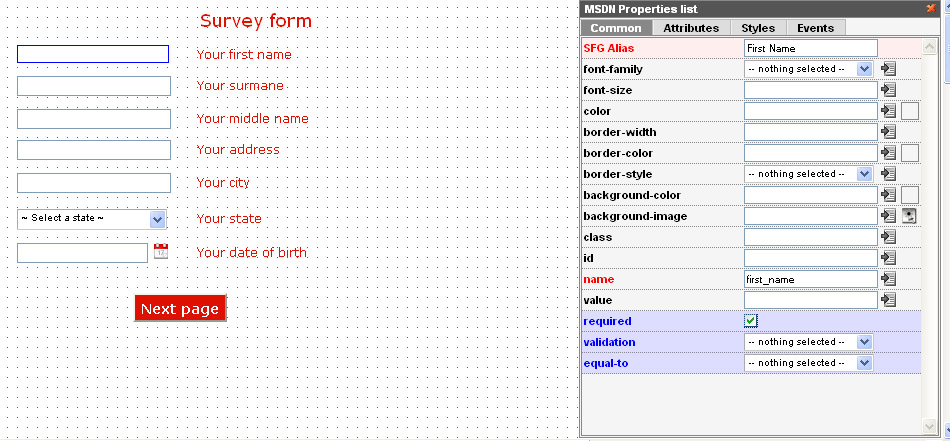
Let us press Page 1 again and select the first input box. The most important settings are:
SmartFormer Gold Alias will be used for email templates. Add a meaningful name to it Name will be used to bind the field to the DB. If you do not give an element a name – it will not be saved. Name should contain letters and underlining only. Required – if the checkbox is checked – the field will be mandatory Validation – rules according to which the field will be checked. For example if you select Email validation – users should enter This e-mail address is being protected from spambots. You need JavaScript enabled to view it format, otherwise they will see an error. Add settings to the rest of input boxes. Click the button. It also has settings. We need users to go to the next page of the form when they press the button. So we will select on-click action = submit the form.
New settings will appear, we will select after-submit = open next page
Go to Page 2 of the form. Here we have a several radio buttons. To make them a group – so that only on of them can be selected – we should add the same name to them. They can have different SmartFormer Gold Aliases and values. Select then one to another and enter the same name to them. Enter Aliases and Values.
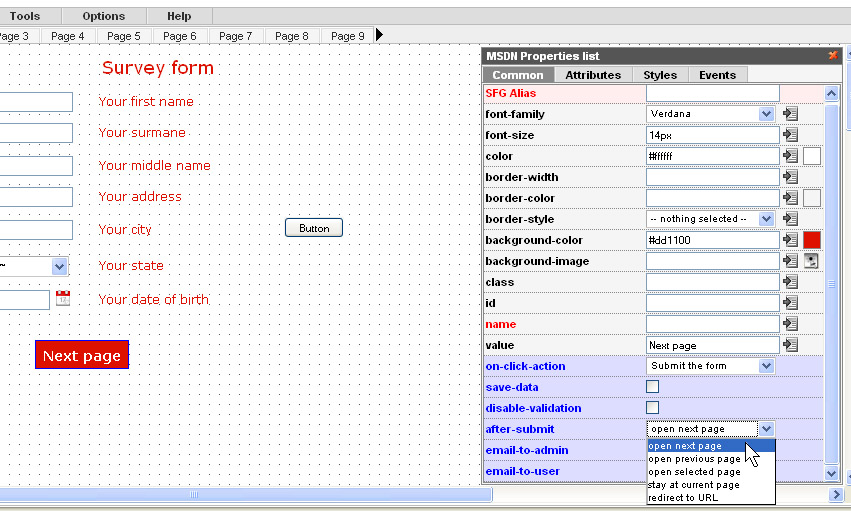
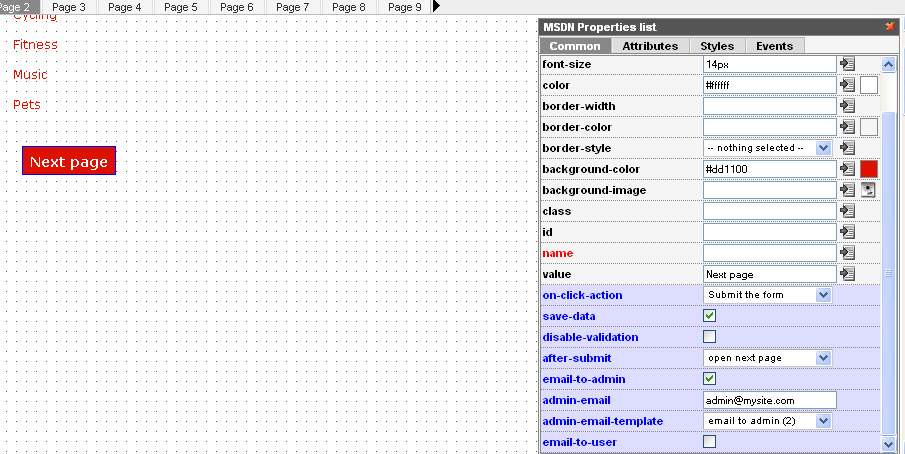
Then select the button. On this page we need the form to be saved to DB and email notifications to be sent. So we select: On-click action = Submit the form Save data After submit = Open next page Email to admin Admin email = (enter the email address of the admin) Admin email template = email to admin (2)
So our submission will be saved to DB, when this page is presses users will see “Thank you page” (Page 3), when the form is submitted admin will receive notification email. The template for this email will be “Email to admin (2)”.
We have finished the settings.
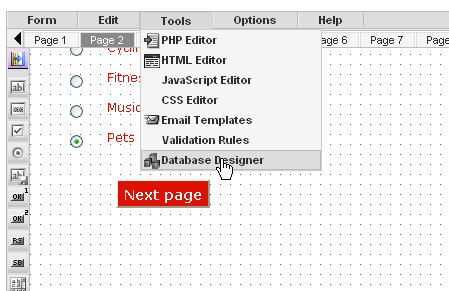
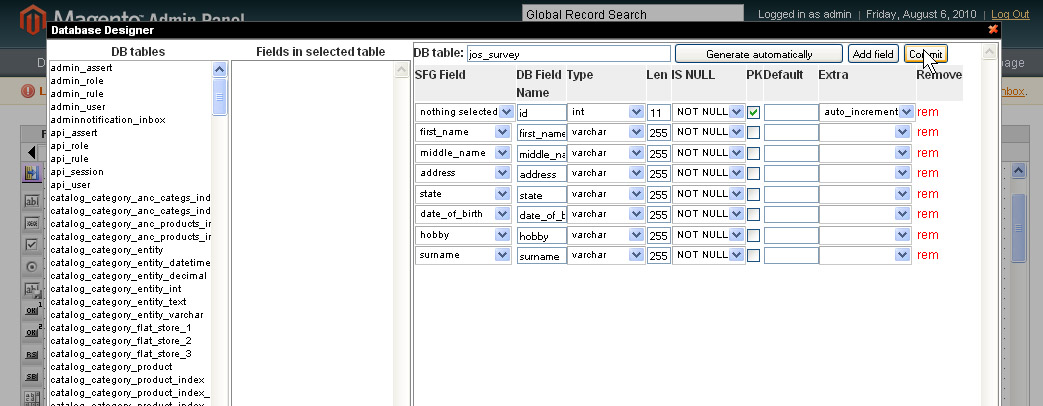
Quick start - Associate form with DBNow in order to save our submissions we need to bind the form to the DB. Open Database designer from the SmartFormer Gold menu (Tools -> Database Designer)
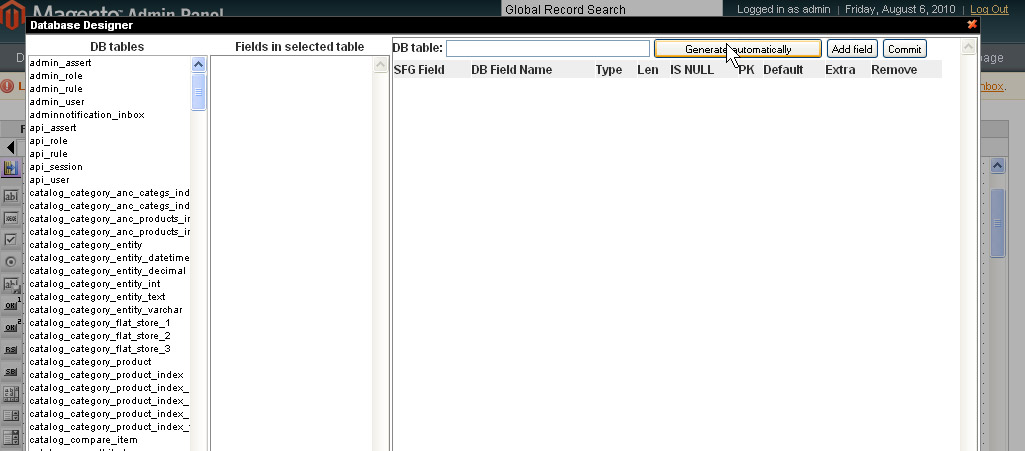
We will do the simplest association – create a new table and bind it to the form.
Press Generate automatically button. New table with fields will be created. Enter a name of table in DB table field. Then press Commit button.
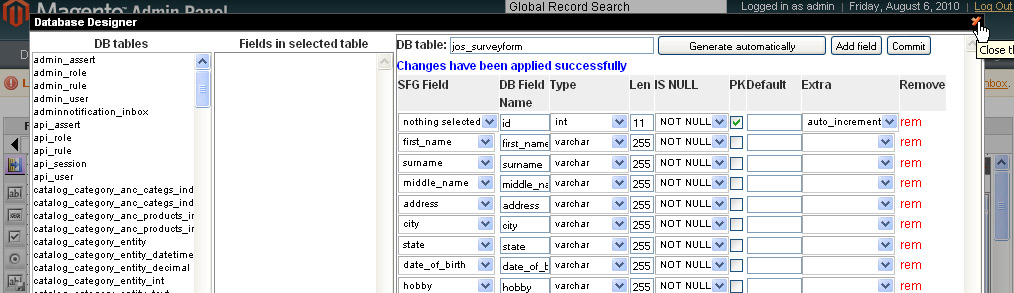
You will see the message that the changes have been applied. Now the window can be closed.
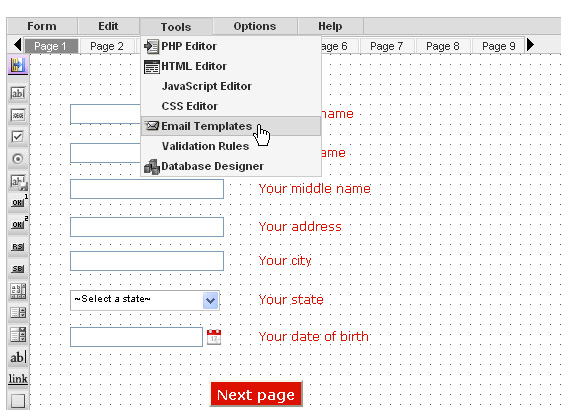
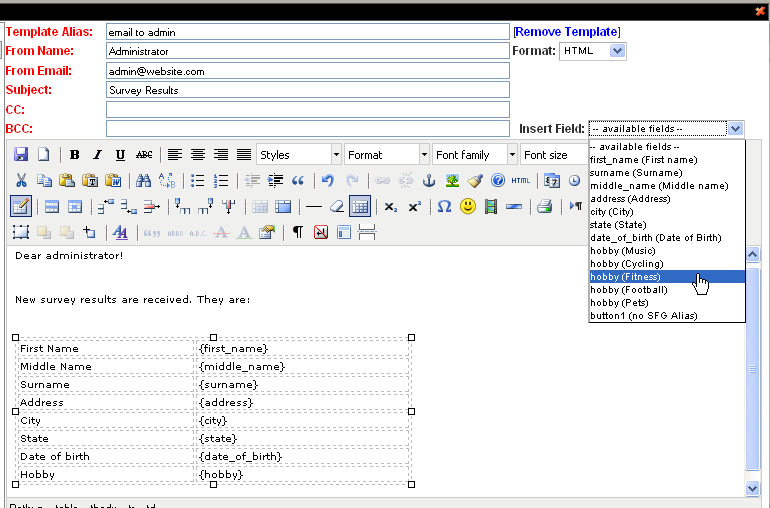
Quick start - Create email functionalityIn order for admin (and user if required) can receive email notifications – we need to create email template(s). To do it select Email templates from the menu (Tools -> Email Templates)
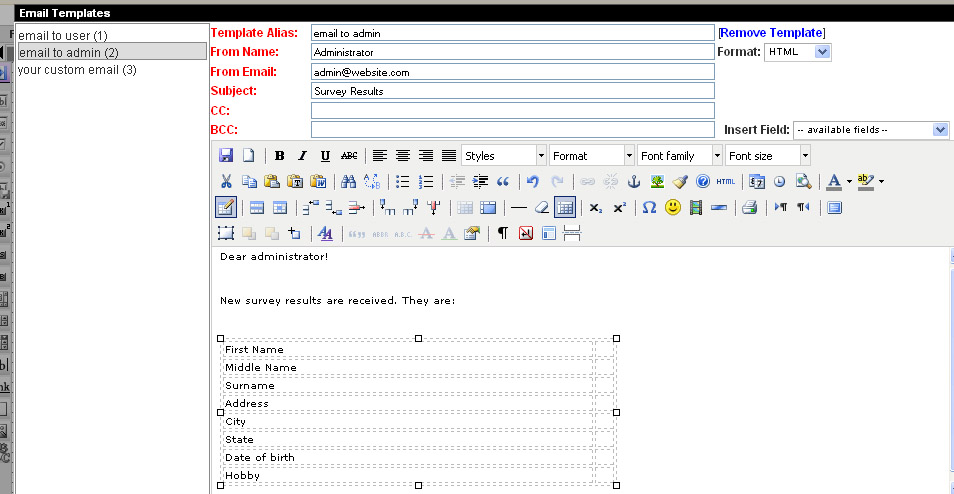
Your will see template editor. Let us select Email to Admin (2) (we have selected this template in the properties of the button). Template can be selected from the left area.
From name – we will add “Administrator” Subject – “Survey Results” These settings are what a person will see when email is received.
Now let us delete everything in the body of the template and start anew. Add text to the template (and decorations if you wish).
Now we need to pull the information that user enters when he/she fills in the form. At the top right there is Insert Field drop down. It contains all fields of our form. Let us add these fields to the appropriate cells of the table.
Now when a user submits a form enters John as the first name – administrator will receive “John” instead of {first_name} in the email.
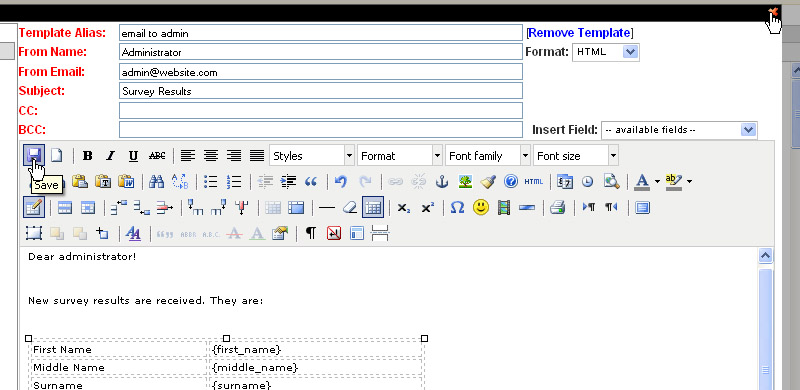
Now save the changes and then close the window.
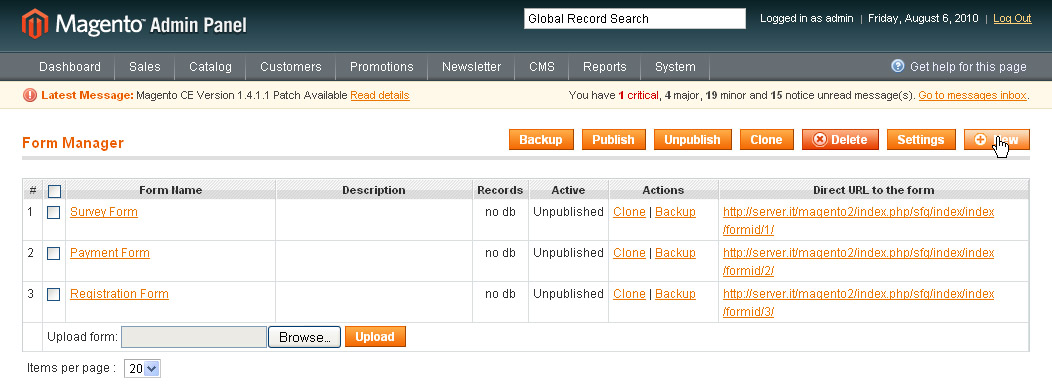
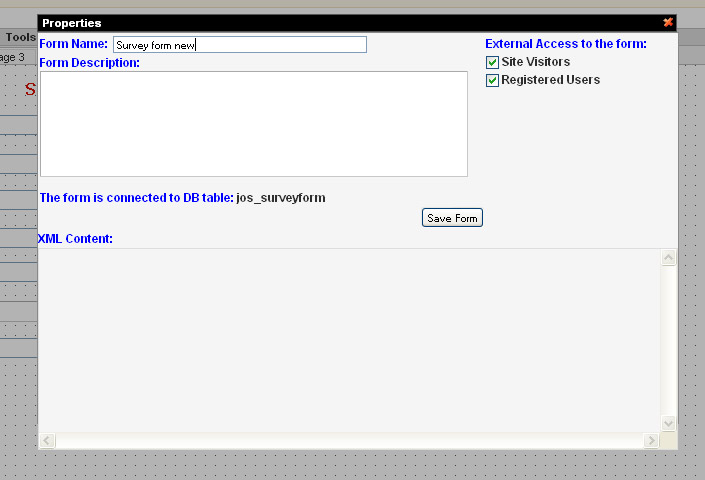
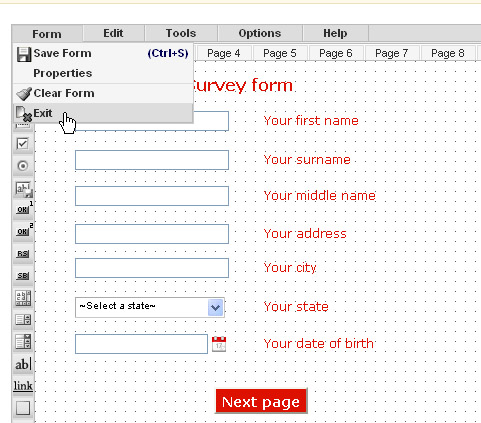
Quick start - Save the form. Publish and check itNow the form is completed. Select its properties (Form -> Properties). Enter form’s name (you can also add description. It is used for admin only).
and save the form. Then exit it.
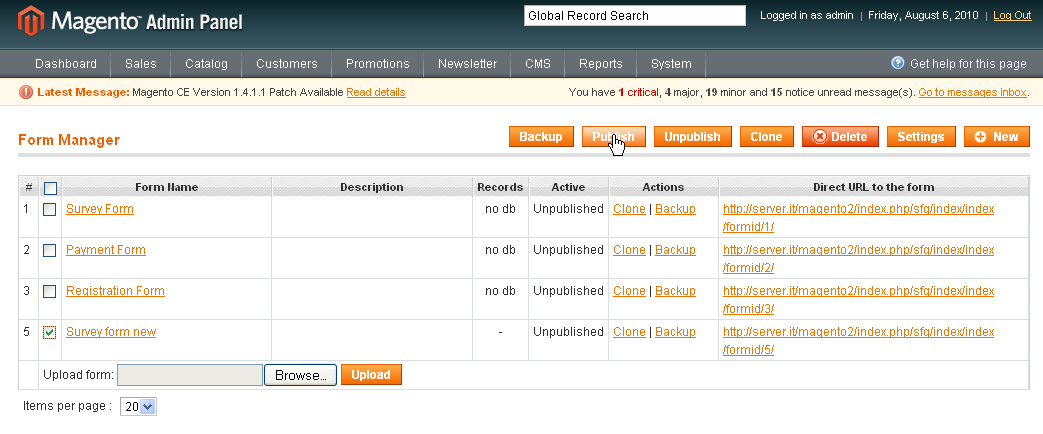
Now we see our new form in the list of forms. By default all new forms are unpublished (not available for front-end users). To make it published check the checkbox near it and press Publish button.
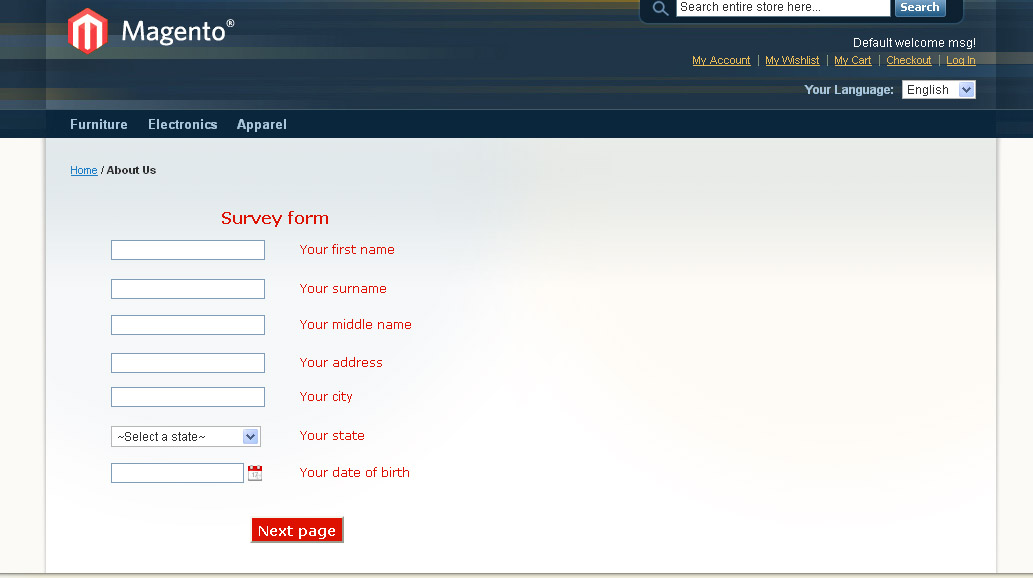
Now we can check it. Press itsDirect URL to view it from the front-end.
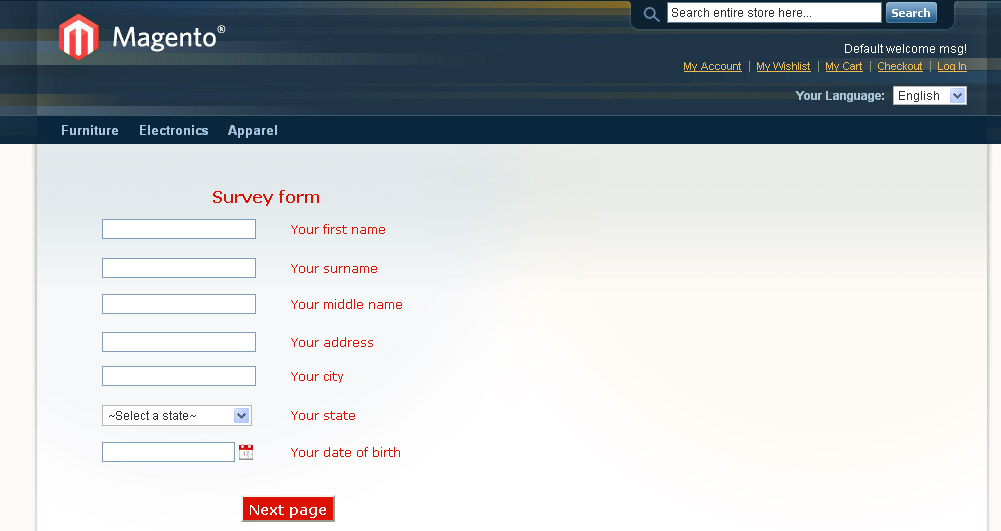
Fill in the form and submit it to test its functionality.
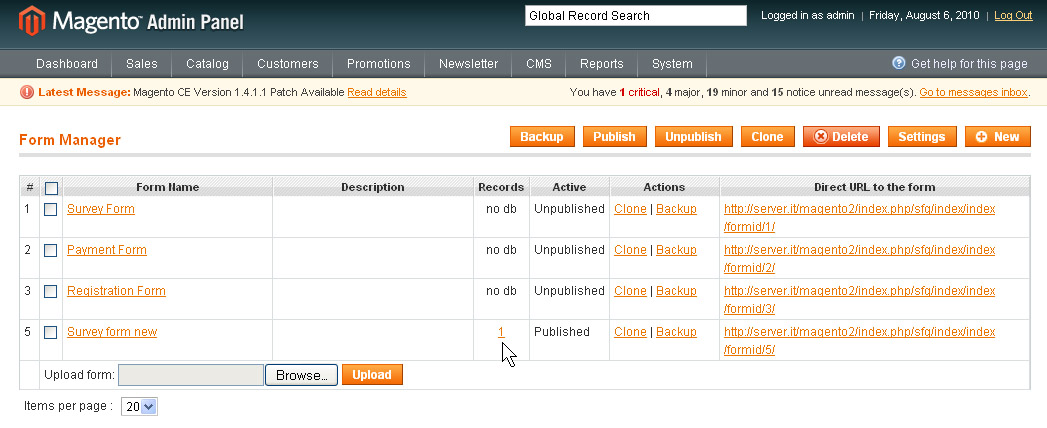
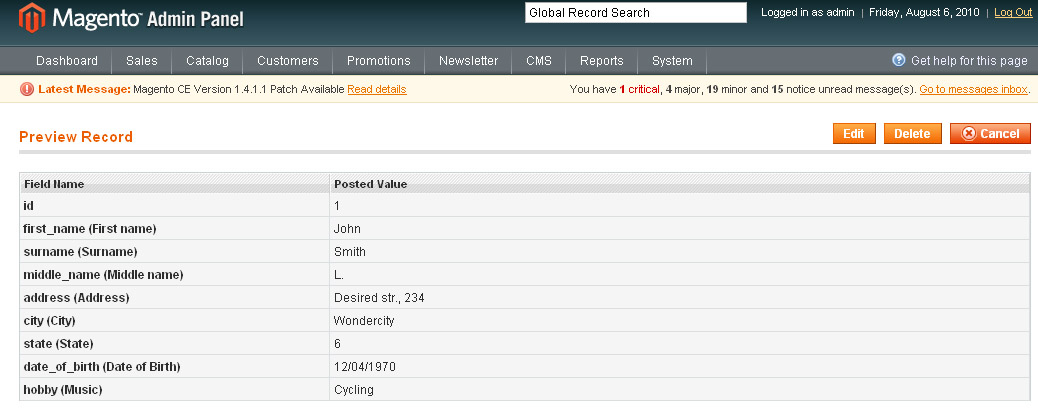
Quick start - Manage submissionsAfter you submit the form – go back to admin area. Update the page. You will see that now the form has one record
Click this number to view the submission (record). You will see all records available for this form (currently we have one record only). There will also be a filter to sort records.
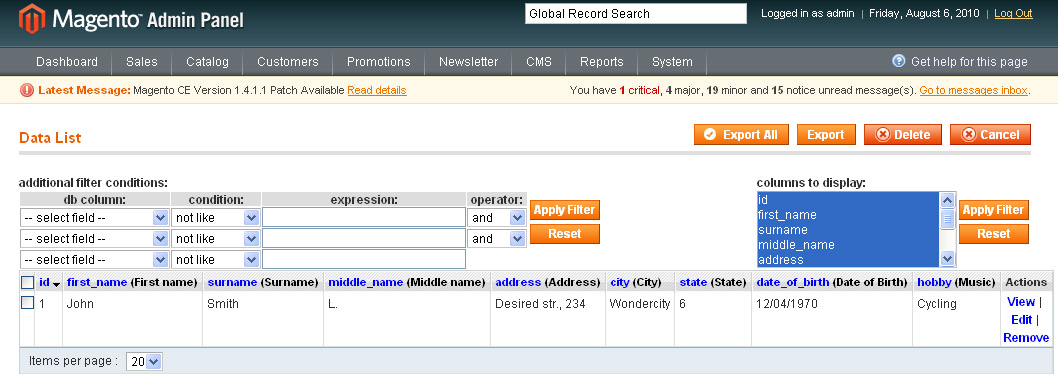
There are records’ actions. Click View action.
You can edit records, delete and export them.
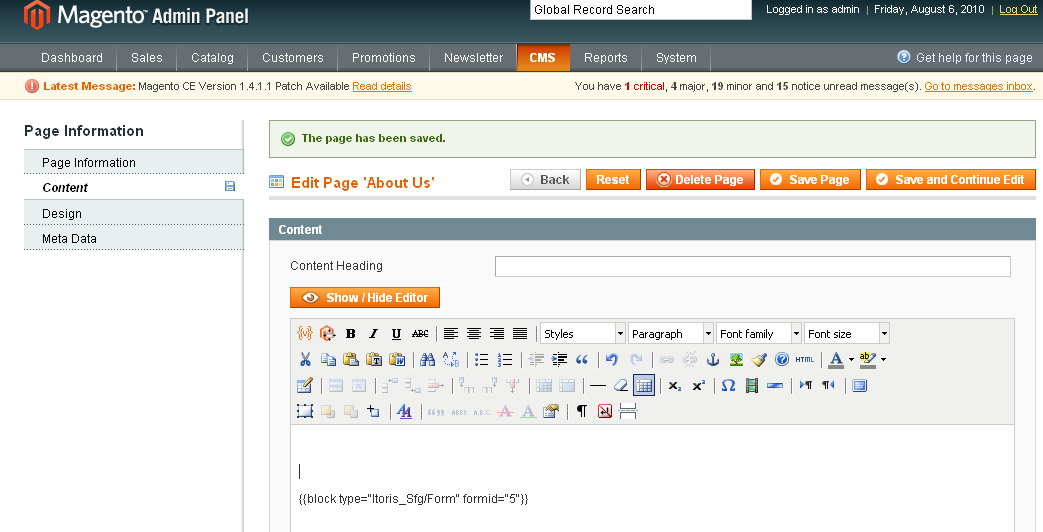
Quick start - Publish your form on websitehere are several ways to publish the form. We will add our form to About Us page. Find the page in admin area (CMS -> Pages -> About Us -> Content). We will delete its text and add our form. To add the form you will need its ID. ID is the last number in the URL. Our form’s ID is 5. Add the following tag to the content of the page
{{block formid="5"}}
and save the changes. Now open this page from the front-end. That is where your users will submit the form from.
Typical problems - I do not know how to create forms. HELP ME!Variant 1. Read Quick Start document (it is indeed very small – plenty of images and some text). Then view the video. Or vs. They will provide you with a general idea. For special cases consult User Guide (you do not need to read it all. Check the Contents and select the topic).
Variant 2. Purchase a support ticket and ask support department. We understand that it is not great fun to read Guides. Yet as answering the same very questions several times a day is very hard either. So we provide this option - either documentations or paid support.
I have created a form. Yet when I try to open it on my site – it says “The form you request is not available now. Please try again later”.
There can be several reasons:
My form does not save submissions to the DB.Check the following:
If only some of the fields are not saved and you have checked their name attributes – perhaps you have added them after you created DB association. In this case you will need to either re-generate the DB (this will delete all previous records) or to add them manually in Database Designer. For more details check User Guide.
My form does not send emails.Check the following:
If everything is set correctly there – make sure that your website sends emails at all. To do it create a new customer from admin area, enter your email address and check if you receive email notification or not.
|