Username
Password
Remember Me
Log in
Forgot your password?
Forgot your username?
Forgot your username?
|
Events Manager for Magento User Guide
PurposeThis document is a User Guide for Events Manager module for Magento. It describes how work with the extension. This module is to create events and organize them in calendar. There are several ways to display the events - monthly, weekly or daily. Features also include sorting, search as well as ability to create events block. System RequirementsThe extension works under Magento from 1.4.x and higher. The extension works with Apache 1.3.x and higher, PHP 5, Linux or IIS. The extension’s correct work is guaranteed with the following browsers:
The correct work with other Magento versions, other browsers and Apache/PHP versions is not guaranteed. InstallationAll our Magento extensions and templates are installed via IToris Installer.
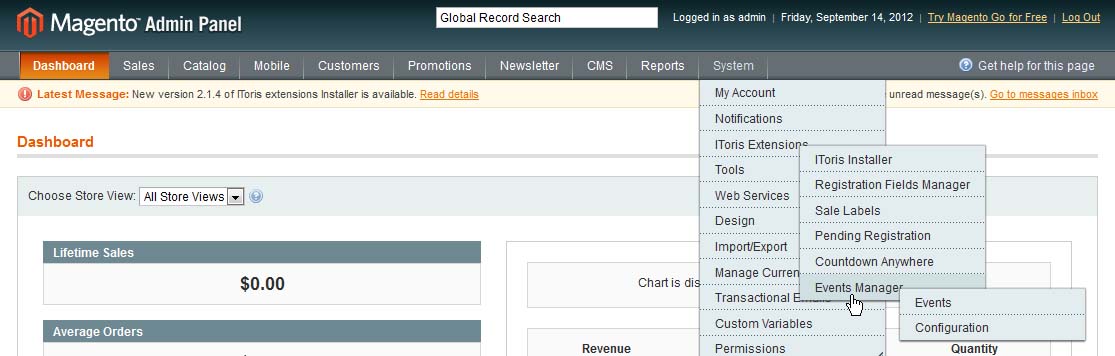
LicenseMagento modules developed by IToris are provided with 2 license types - regular and premium. Regulal license is partially encrypted. This license is website-dependent. By ‘website’ here we understand the website in Magento terms. Under one Magento installation one license key of the extension can activate all stores/storeviews. within one website. If your configuration has several Magento websites - a separate license will be required for each. You can switch the license from one domain to another – login to IToris website using the credentials you will receive after the purchase. Go to My Downloads area, find your key there and reset it from the current website. Then use it again to activate another website. Back-end. Overview
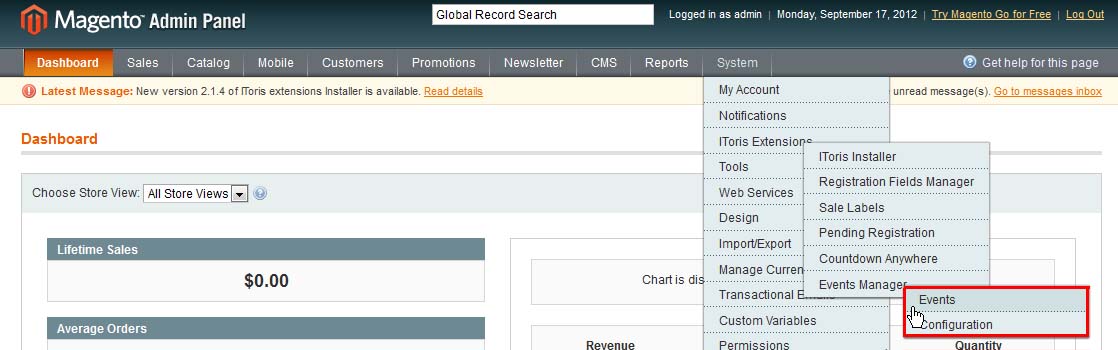
Configuration - in this area you can set the events calendar, select how it should look and function. Events - this area is for creating and managing events. Configuration
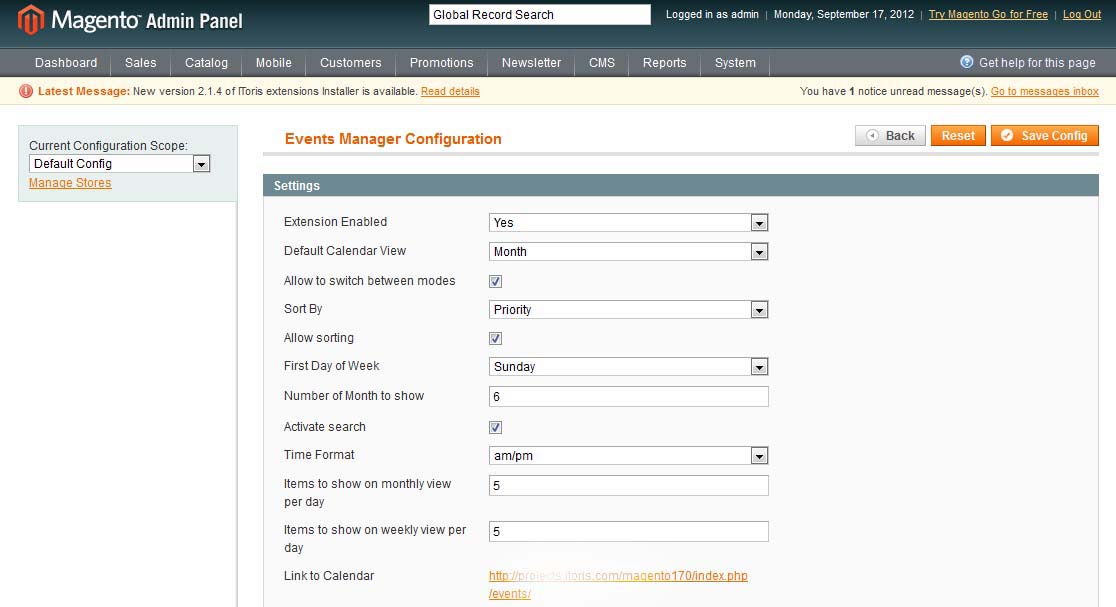
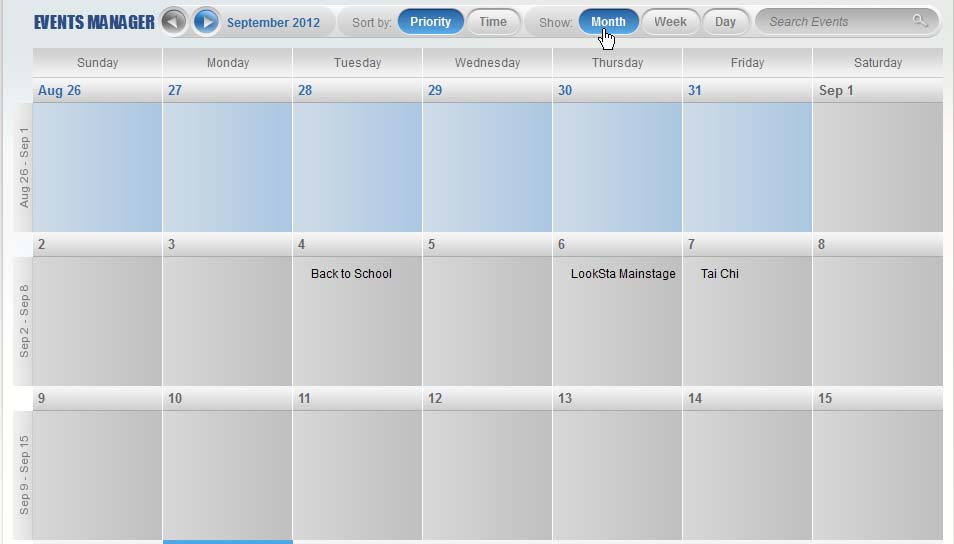
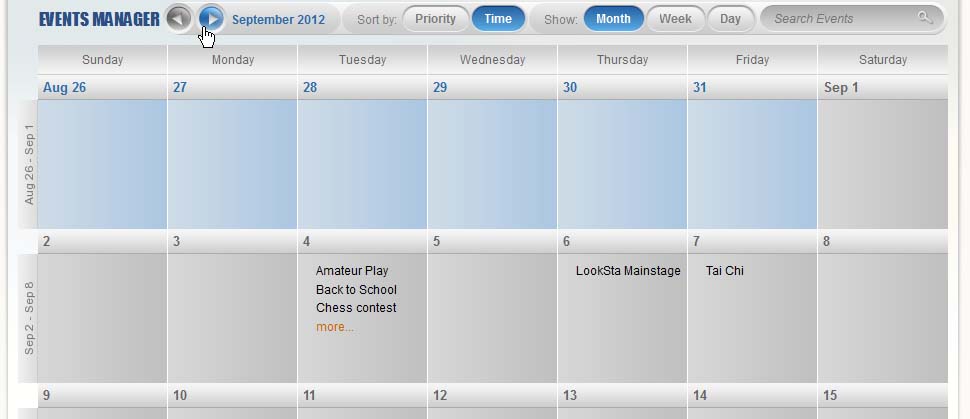
You will see the main settings of the events calendar. On the left there is ability to select if the settings should be applied to the whole Magento, to selected websites or stores. You can select different settings for different stores. To activate the module on the front-end, select Extension Enabled = yes. Link to Calendar is the direct URL where the Events Calendar is available - add it to a menu or where you want. Default Calendar View - how the events calendar will be displayed. There is ability to display it Monthly
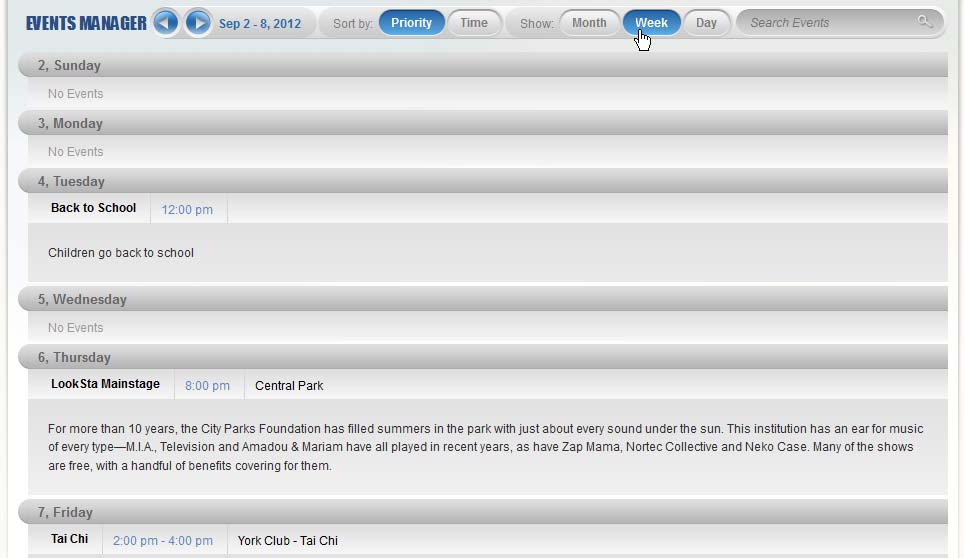
Weekly
or Dayly
If you plan to have plenty of events every day - select daily or weekly view. Otherwise select monthly view. If you select Allow to switch between modes - your customers will be able to change view from monthly to weekly to daily. If this setting is not selected - only the selected mode will be available for the customers. Sort by - there is ability to set priority for events, normal or high. This settings allows your customers sorting events out by priority or by time. Select this as a default sorting setting. Allow sorting setting - if checked, your customers can change the sorting. If not - only the selected default sorting is available. First Day of Week - select the day weeks should start from (Sunday or Monday). Number of Month to show - for which period the calendar should be available onwards. Your customers will be able to leaf through the months using back and forward arrows:
Activate search - select if you want your customers to search among events. Time Format - select am/pm or 24 h format. Items to show on monthly view per day and Items to show on weekly view per day - how many events to be shown in one day on monthly and weekly view. The rest of the events will be hidden with more…, or more events… links. Clicking the link will open up the daily view with the full list of the events.
Events
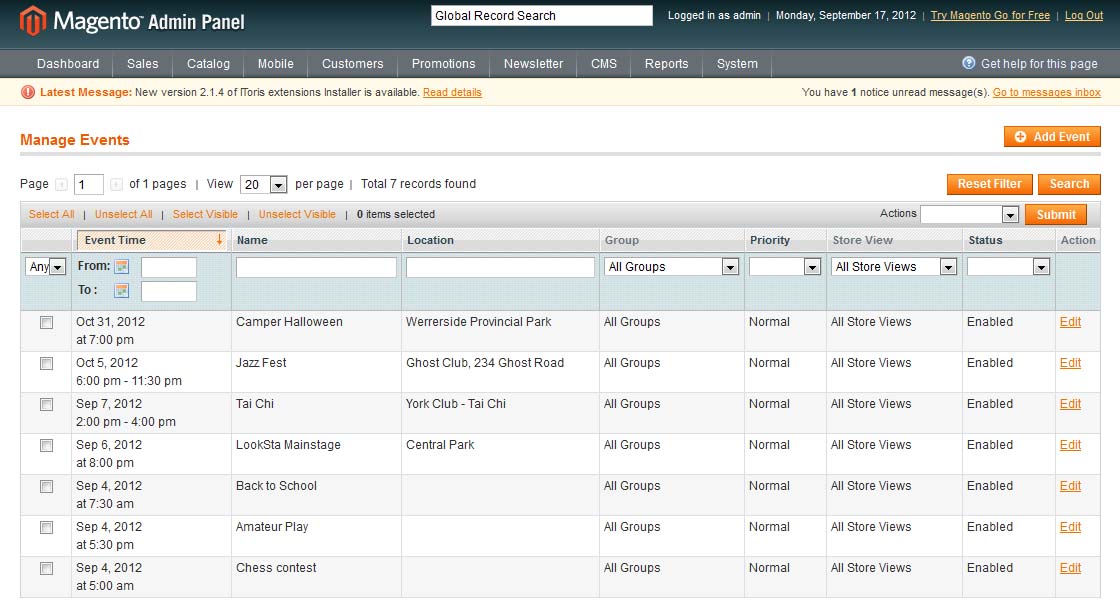
You will see the list of events, their details as well as ability to manage them and create new events. EventsCreate new Events
Event Name - the title of the event, this is how your customers will see it. The unique URL of the event will be formed based on the title as well. Enabled - events will be visible on the front-end only when they are enabled. Priority - there is ability to make some events more significant than the rest by selecting high priority for them. The default priority is normal. Event date - select the date the event will happen. Time start and Time finish - time of the event. Only start time is mandatory, you can leave finish time blank. Location - optional field. Enter a location or leave it blank. Short Description - optional area. Short description will be shown on weekly and daily modes. Details - this is the main events description that customers will see when they open the event. This area is mandatory, you can enter text, add links, insert images here. Image - upload the event’s image. This is optional Store view - select on which stores/storeviews the event should be displayed. By default all storeviews are selected. User Groups - select which customer groups will see the event and which will not. By default all groups are selected. When all data is populated - press Save button on the top right pane. Manage Events
Two bulk actions are available - change status and delete. When change status action is selected - there is additional drop-down to select the status (enabled/disabled). To change any other information of an event open it up for editing (there is Edit link in Actions column for each event). The event’s page (pre-populated with previous data) will be opened for editing. Change any data you need there and save the changes.
Events URLs
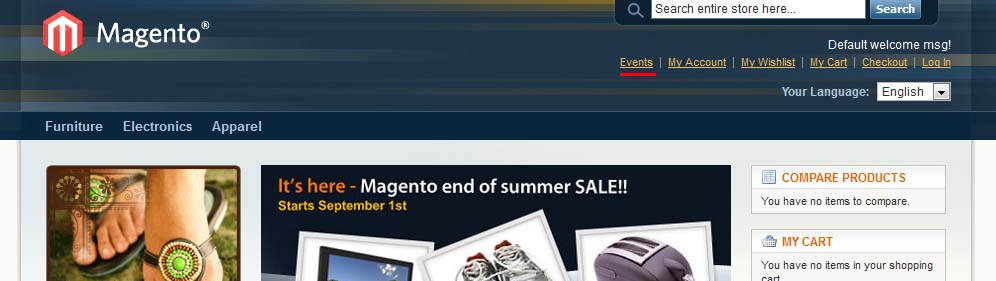
Direct URL to the events calendar can be found on System –>IToris extensions –> Events Manager –> Configuration It is formed as http://yourwebsitename.com/index.php/events This URL will open up the default configuration of the events calendar. You can switch to other modes in the calendar (month/week/day), change sorting, etc. - each new mode and change will have its own unique URL. You can open up an event’s page that will have a unique URL as well. Add Events to Customer MenuEvents calendar is available via direct URL, so you can make it available anywhere on your website. If you want to add link to the top right user menu - please follow the instruction below.
Add Events BlockIn addition to the events calendar you can add a small events block on the pages you need:
To create this block follow the instruction:
|