Username
Password
Remember Me
Log in
Forgot your password?
Forgot your username?
Forgot your username?
|
Category Banner Slider for Magento User Guide
PurposeThis document is a User Guide for Category Banner Slider extension for Magento. It describes how work with the extension. Easy management of the banner sets as well as several beautiful rotating effects for you to select make this module the must-have. Stress accent to your best products and services, make beautiful banner campaigns for your new products and attract more attention to what you sell. InstallationAll our Magento extensions and templates are installed via IToris Installer. LicenseBanner Slider is website-dependent. By ‘website’ here we understand the website in Magento terms. Under one Magento installation one license key of the extension can activate all stores/storeviews. within one website. If your configuration has several Magento websites - a separate license will be required for each.
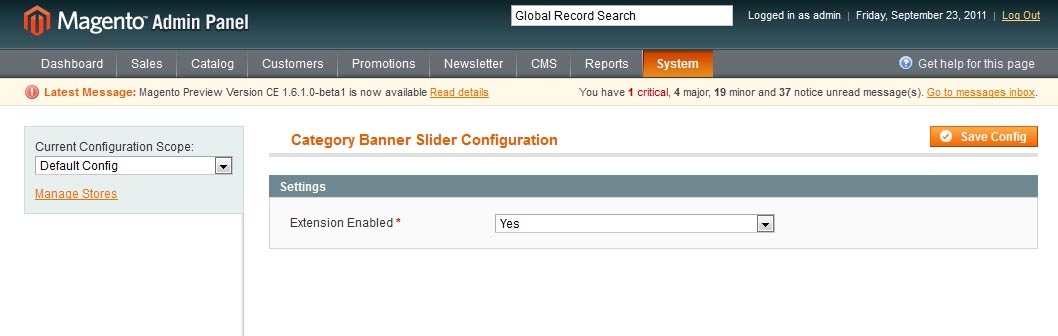
Settings
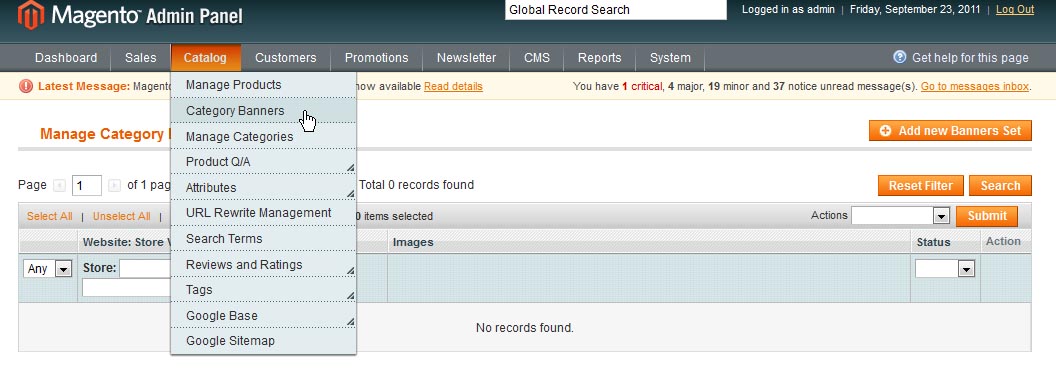
From this page you can enable/disable the extension (temporary disabling is convenient when you work under creation new banner sets). You can switch the module on/off per store. To do it select the store(s) on the top left, select the state of the module and save the configuration. One more new area is available in Catalog menu Catalog -> Category Banners.
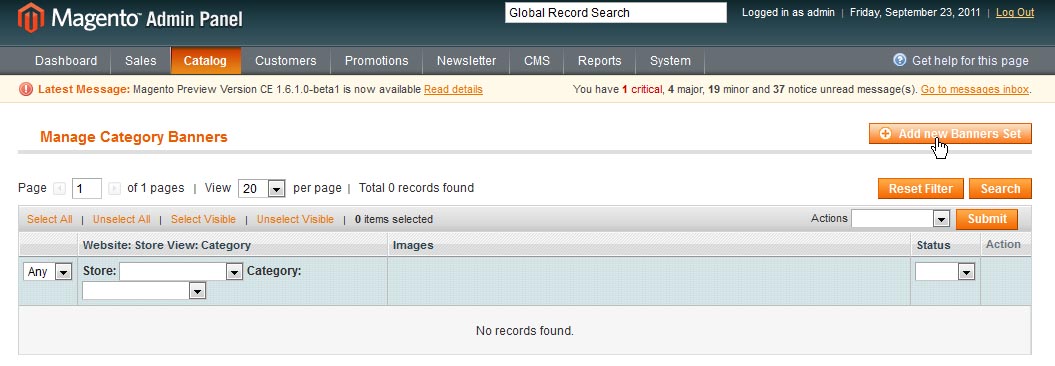
In this area you can create amd manage sets of banners.
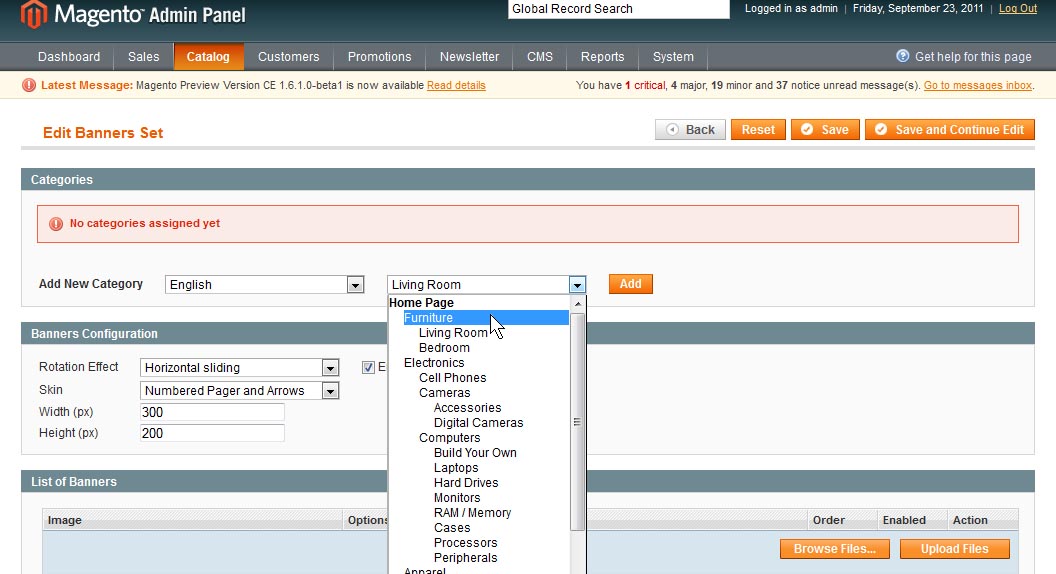
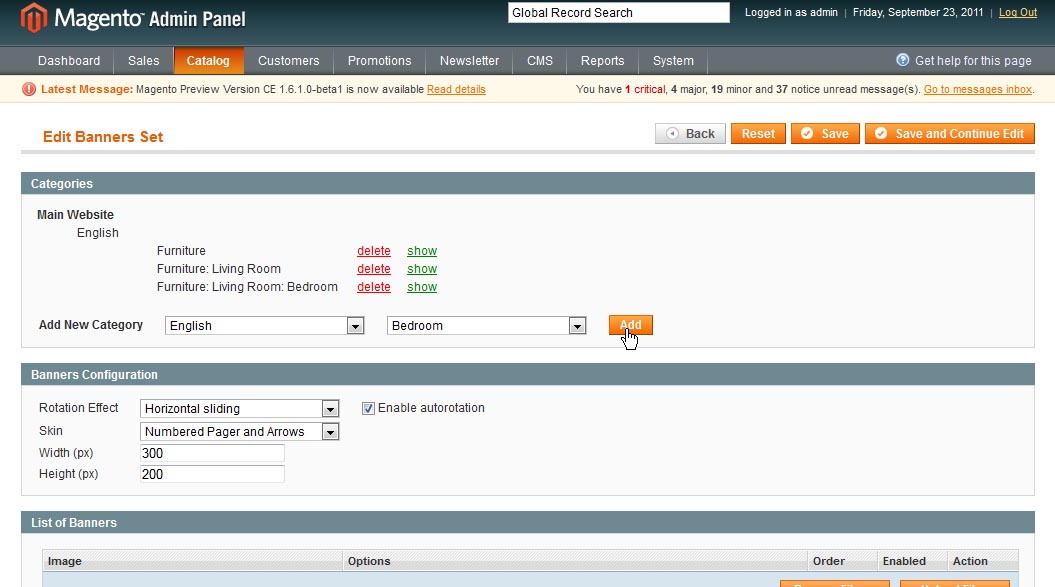
Selecting Categories
To create a new set of banners please press ‘Add new Banner Set’ button
Several categories can be selected for the same banner set. In this case they all display the same banners with the same rotation effects. To add another category press ‘add’ button. There will appear drop downs to select another store and category, etc.
You can remove as well as add new categories for the banners’ set. Pressing ‘show’ icon will open up the category page for you to preview.
Banners Configuration
The settings will vary the display of the banner set for your customers.
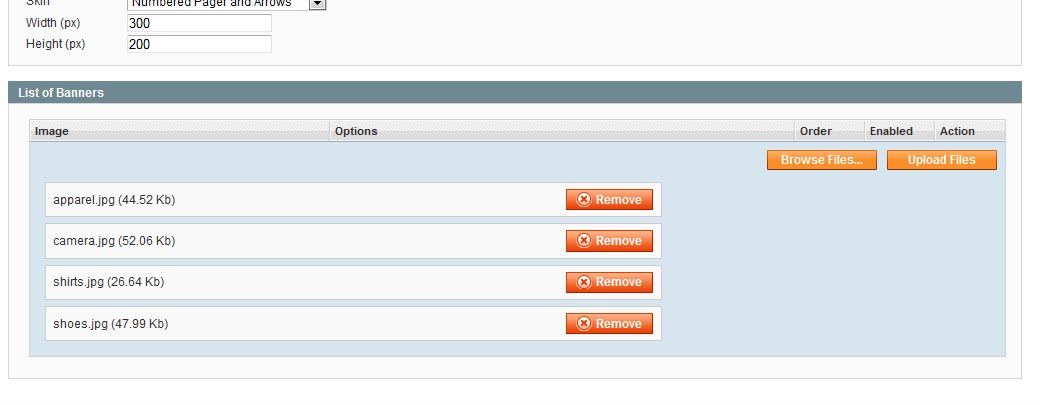
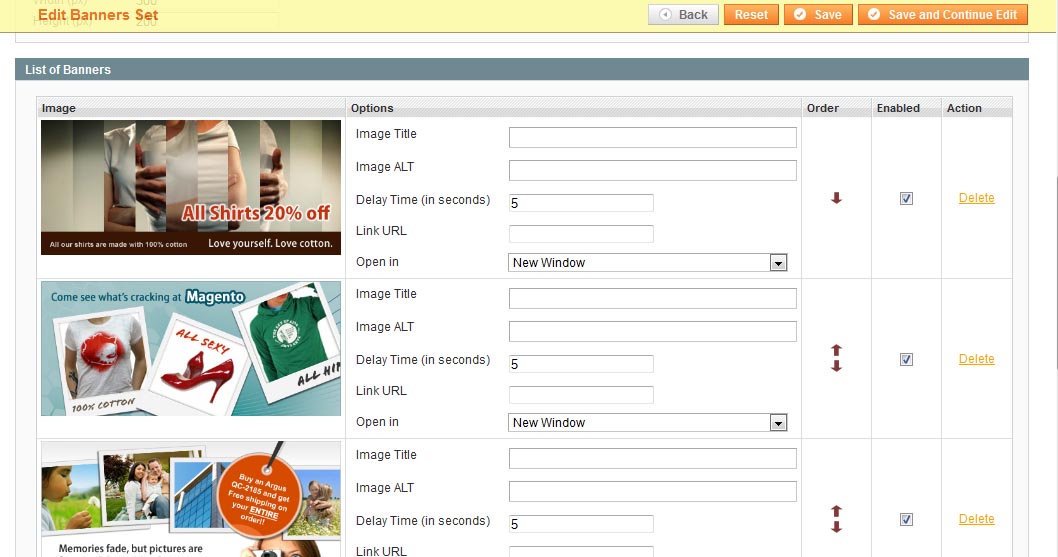
List of Banners
If you keep all banners in one folder on your local computer - you can select them all together.
Once the banners are uploaded you will see addiutional special settings as well as banners’ preview
For each banner the following settings are available:
After the categories have been selected, the settings have been chosen and the banners have been uploaded and set - save the banners’ set. You can edit it any time. Now when Catalog -> Category Banners are selected you will see all created sets with preview and general information.
Main Page Banners
Select Catalog -> Category Banners and press ‘Add new Banners Set’ button. Select a store and Home Page as a category. If the same set of banners should be displayed on all home pages of all stores, select them as well
After that select CMS -> Pages and find your Home Page in the list. In the content of the Home page add the following block: {{block type="itoris_categorybannerslider/slider" name="banner_slider" template="itoris/categorybannerslider/home.phtml"}}
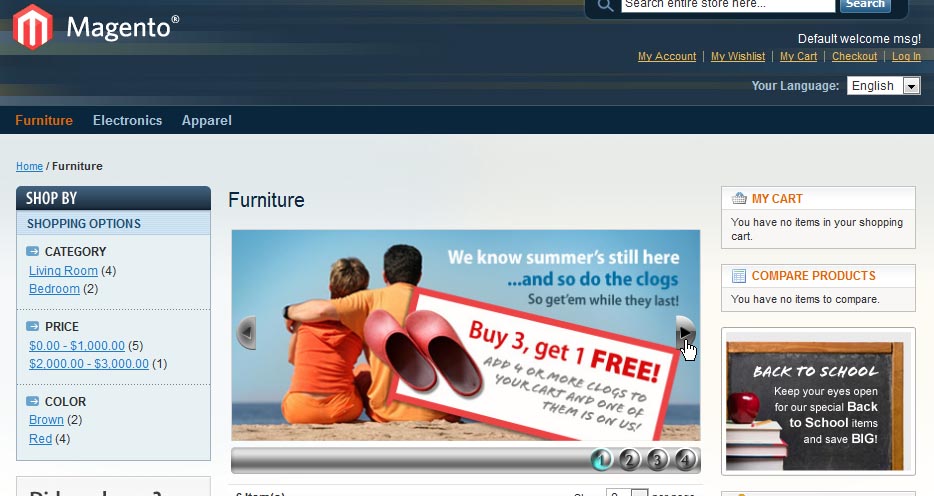
Front-End. Configuration Effects
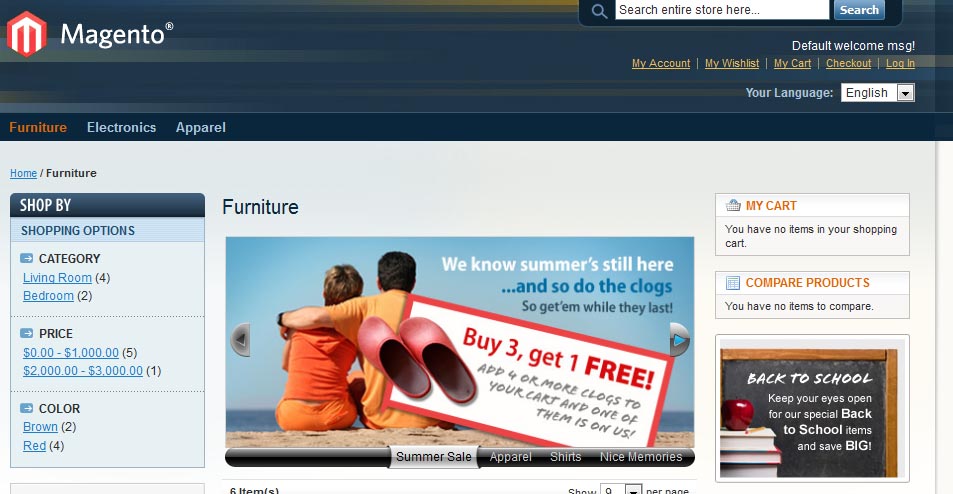
To see the rotating effects please watch our video presentation. This part will provide a general idea how the look will change depending on the skin selected. Numbered Pager and Arrows skin
This skin will add paging as well as scrolling arrows. Titled Pager and Arrows skin
With this skin instead of paging the titles you have entered will be displayed together with the scrolling arrows. Numbered Pager and Titled Pager skins are the same as above apart from the scrolling arrows that they will not have. Arrows skin will display scrolling arrows only
No Skin skin will show the banners, no scrolling arrows or paging will be shown. Please check the rotating effects and visul effects on the video.
|