Username
Password
Remember Me
Log in
Forgot your password?
Forgot your username?
Forgot your username?
|
2CO Integrator User Guide
Purpose2CheckOut Integrator is the Joomla extension for making payments from your website via 2CheckOut payment gateway. You can add default or custom “Pay” buttons to pages and modules of your site. In admin area you can manage the payments and statistics and check the real-time statuses of the payments. To use the component you will need an account in 2CheckOut system.
System Requirements2CheckOut Integrator is provided for Joomla 1.5.x native line. So that to guarantee the correct work of the component, special technical requirements should be met. They are:
Supported Browsers
Terms
How to update 2CheckOut Integrator?2CheckOut Integrator is updated manually, as the majority of Joomla extensions. To update it you will NOT need to uninstall the current version. Please download the new version and install it over the existing one. All your previously submitted data will be kept. (Joomla admin area -> Extensions -> Install/Uninstall).
SettingsTo set the extension please either open Settings submenu (Joomla admin area -> Components ->2ChecOut Integrator -> Settings)
or press Settings tab if the component is opened already.
The settings can be divided into 4 groups:
To make the component work you should have the account in 2CheckOut system. After the account is set there – you will be able to create products and invoices in 2CheckOut.
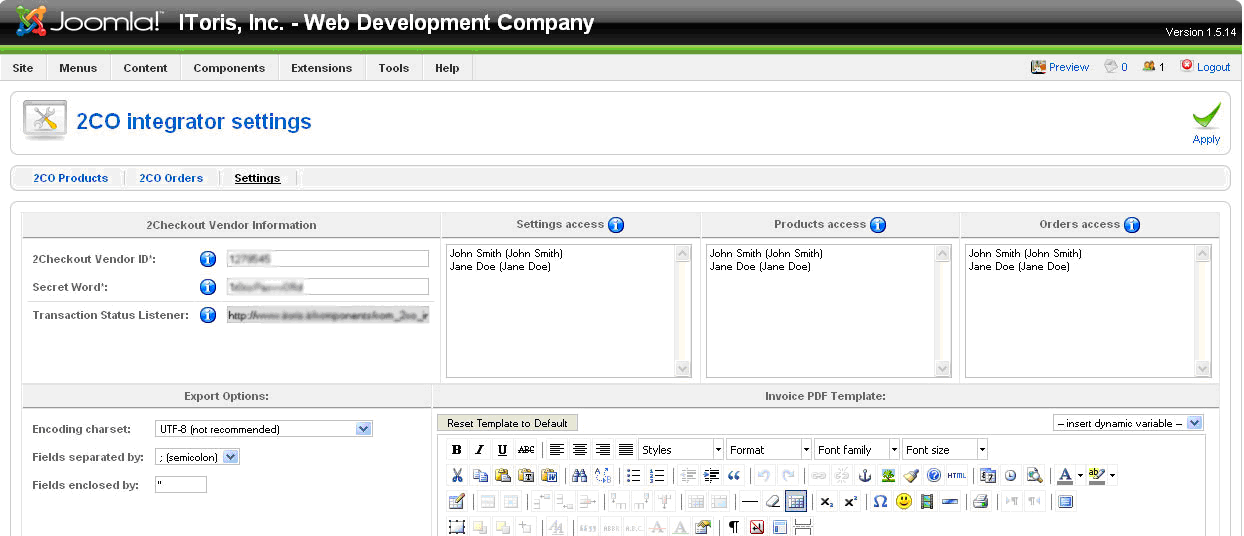
To integrate the component with your account please submit 2CheckOut Vendor Information in the settings and apply it. 2CheckOut Vendor ID is the identifier of your 2CheckOut account. Please log in to it to check and copy your Vendor ID. Secret Word is the word which is used in 2CheckOut account in the encryption of the parameters sent when the sale is completed. Please log in to your 2CheckOut account (Account -> Site Management –>Secret Word) to find and copy it. Transaction Status Listener is generated automatically. It will be used to receive and handle out the transactions from 2CheckOut account. Please open your 2CheckOut account and copy this path there (as Global URL in Instant Notification Settings) so that you are able to see all transaction statuses in the admin area of your site. After you set all these settings and apply the changes – your 2CheckOut account is connected to your website.
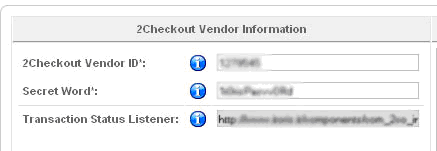
PermissionsAll super administrators will have unlimited permissions in admin are with the 2CheckOut Integrator component. Yet there is the ability to limit the permissions of administrators. There are 3 areas of access in 2CheckOut Integrator:
In each area you will see all active administrators of the site. Please select the one(s) who should have access to the area. The rest of administrators will not be able to open and manage the area. Apply the changes.
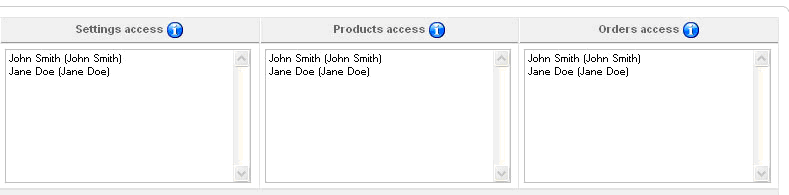
Export OptionsAll or part of the orders (purchases with the information about the buyer and the transactions’ statuses) can be exported to .csv and/or PDF. Export options should be used to set the correct encoding, separating and enclosing characters for .csv (if these are set incorrectly, you will see the mess up of information in .csv. To export the information in the structural way please select the correct settings here).
Invoice PDF TemplateSome of your buyers will need invoices. The invoice can be generated automatically in the component. To do it you will need to create the template of the invoice. The template will have design and dynamic variables. Dynamic variable is the data, which will be used during the payment (e.g. name of the product, name of the customer, price, date or purchasing, quantity of products, etc.). The template will have variables, which will be substituted by real data for each customer.
To create the template WYSIWYG is used. Here you can create the look, add images, change colors and fonts, etc. There is the ability to reset the template to default (button on the top left). On the top right there is the drop down menu, which contains all available dynamic variables. To add a variable to the template please set the cursor to the place and select the variable from the drop down. In will be added to the template of the invoice. Apply the changes when the invoice is ready.
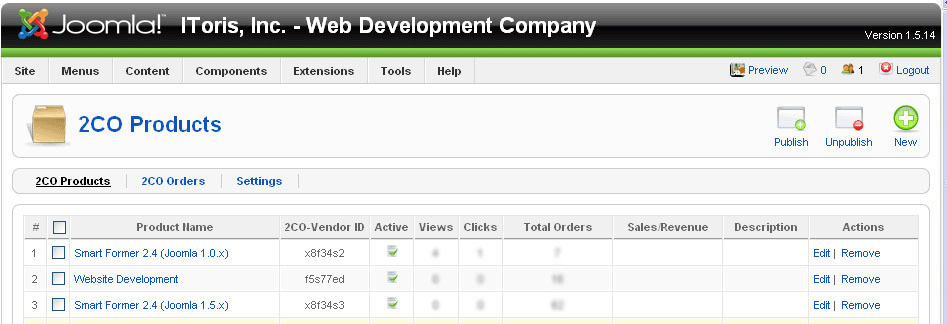
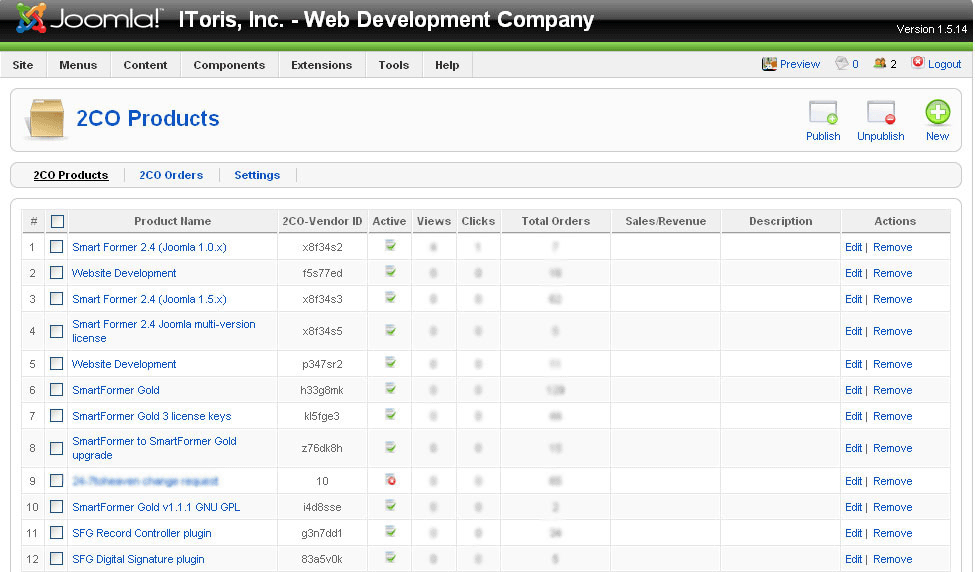
ProductsAfter the component is set, now it is the time to create the products. For your customers each product will look like a button (or several buttons) on the site. Pressing the button will direct the users to the 2CheckOut page will all data of the product inserted already. Your customers will add the payment data to the page and make the payment there. To set the extension please either open Products submenu (Joomla admin area -> Components ->2ChecOut Integrator -> 2CO Products)
or press 2CO Products tab if the component is opened already
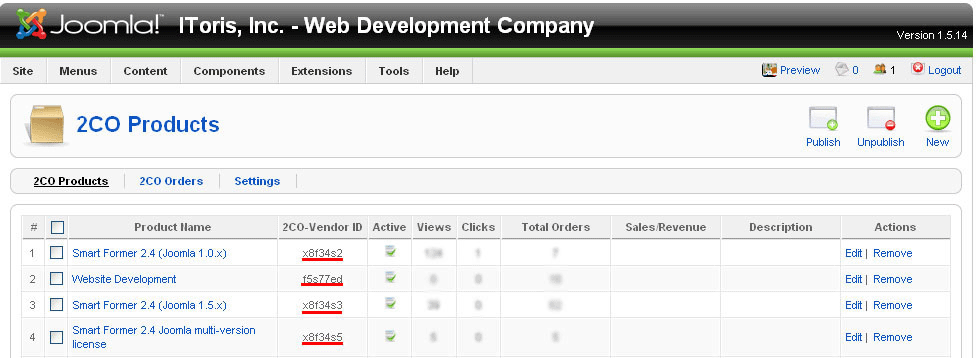
Managing ProductsWhen the Products page is opened, you will see the list of all existing products here.
You will see the products’ names, their IDs in 2CO, as well as site statistics for them (number of views and number of clicks). You can also make products inactive (they will no be available from the front end then). The products can be edited or removed from this page.
Creating New ProductsFirst of all please create the products which you want to sell in your account of 2CheckOut. Each product there will have two parameters you will need for your site:
After the product(s) is(are) ready in 2CO, please open the Products area of your site and press New button from Joomla button pane (top right). You will see the page for creating a new product.
Please add the name of your product, Vendor ID and 2CO Product ID. Chcek the checkbox to make the product published. Add a description. Each product will also have two tabs – Coupons and Events.
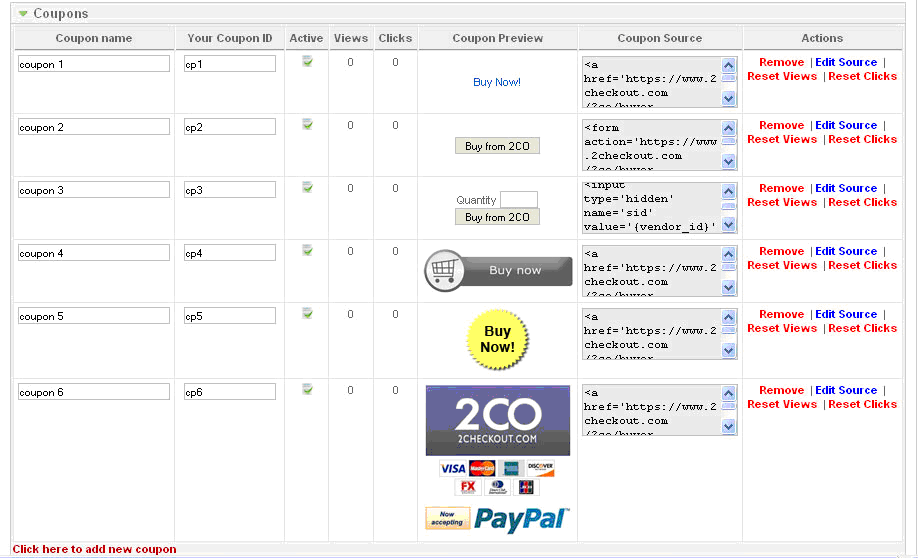
Coupons
Sometimes there is a need to use different buttons/links for the same product. To avoid creation of the same product for several times you can use coupons. When a new product is created, there is a list of default coupons available. They are set already for this product and can be used as they are. You can also create your custom coupons with your own design. The coupons are organized in the list, each having the following parameters:
If you prefer one of the default coupons – the source code if code is created for it already. When you add a new coupon – you will need to add the source code for it. The source code should be the following: <a href='https://www.2checkout.com/2co/buyer/purchase?sid={vendor_id}&quantity=1&product_id={product_id}'> <img src="http://www.mysite.com/images/myimage1.png" alt="Buy Now" /> </a> The first tag should be copied as is. The second tag should contain the URL of your image and the Alt you prefer.
If you have made some checking with test data, and now want a correct statistics with real data to be colleted – you can reset this counter. Click here to add a new coupon link at the bottom of the list will add a new coupon. Please add the source, ID and name of the coupon. Its preview will be available in Coupon Preview column.
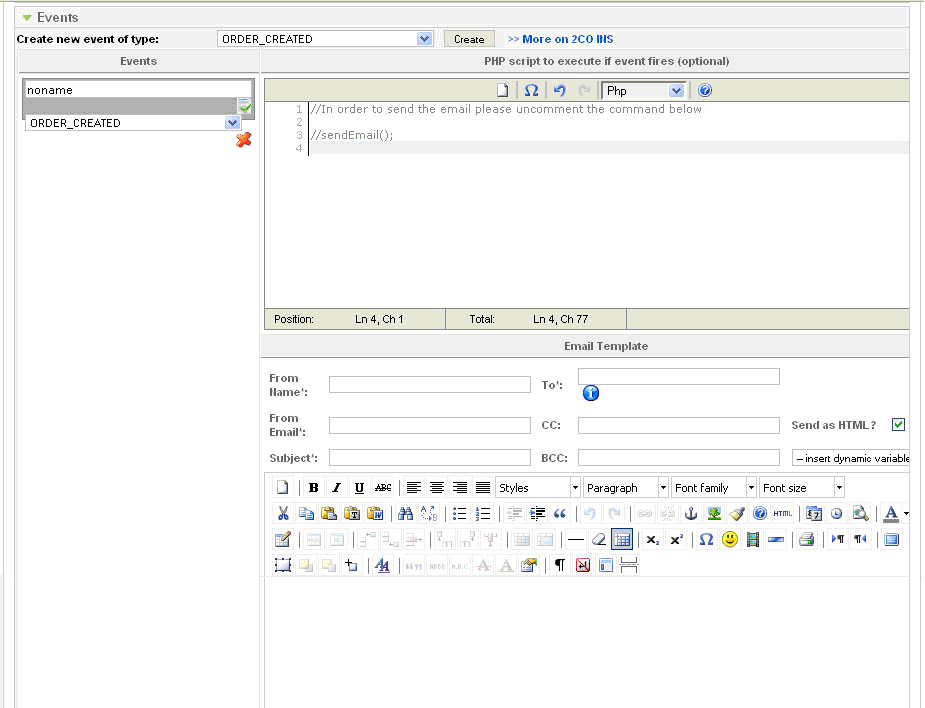
Events2CheckOut provides Instant Notifications functionality. The notifications are available on the following events:
You can create your own events on all these situations.
To create a new event please select the event from the drop down and press Create button. You will see the window to add the custom code, the WYSIWYG for email template and the input to enter the name of this new event. You can select among a number of programming languages. There is also the ability to select a new event or to delete the current one. How to send a notification event bound to an event E.g. a notification email will be sent to administrator when your product is purchased (your customer has clicked Buy button and submitted the payment via 2CheckOut). Please select ORDER_CREATED event from the drop down. Add a name to your event, create the template of the email in WYSIWYG. To create a new email template please add the design of the template to the WYSIWYG, then add dynamic variables from the drop down above the WYSUWYG icons. After that uncomment one line in the Scipt Editor (delete “//” before the sendEmail(); line). Apply the changes. Now when your customers purchase the product – the notification email will be sent to administrator.
Front-end. Adding products to siteWhen the products and their coupons are ready – now it is time to add them to the site, so that your users can press buttons/links and purchase your products. There are two options of adding coupons:
Inserting coupons to Joomla articlesYou need a page with some text about a product and ability to purchase it. So apart from the text you will need a Buy button on the page. To add the button/link to the article please do the following:
They all should have 2CO Vendor ID, which will be used as the first parameter. Please select the product you want to add to the article and insert its ID to the tag.
You will need the ID of the selected coupon as the second parameter.
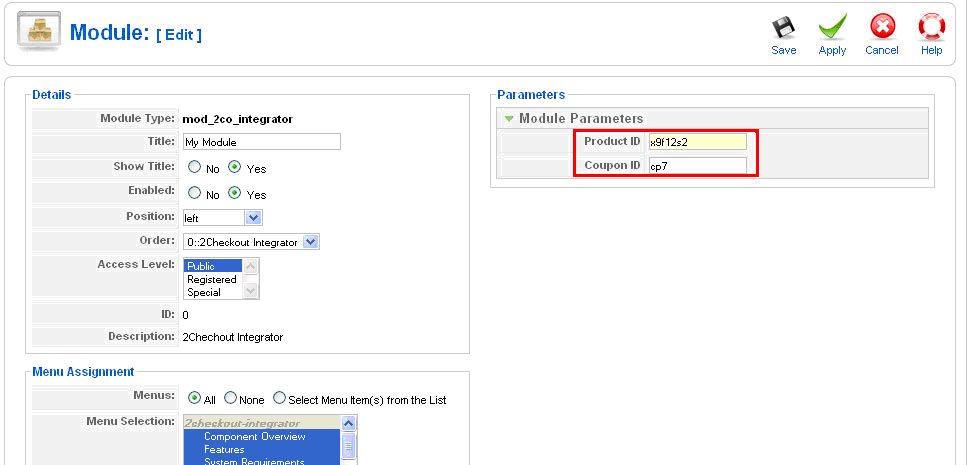
{2co x9f12s2:cp7} where x9f12s2- is 2CO Vendor ID of your product cp7– is the ID of the product’s coupon
Inserting coupons to Joomla modulesThe coupons can also be inserted to Joomla modules. To add the Buy buttons/links to modules please do the following:
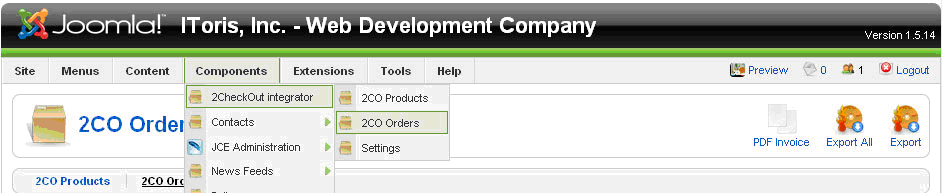
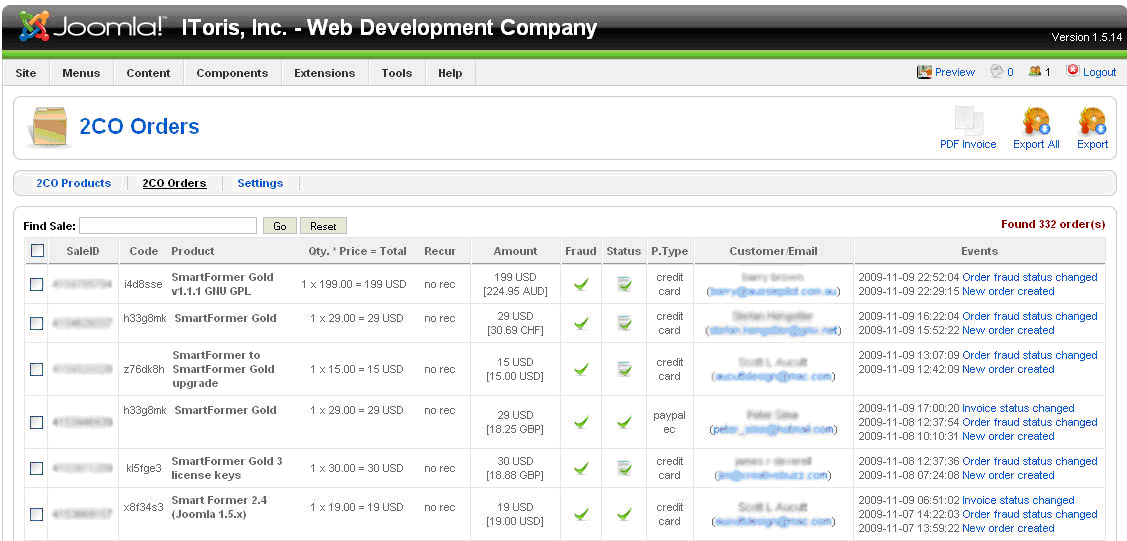
OrdersThere is the ability to manage the orders (purchases of your products or services) in 2CheclOut Integrator. To manage the orders please either open Orders submenu (Joomla admin area -> Components ->2ChecOut Integrator -> 2CO Orders)
or press 2CO Orders tab if the component is opened already
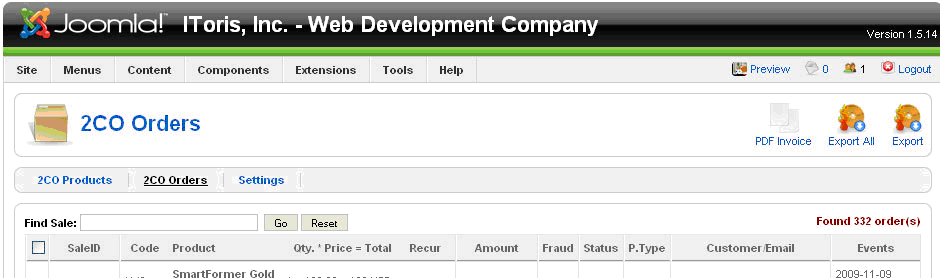
Managing OrdersWhen the Orders part is open – you will see the list of all orders available with real-time data.
The following columns are available:
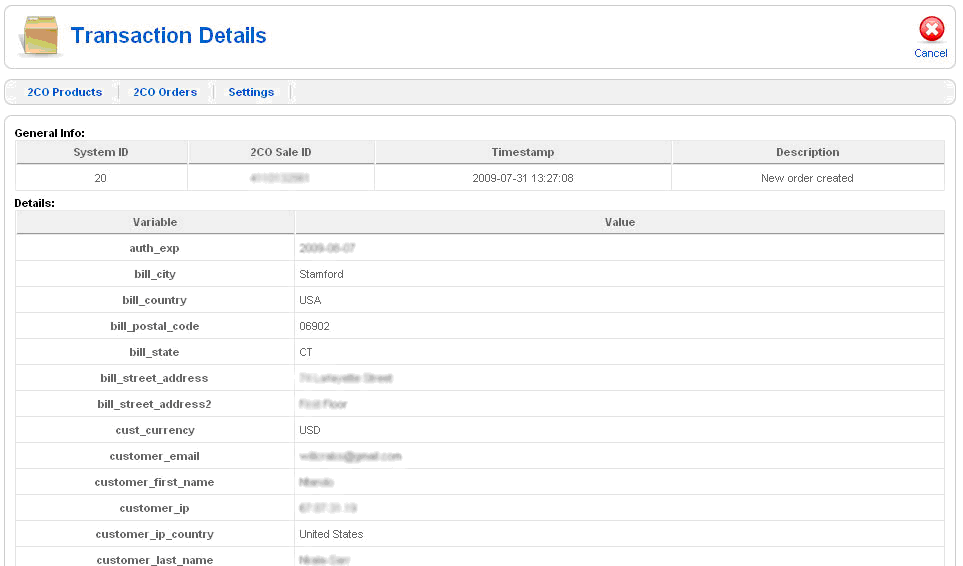
To see the details of the event (each event is the change of the order status) please click it.
All data apart from secure one (SSN, card data) will be displayed here.
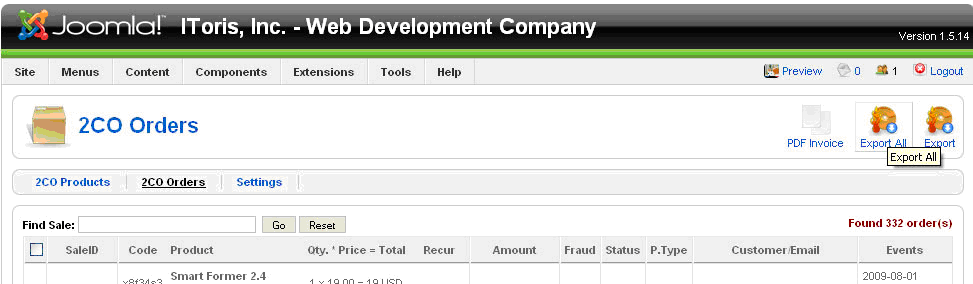
Export OrdersYou can export the orders (purchase details) to .csv file. There is the ability to export either all orders or the selected ones. To export all orders please press Export All button (top right). To export the selected orders please check them and then press Export button (top right).
Create PDF InvoicesTo create a PDF invoice please check the order for invoice and press PDF Invoice button (top right).
UninstallingThe uninstalling of 2ChechOut Integrator is applied through the standard Joomla! Uninstall process. Please choose Installers -> Components in the admin area of your web site. The Installed Components’ list contains all currently installed components. Please check the one you wish to uninstall and press Uninstall button. The component will be uninstalled.
|