Username
Password
Remember Me
Log in
Forgot your password?
Forgot your username?
Forgot your username?
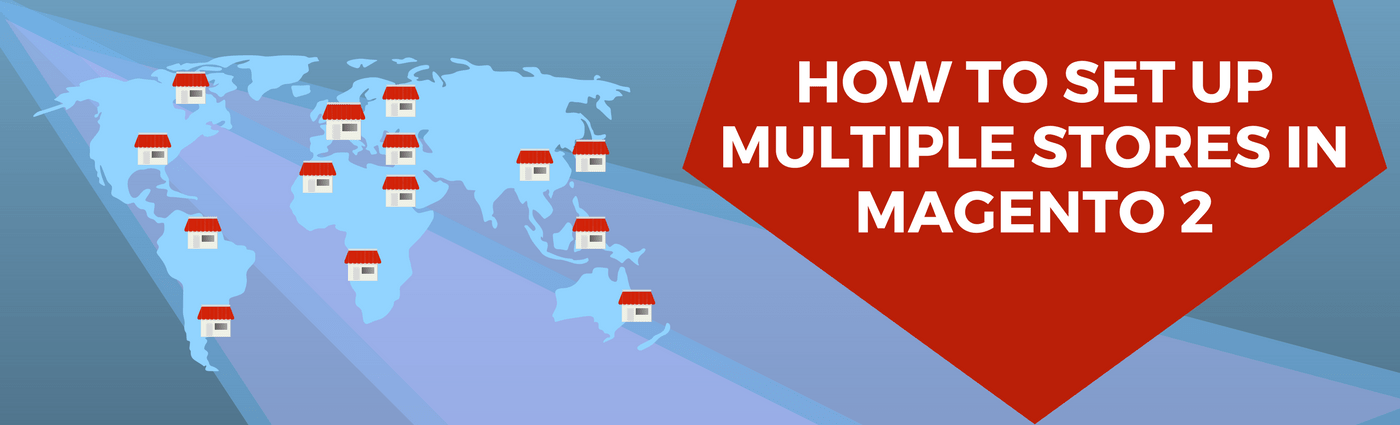
How to Set up Multiple Stores in Magento 2 |
| Magento 2 Discussion |
| Written by ITORIS Team, 2018-05-02 |
|
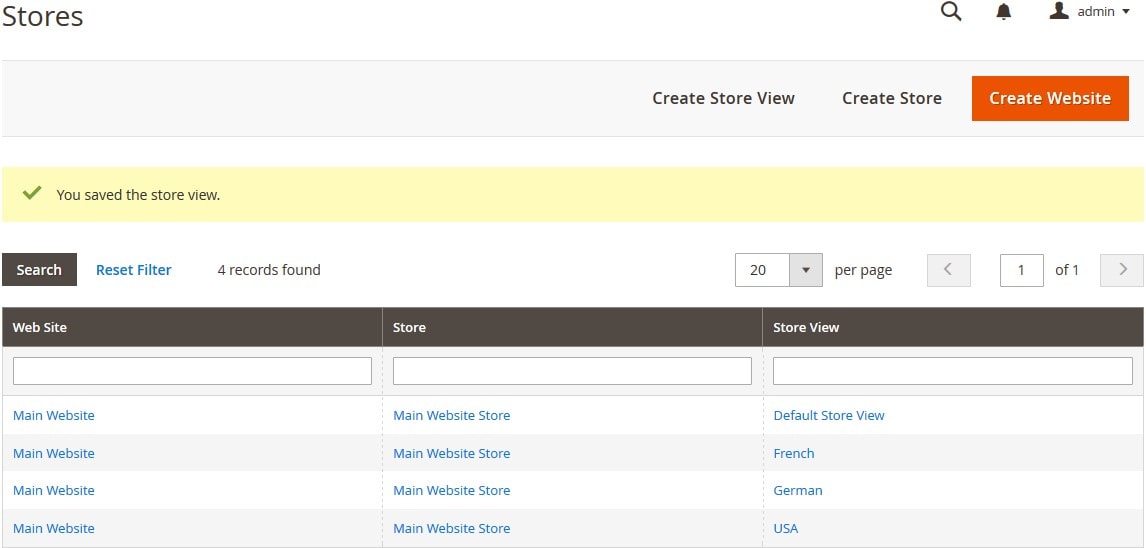
Configuring multiple stores within a single domain is one of the essential functions of the Magento 2 platform. It gives store admins an opportunity to create multiple virtual stores within a single configuration. The websites may be run either on single or multiple domains and be controlled from a single backend system. Creating a New Store in Magento 2This section will walk you through the process of creating a new store in Magento 2 so as to give site admins an opportunity of running different stores on the single domain. Step 1: Once you are logged in as Admin, go to Stores → Settings→ All stores; Step 2: Choose to Create Store; Step 3: Fill in all the Store Information and hit the Save Store button. Below is a screenshot on how these stores look like in tabular form:
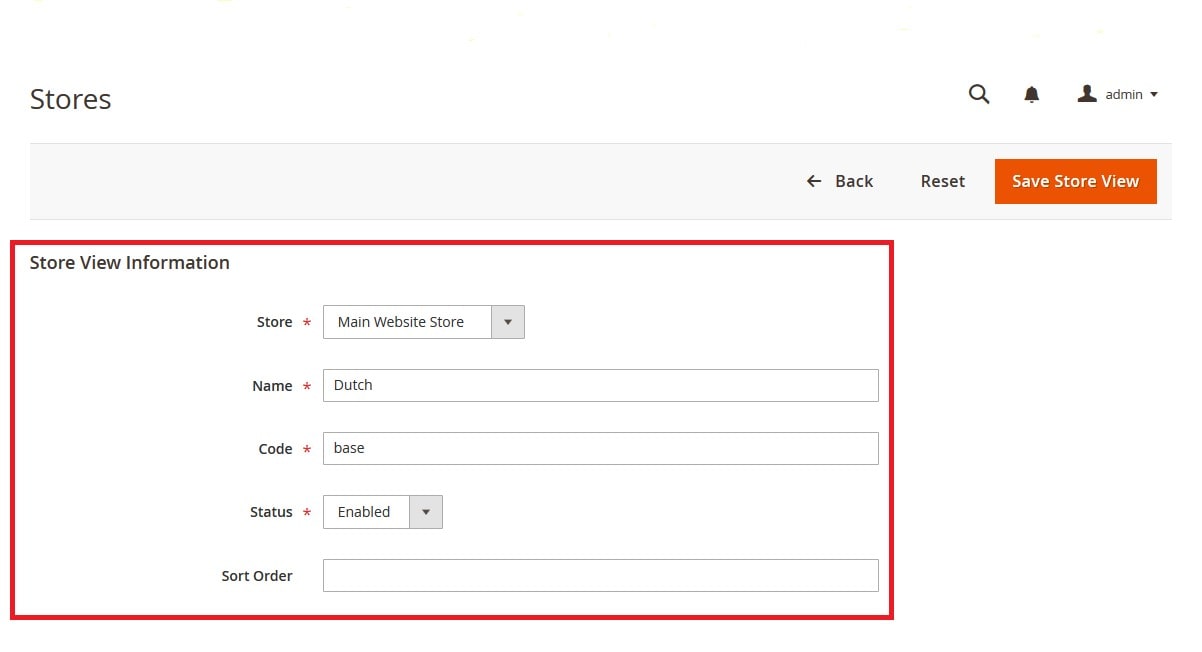
Creating the Default Store View in Magento 2This section is dedicated to showing you how to create the default store view in Magento 2 so that you can display different versions of the site depending on the language, currency or a geographical region your users may be associated with. Step 1: Once you are in the All Stores section of your Magento’s Admin account, click the Create Store View button; Step 2: Fill in all the Store View Information and choose to Save Store View.
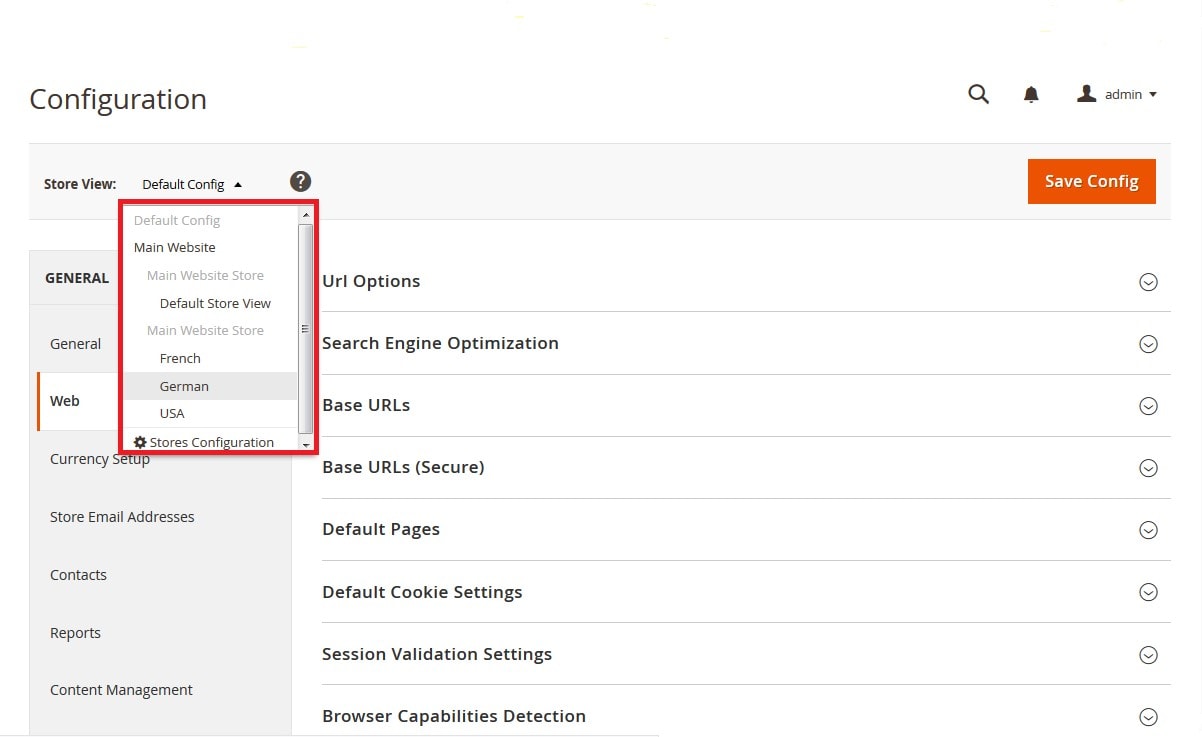
Configuring the Store URL in Magento 2Finally, let us go through the process of setting up multiple URLs which can give website admins an opportunity to place their stores on the different domains whenever necessary. Step 1: Navigate yourself to Stores → Settings → Configuration; Step 2: Go to the section called “Web” which you can find on the General tab located on the left-hand panel; Step 3: Select the store we’ve added in the first section of this tutorial and confirm scope switching by clicking the OK button;
Step 4: Expand the Base URLs section and uncheck the Use Website option for every single field you want to set your own values for. Change the Base URL with the one you would like to use.
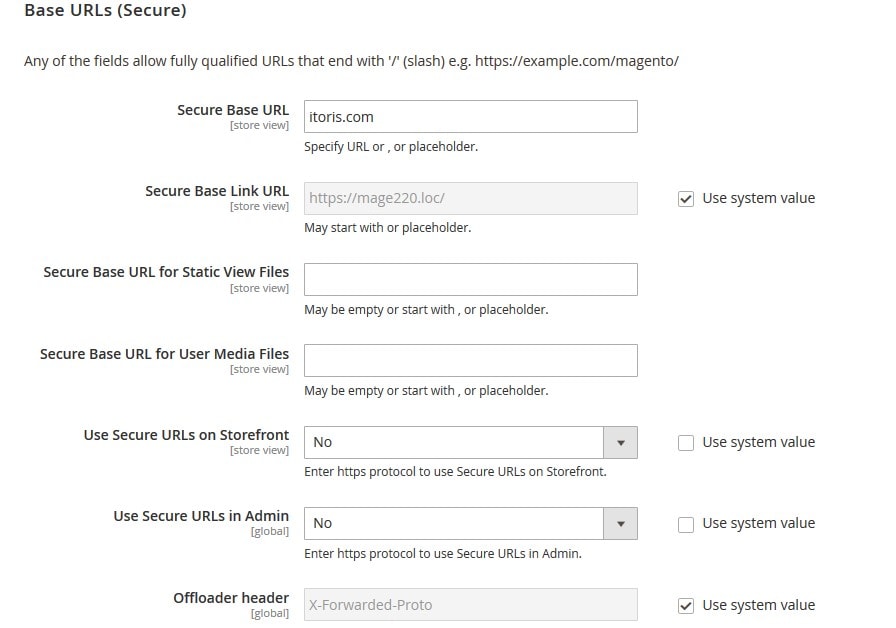
Step 5: If you require a Secure URL, don’t forget to check out the Secure Base URLs menu section below, fill in all the necessary form fields and hit the Save Config button at the end of the process.
|