Username
Password
Remember Me
Log in
Forgot your password?
Forgot your username?
Forgot your username?
How to manage newsletters in Magento 2 |
| Magento 2 Discussion |
| Written by ITORIS Team, 2018-06-08 |
|
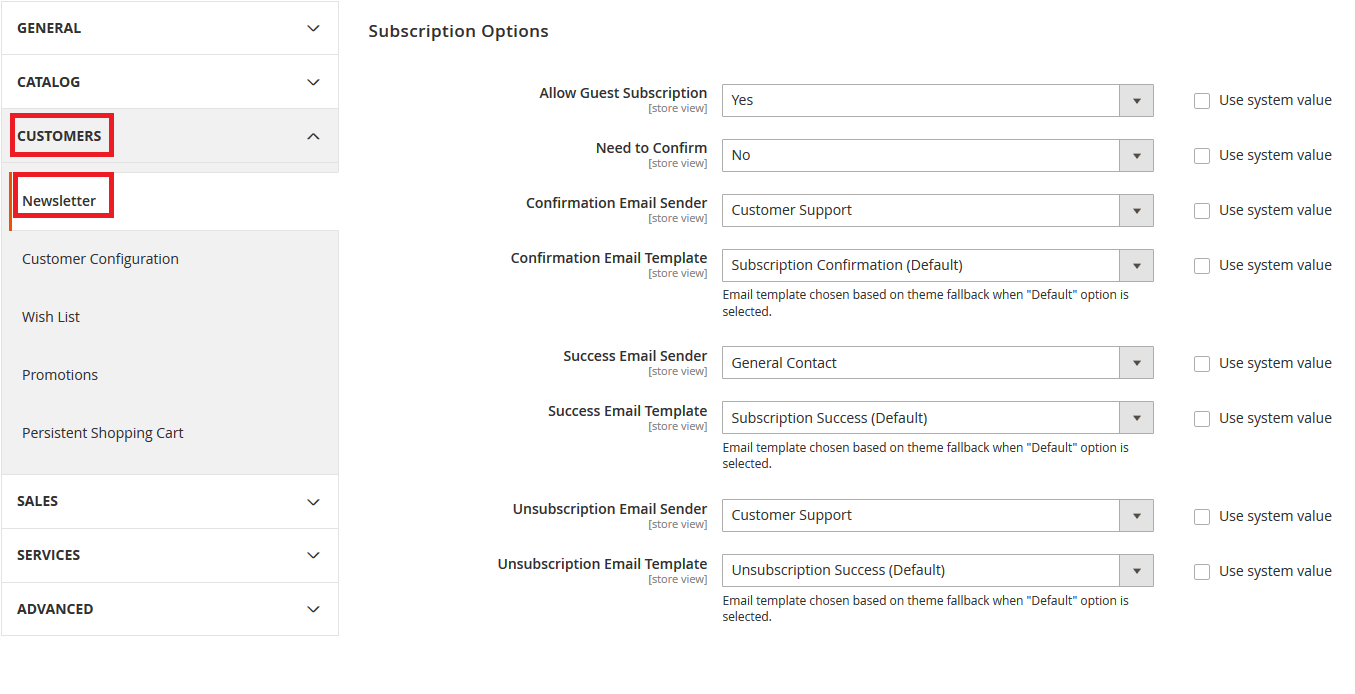
Electronic newsletters are electronic publications with a particular topic of interest that may be regularly produced and distributed electronically by a certain company. They are considered to be one of the most effective ways to inform customers about the current and future product promotions. Magento 2 platform gives site admins a unique opportunity to configure and distribute electronic newsletters to certain subscribers, manage their respective user list and analyze newsletter problem reports. Creating newsletters in Magento 2In order to create a newsletter in Magento 2, you’ll need to go through the following steps: Step 1: Login to your Magento 2 Admin account and proceed to Stores→ Settings → Configuration. Expand the “Catalog” tab and open the section called “Newsletter”; Step 2: Fill in all the necessary fields, including Success Email Sender, Unsubscription Email Sender and Confirmation Email Sender:
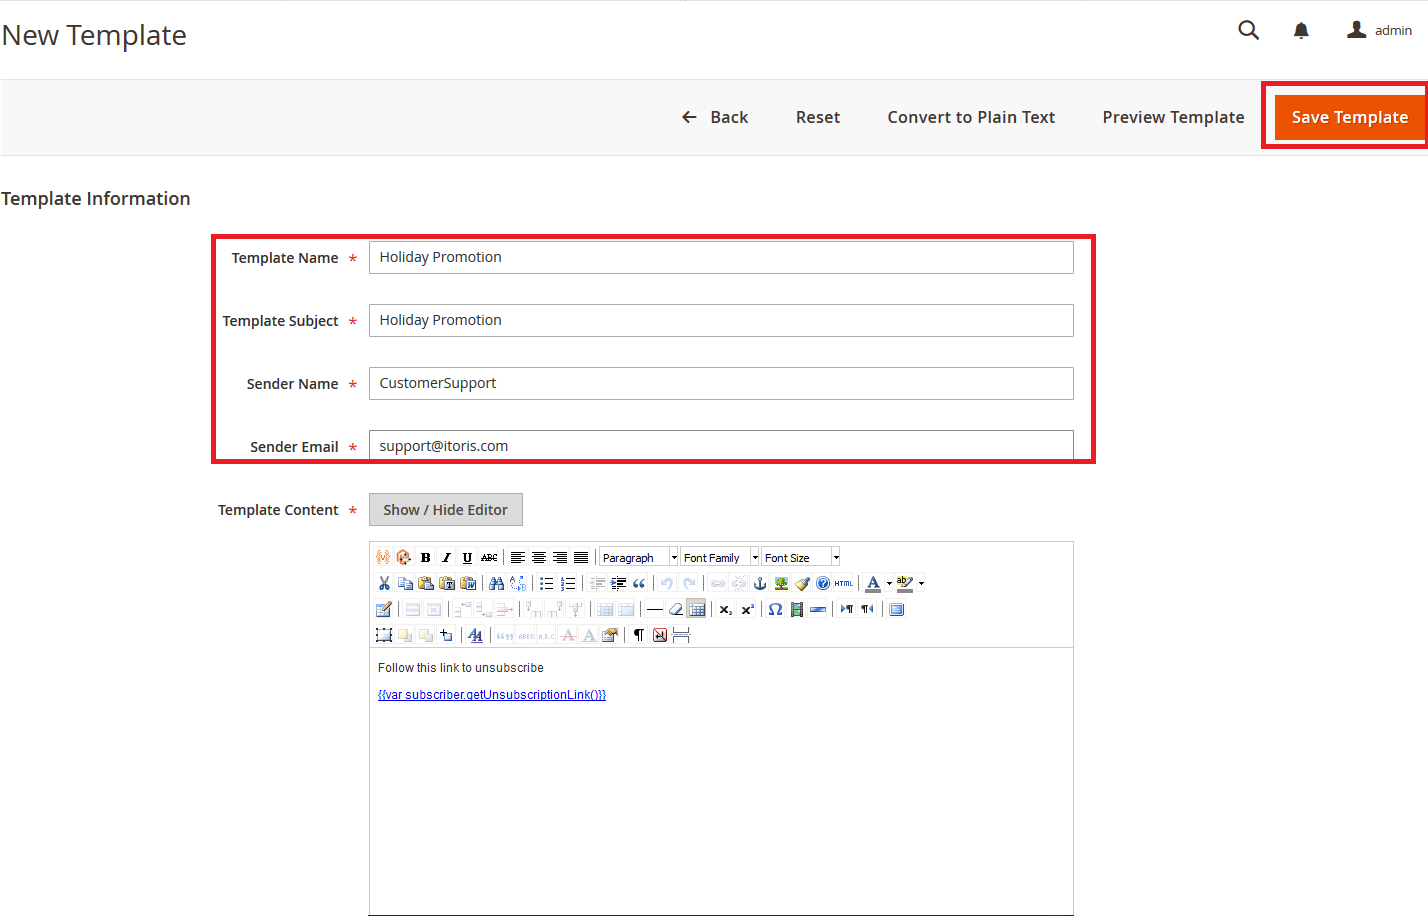
Set the value of Allow Guest Subscription field to “Yes” if you want to allow guest visitors to get an access to your newsletter. Similarly, choose “Yes” in the Need to Confirm field if you would like your customer to confirm the actual newsletter subscription process. Press the Save Config button once the final selection is made. Sending newsletters in Magento 2Step 1: Go to Marketing→ Communications → Newsletter Templates. Step 2a: Click the Add New Template button to start creating a new template. Fill in all the required information, including Template Name, Template Subject, Sender Name, Template Content and hit the Save Template button:
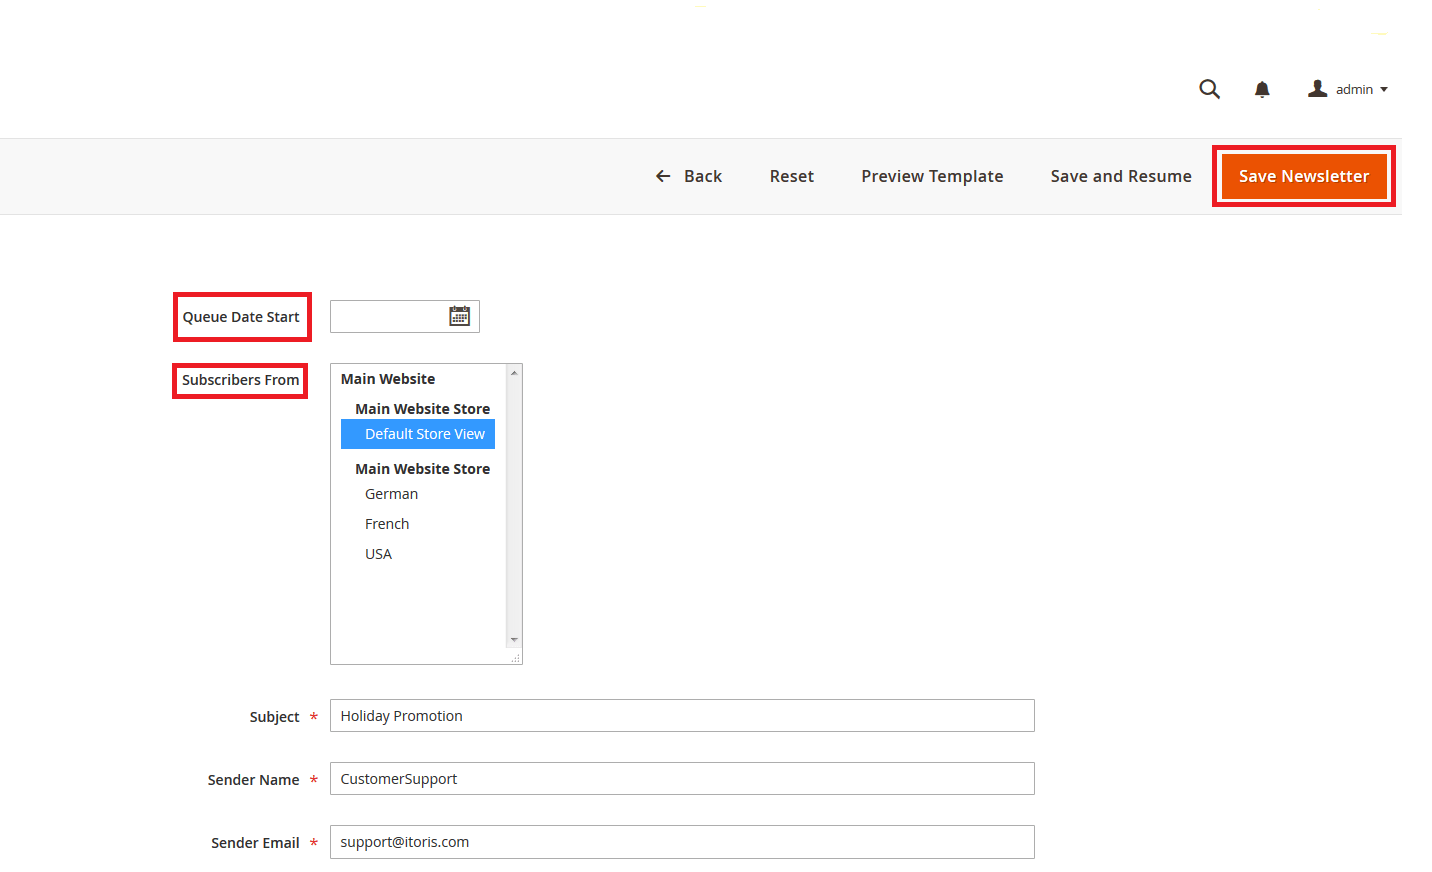
Step 2b: Similarly, select the existing template if you’ve already created one in the past, open the drop-down window of the corresponding column called Action and choose to Queue Newsletter. The new window should open up. After that, you are required to choose the value for Queue Date Start and use the Subscribers From field to specify the group of subscribers you want to send the newsletter to:
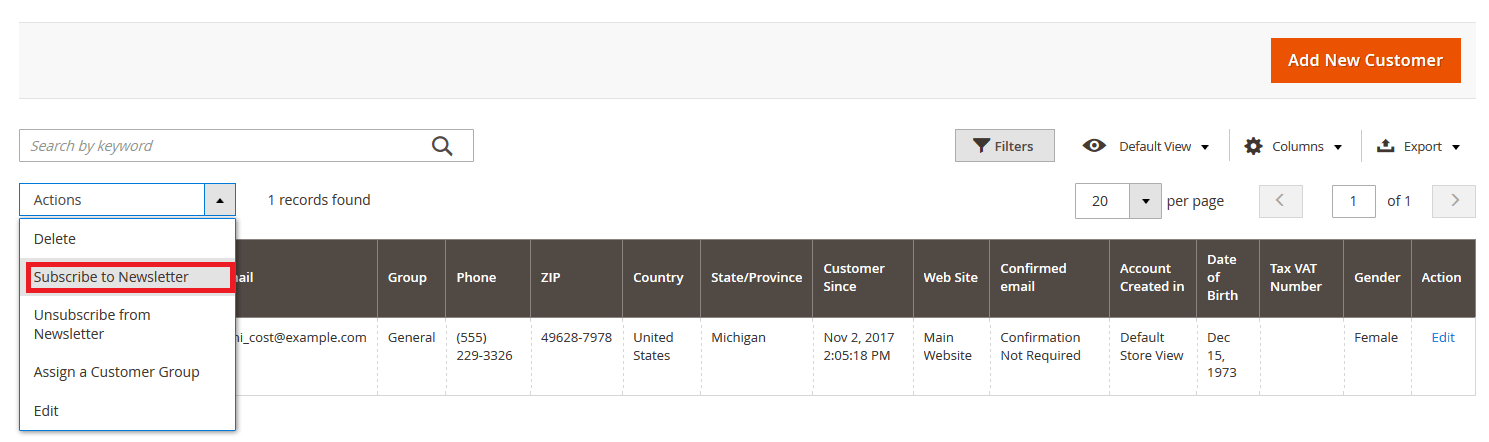
Managing subscribers in Magento 2Apart from configuring and sending newsletters in Magento 2, there is also a possibility of managing your newsletter subscribers directly from the Admin panel. To take advantage of this feature, you’ll need to go to Customers→ All Customers. Select the customer(s) you would like to subscribe to your newsletter, open the drop-down window called “Actions” and choose the Subscribe to Newsletter option:
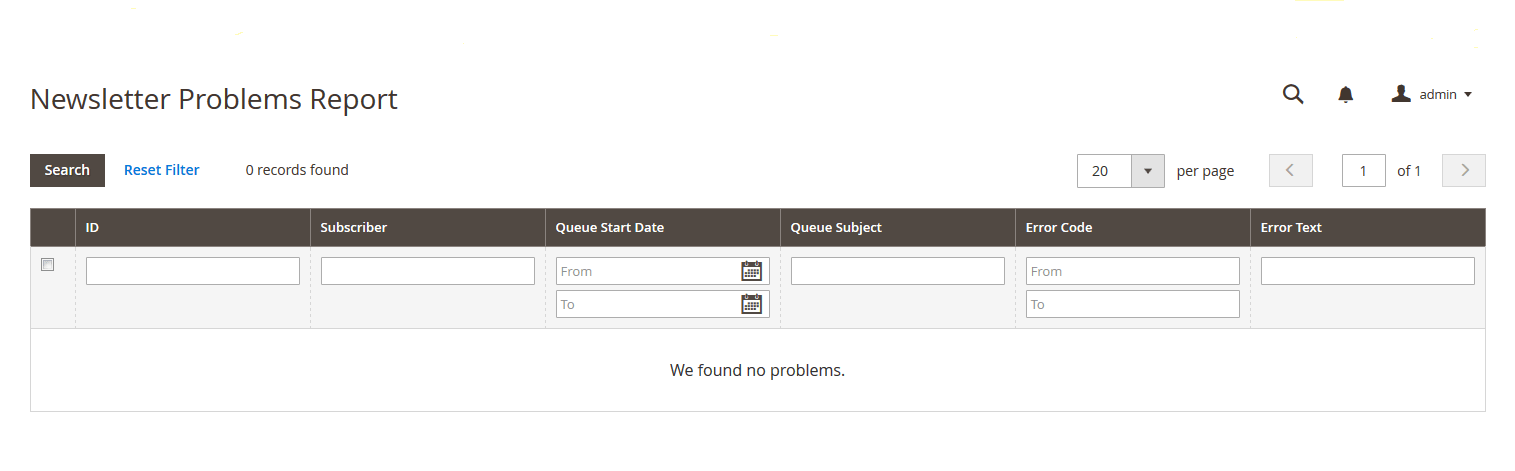
To unsubscribe users from your newsletter, you’ll need to choose the Unsubscribe from Newsletter option accessible from the same drop-down window. Checking newsletter reports in Magento 2Finally, let us look at the Newsletter Problems Report, which will give an up-to-date information about your newsletter campaigns. To do that, you need to go to Reports → Newsletter Problems Report. This section will contain the date/time, the error number and email content of the newsletters that you are working on:
|