Username
Password
Remember Me
Log in
Forgot your password?
Forgot your username?
Forgot your username?
How to install Magento 2 extensions from Magento Marketplace |
| Magento 2 Discussion |
| Written by ITORIS Team, 2018-05-28 |
|
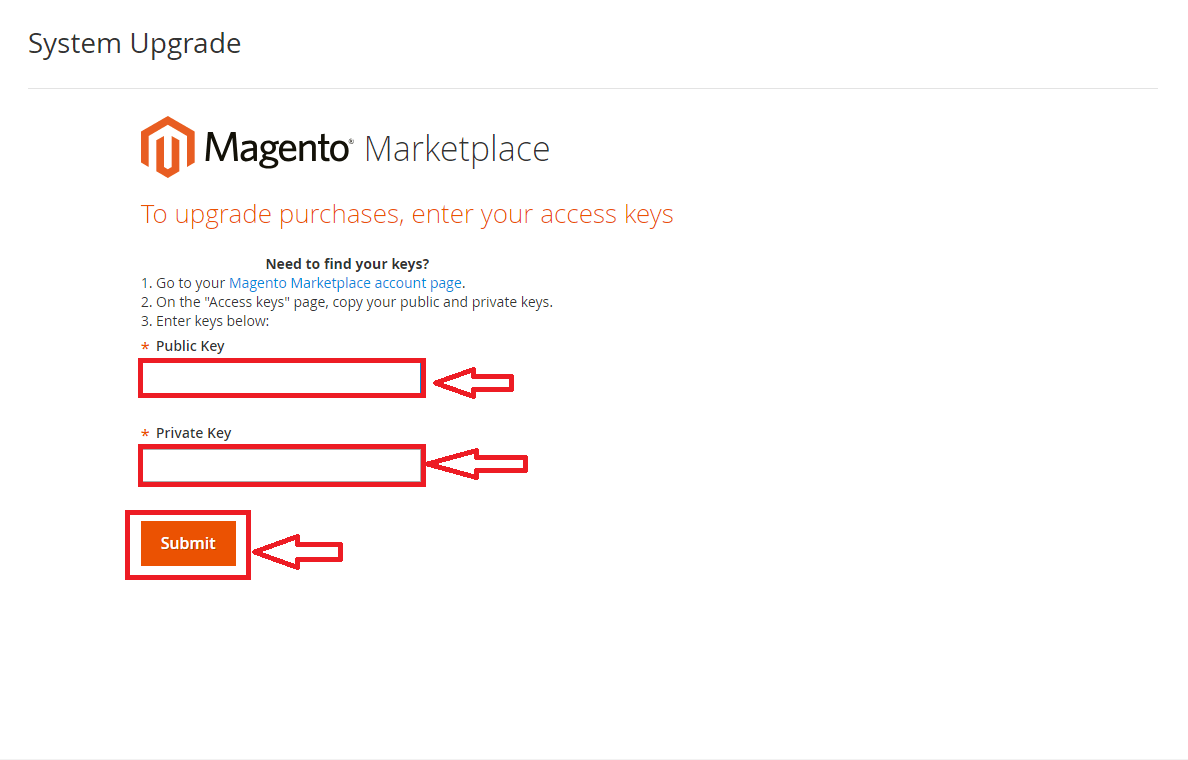
The high degree of customization is one of the main reasons why Magento is such a popular E-Commerce platform. An instant ability to install and update extensions with just a few clicks of the mouse will give your website an important competitive edge over the ones of other companies in the same market. How to install extensions from Magento MarketplaceTo install a new extension from Magento Marketplace, you’ll need to login into your Magento 2 Admin account and proceed through the following steps: Step 2: You should find yourself on the sign in page where you’ll be requested to provide your personal Public Key and Private Key. The latter two can be obtained from your personal Magento Marketplace account page, accessible via Marketplace → Access Keys section. Once you have his information, enter both keys and click the Submit button:
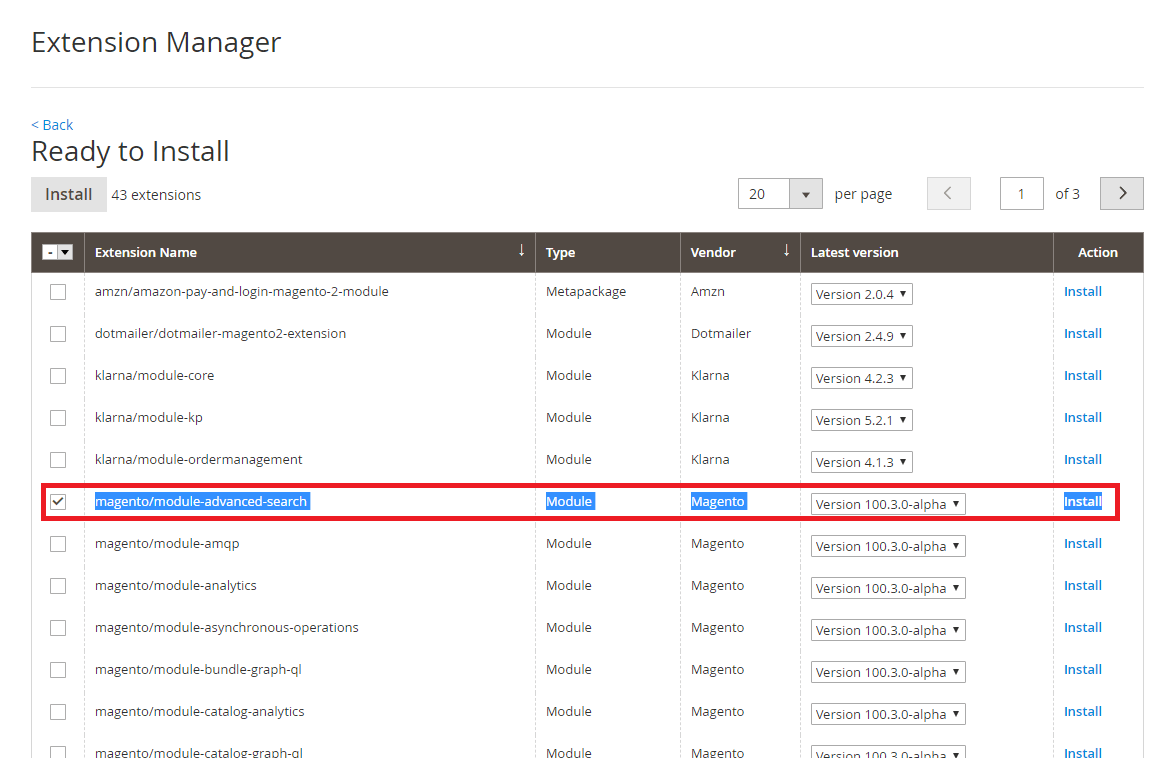
Step 3: The next page will display the number of extensions you can update and the number of ones you can still install. By scrolling the page down you will be presented with an overview of the extensions which you can either update or uninstall. In our example, we will click the Review and Install button to install a new extension called Advanced Search Module by clicking the Install button on the right side of the page:
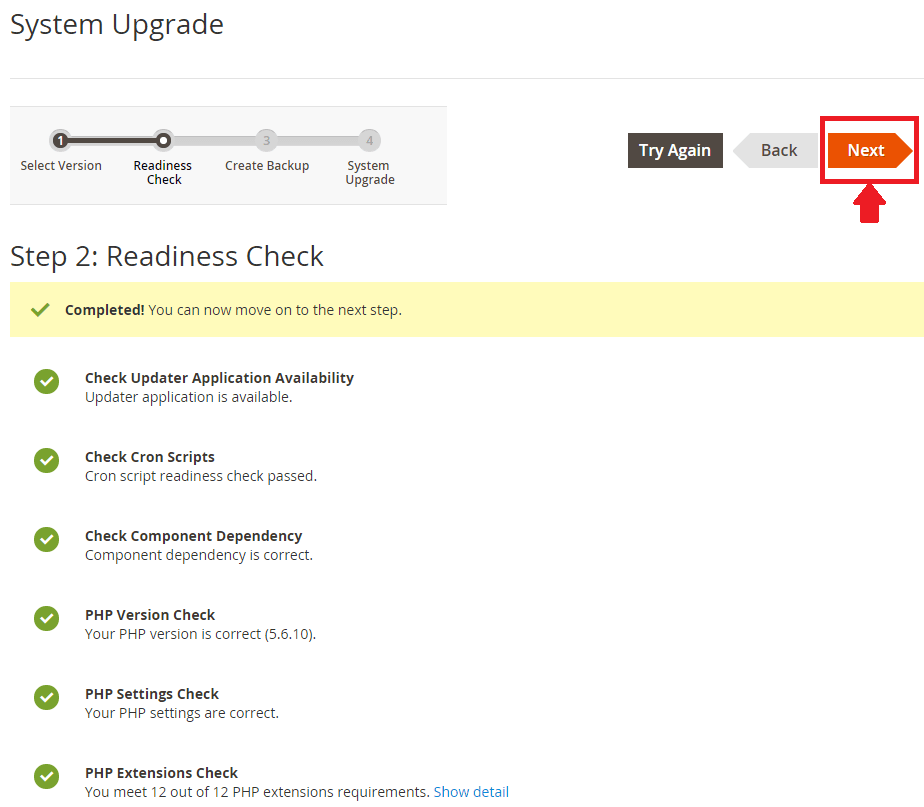
Step 4: Next, you’ll have to go through the Readiness Check to make sure that the extension has all the necessary components to be installed on your computer. Click the Start Readiness Check button in order to carry on with the process:
Step 5: After the Readiness Check is complete, click the Next button to go to the next step:
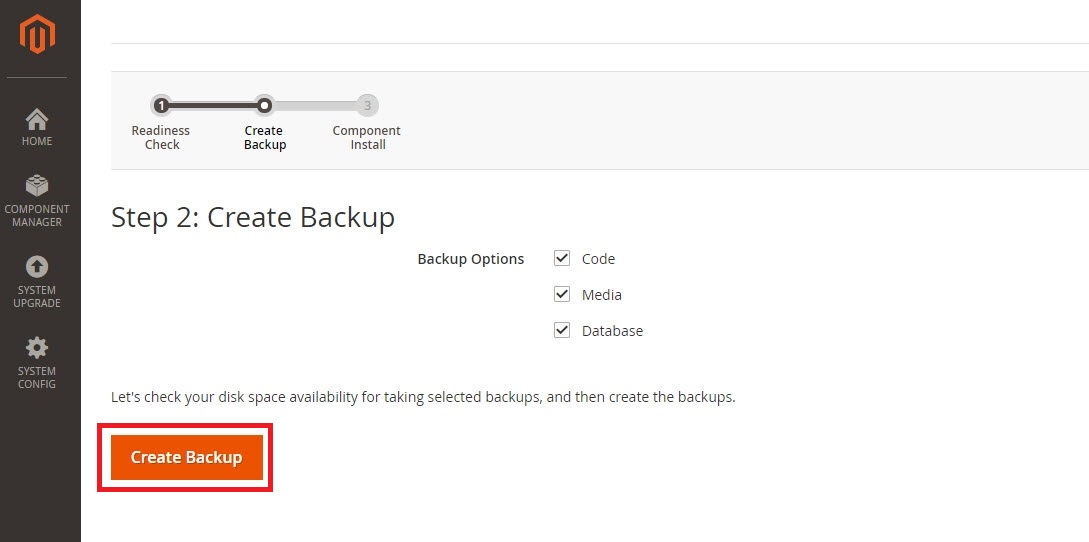
If one of the components will be marked in red, we advise you to have a look at the supporting documentation on how to fix the particular problem. The corresponding information will be located underneath the error message. Step 6: Next step will be about backing up the data on your site. By accessing the respective settings menu, you can select to backup your Code, Media, and Databases. Click the Create Backup button once the final choice is made:
Once the backup process is complete, you should see a confirmation message saying that the backup process is complete and that “you can now move on to the next step”. Step 7: The last step involves installing the actual component. Open the page of the component you want to install and click the "Install" button. |