Username
Password
Remember Me
Log in
Forgot your password?
Forgot your username?
Forgot your username?
How to Filter Products by Brand in Magento 2 |
| Magento 2 Extensions |
| Written by ITORIS Team, 2018-07-24 |
|
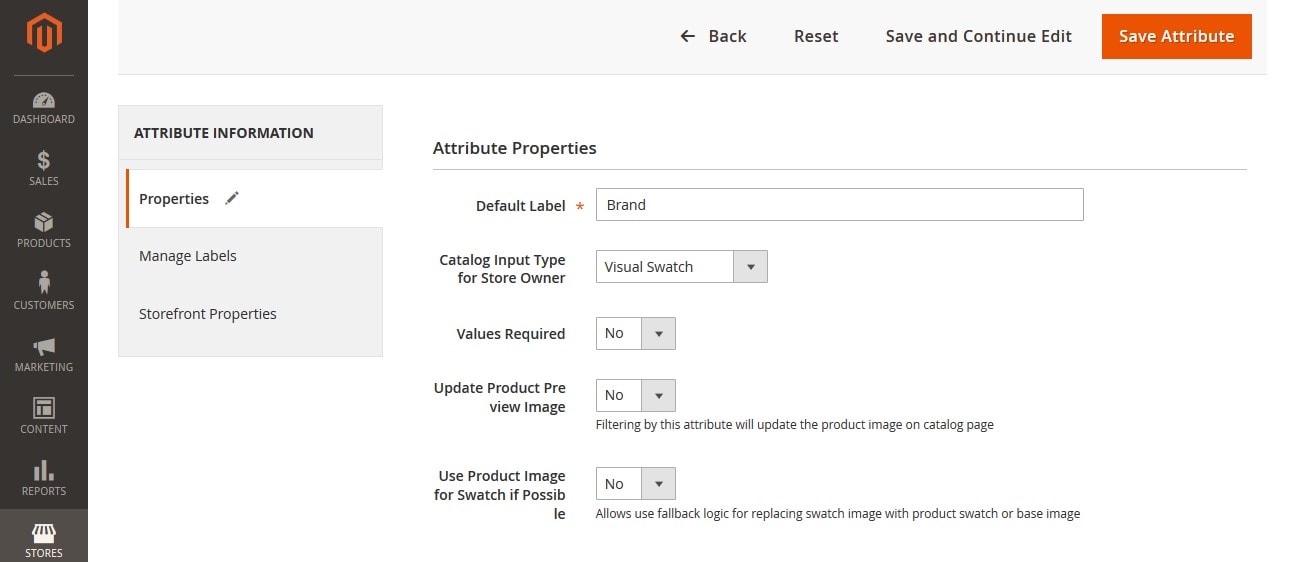
Using product attributes in Magento 2 allows storeowners to determine specific product characteristics and provide additional information on product pages. By default, these attributes are price, color, activity, category, etc. There are also some attributes that should be created for specific needs. For example, in our rapidly changing world a number of brands are increasing every day. What you can do to help customers get their favorite products from Nike, Puma, Reebok, Everlast is to create an attribute called "Brand" and enable an advanced layered navigation on catalog and search results pages. The Improved Layered Navigation extension for Magento 2 enables the advanced navigation and helps users choose multiple attributes, specify a price range with a help of the price slider, share URLs including chosen attributes, filter products by categories and brands and more. Let's complete the following steps to create an attribute named "Brand" which is going to be used by customers. How to Create Product AttributesAll attributes can be accessed by going to Stores > Attributes > Product. Click "Add New Attribute" to create a new attribute. 1. Enter a default label "Brand" to specify the attribute title. 2. Select "Visual Swatch" from the "Catalog Input Type for Store Owner" dropdown.
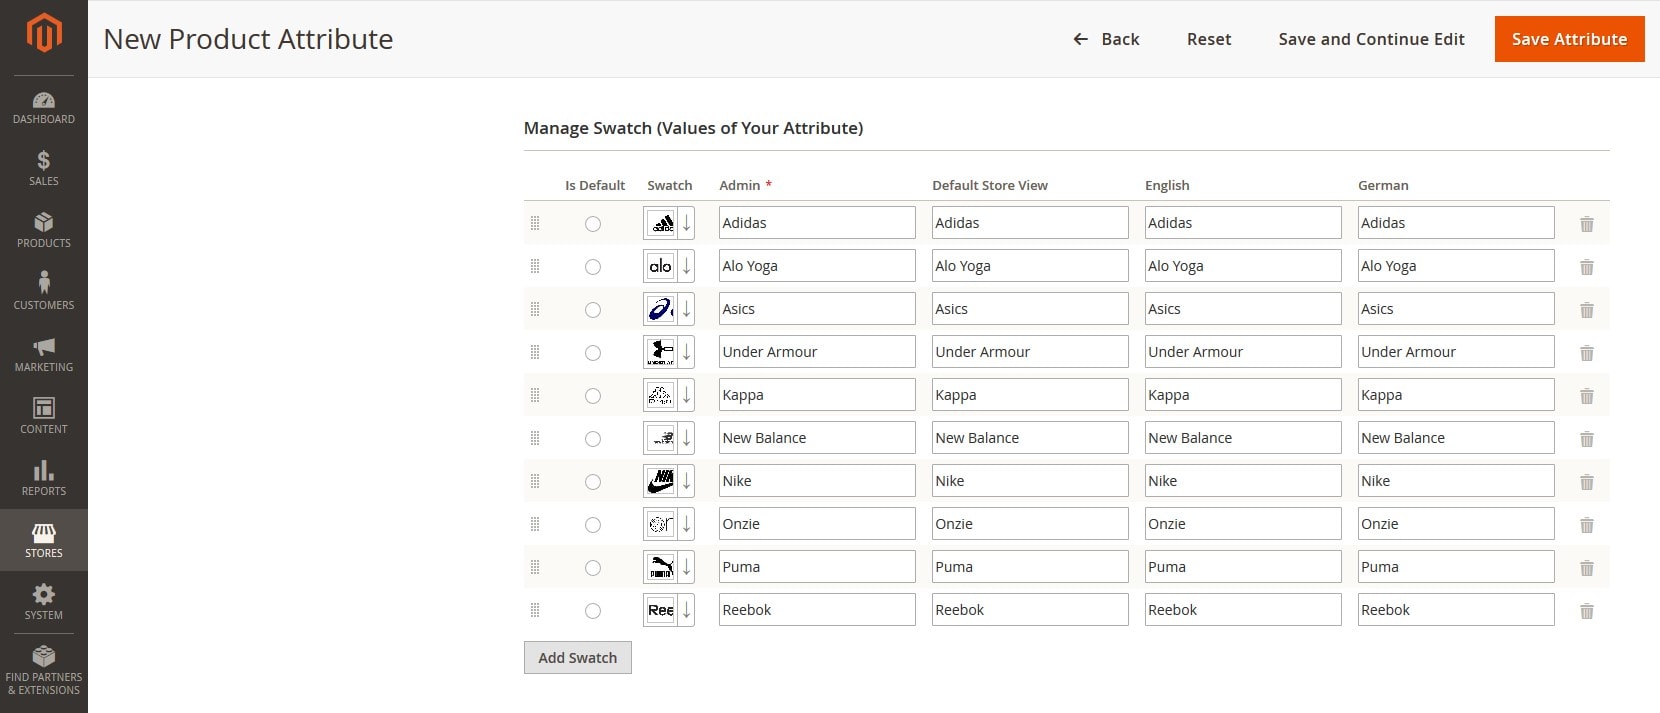
3. To add a value, click button "Add Swatch" in the "Manage Options" section. 4. Enter the first value below the "Admin" column. You can also add a translation of the value for each store view. 5. To add an image to your brand click "Swatch" and select the picture from your PC. 6. Click "Add Swatch" and repeat the previous step for each option. 7. To make the options be chosen by default, mark "Is Default" next to each option. 8. You can also change the order or remove the options. 9. Click "Save Attribute" to save the changes.
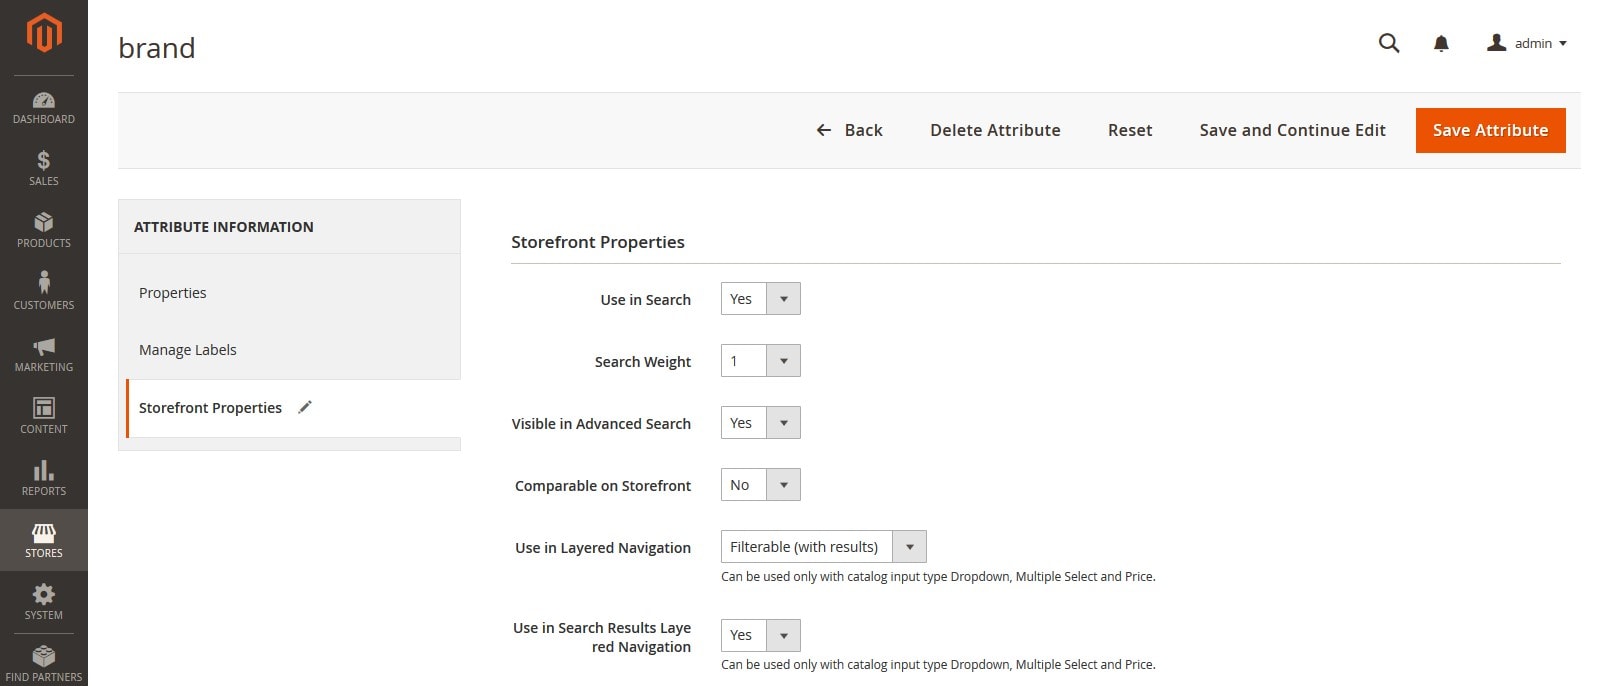
How to Make Attributes Visible on FrontendOpen the "Brand" attribute for editing and go to the "Storefront Properties" section. 1. To make the attribute be available for search, choose "Yes" in "Use in Search". 2. Select "Yes" in "Visible in Advanced Search". 3. To use the attribute as a filter in layered navigation, set the value of "Use in Layered Navigation" to "Yes". 4. To use the attribute in the layered navigation on search results pages, set "Use in Search Results Layered Navigation" to "Yes". 5. To include the attribute in catalog page listings, set "Visible on Catalog Pages on Storefront" to "Yes", "Used in Product Listing" to "Yes" and "Used for Sorting in Product Listing" to "Yes". 6. When finish, click "Save Attribute" to complete the process.
How to Add Attribute "Brand" to the ProductsBy default, Magento 2 allows users to update product attributes by selecting several products and apply the attribute via the mass actions on a separate page. You can also use the Product Mass Actions extension for Magento 2 and add attributes without unnecessary redirects. To update the attributes, do the following: 1. Select products on the grid and choose "Mass Attribute" in the mass actions. 2. Find an attribute you want to add or update. Choose "Brand" in the dropdown. 3. Then select a value to apply the mass action to. 4. Click "OK".
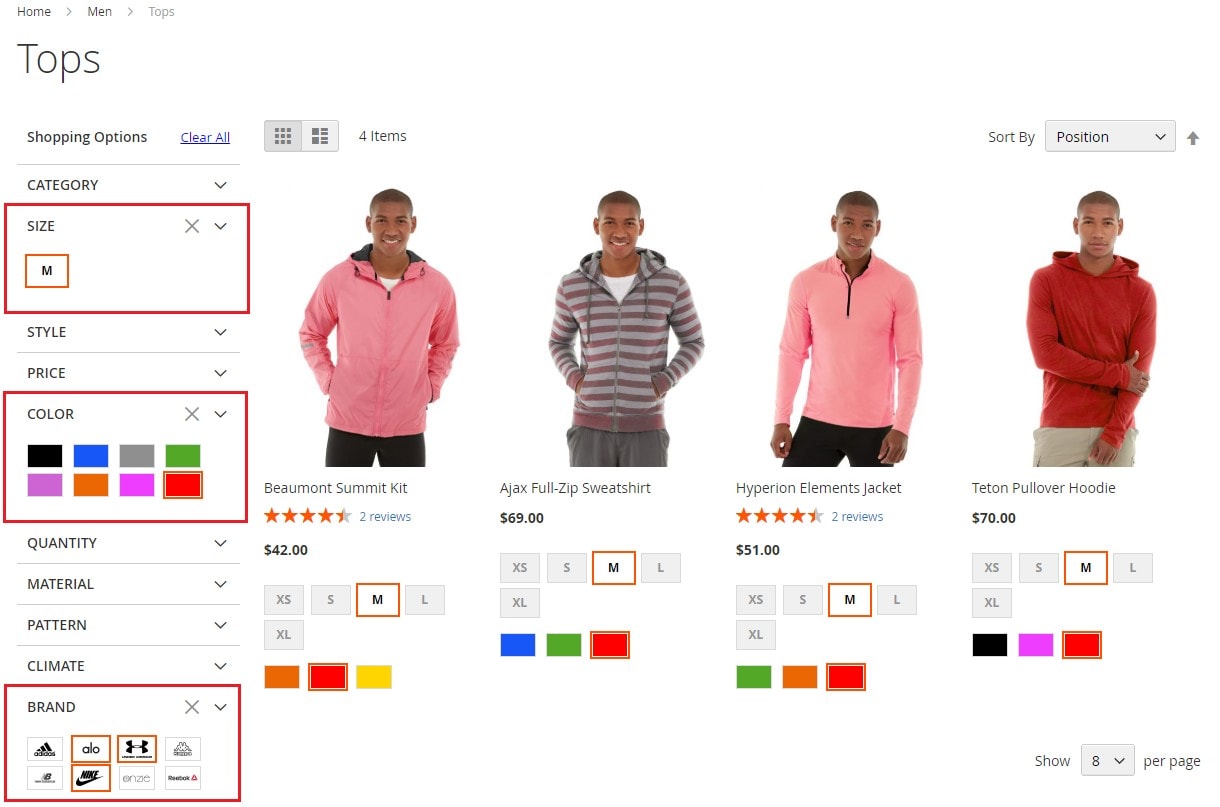
Let's go to the frontend. The extension allows you to collapse several attributes at once, enable the price slider and more. You can apply the multiple filters by selecting the size, color and brands. The products that include the selected brands will be displayed on the catalog page.
|